
Destiny 2 Calus Resplendent Guide: Argos, Gahlran and Calus
Calus Resplendent is the first launch block of Pantheon 2.0, the 6-player back-to-back boss rush that opened on 9 June 2026 with the Monument of Triumph patch. It bundles three of the most iconic raid bosses from the vaulted Leviathan era into a single non-stop run: Argos, Gahlran and Emperor Calus, in that fixed order. No matchmaking, every Guardian under-leveled, revives pooled across the entire run. It rewards Pantheon-exclusive armor, reprised raid weapons, weekly Adept drops on Standard, and feeds the Godslayer Title and MMXXVI seal.
This is the encounter-deep walkthrough. For the wider Pantheon 2.0 schedule, weekly rotations and the full title path see our Pantheon 2.0 guide . For patch context, the catalysts that re-shape the meta and the rest of the launch loot pool see our Monument of Triumph guide and the new catalysts guide . Right here we cover every mechanic, every callout, every wipe cause and every per-boss loadout swap you need to clear Calus Resplendent on Standard and push toward Platinum on Custom.
Key Takeaways
- Fixed encounter order: Argos, then Gahlran, then Calus. One continuous run, no checkpoints on Standard.
- Six players, no matchmaking: bring a fireteam, use LFG or grab a carry. Standard pools revives across all three bosses.
- Three difficulty tiers: Adventure to learn, Standard for the weekly Adept, Custom for Platinum emblems and masterwork loot.
- Strong launch DPS options: Truth (post-9.7.0 buff), Still Hunt with Celestial Nighthawk, Whisper of the Worm, Fafnir linear fusion, Banner Shield Titan, Well of Radiance.
- Where teams wipe: Argos Gravity Smasher, Gahlran Witch's Blessing timeout, Calus wrong-Psion melee and air Ghost Psions left alive.
- Time: ~25 to 35 minutes on Standard, ~15 to 20 minutes at Platinum pace on Custom.
What Is Calus Resplendent
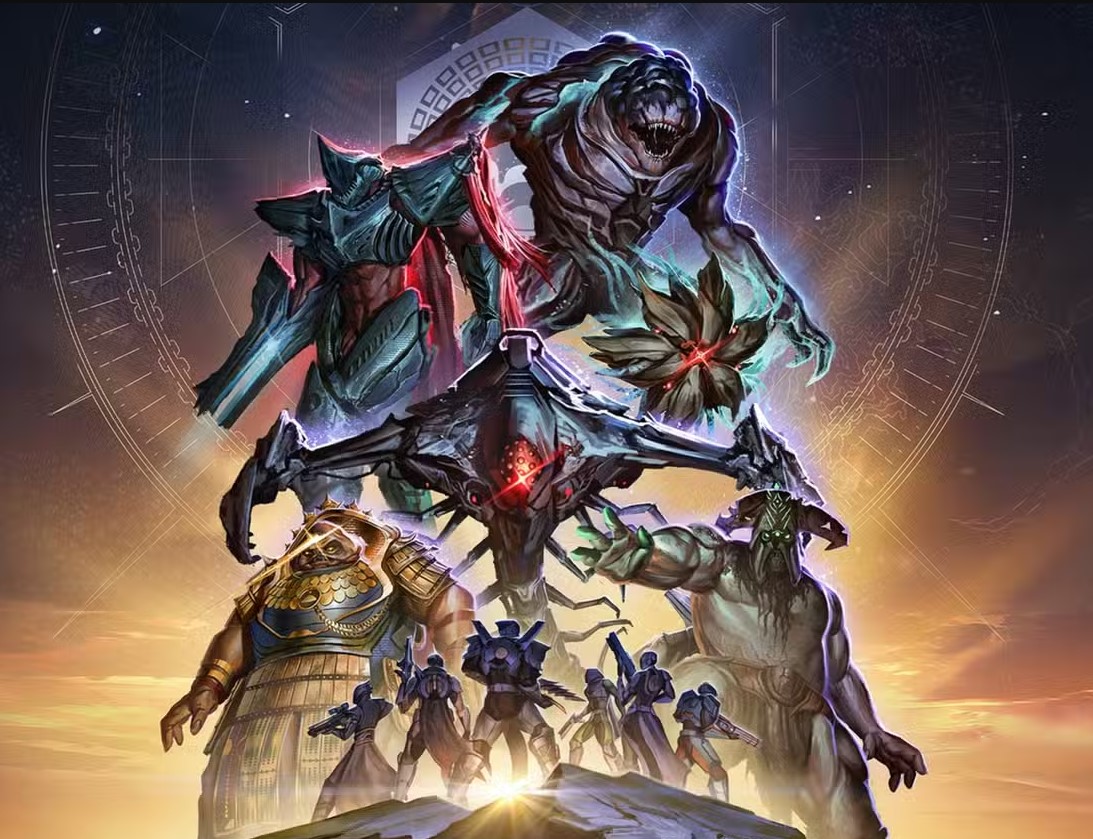
Calus Resplendent is a 6-player Pantheon 2.0 activity that strings together three boss fights from the vaulted Leviathan era. You start at Argos from Eater of Worlds, move into Gahlran from Crown of Sorrow, and finish on Emperor Calus from the original Leviathan throne room. Same order every time. No mid-activity checkpoint on Standard or Custom.
Place in Pantheon 2.0
Pantheon 2.0 is the boss-rush headline mode that returned with the Monument of Triumph patch on 9 June 2026. Calus Resplendent is the launch-week block alongside Morgeth Surpassing, and the full Gauntlet that strings every Pantheon activity into one continuous run unlocks shortly after launch. Treat Calus Resplendent as your weekly Adept farm, your Pantheon-exclusive weapon farm, and your easiest path to Godslayer Title and MMXXVI seal progress before you graduate to the Gauntlet.
Weapons of the Pantheon Quest
You cannot launch Calus Resplendent until you finish the Weapons of the Pantheon introductory quest from the Drifter. It is short, mostly a Drifter dialogue plus one introductory clear. Knock it out solo or in a duo before you queue your first run. After it is finished, the activity appears under Raids in Destinations.
Activity Format and Difficulty Tiers
All Guardians are under-leveled by design and all three encounters demand coordinated team comms. Three difficulty tiers are available the moment the activity unlocks. The tier you pick decides whether you are learning, farming or pushing for Platinum.
| Tier | Revives | Power Handicap | Feats | Reward Tier |
| Adventure | Infinite | Light | Off | Learning, no Platinum |
| Standard | Limited, pooled | Medium | Off | Weekly Adept, Pantheon armor |
| Custom | Limited, pooled | +5 to +20 stacked | On | Masterwork loot, Platinum emblem |
Standard is the sweet spot for most teams. Adventure is only for learning the mechanics with friends who have never seen the bosses, Custom is veteran-only and almost always means you are chasing Platinum or pushing time. Do not jump straight to Custom on a first clear. Power handicap stacks fast and the Feats add deadly modifiers on top of the base mechanics.
Team Setup, Rewards and Time Estimates
The three encounters chain together, so your fireteam composition needs to survive all the way to Calus, not just blast Argos in two cycles. This is where most teams burn revives on the first boss and find themselves four-stacked with no second chances on the Calus final stand. The numbers below are the activity at a glance, the baseline for every loadout and tier decision later in this guide.
| Spec | Value |
| Activity | Calus Resplendent (Pantheon 2.0 launch block) |
| Encounters | Argos, Gahlran, Emperor Calus (fixed order) |
| Players | 6, no matchmaking |
| Difficulty tiers | Adventure, Standard, Custom |
| Power handicap | All Guardians under-leveled, tier-scaled |
| Time (Standard) | ~25 to 35 minutes |
| Time (Platinum) | ~15 to 20 minutes |
| Rewards | Pantheon armor, reprised raid weapons, weekly Adept |
| Title progress | Godslayer Title, Immortal seal |
| Prerequisite | Weapons of the Pantheon (Drifter quest) |
Use this as your at-a-glance reference before queuing. If a friend asks what Pantheon 2.0 looks like, this is the answer in one screen.
No Matchmaking and Fireteam Requirements
Calus Resplendent is 6-player, no matchmaking. You bring five friends, you roll Fireteam Finder or LFG, or you buy a carry. Coordinated voice comms are non-negotiable from Gahlran onwards because the entire fight runs on synced melee timings and live symbol callouts. A six-stack of strangers without mics will not finish Calus on Standard.
Important: Pantheon 2.0 has no matchmaking on any tier. Plan the fireteam before you launch. If you cannot field six on comms, our Destiny 2 Pantheon 2.0 carry drops you straight into a coordinated team, including Platinum runs on Custom.
Encounter Order and Revive Economy
The order is fixed: Argos, then Gahlran, then Calus. Standard tier pools revives across all three encounters and there is no checkpoint between bosses. Burning four revives on Argos because someone face-tanked a Gravity Smasher leaves you with two for the rest of the run, and Calus is statistically where the hardest wipes happen. Treat Argos as a revive-discipline check. If anyone is dying repeatedly there, slow down, call mechanics out loud and finish the first boss with revives in reserve.
Rewards, Adepts and Title Progress
Each encounter drops a Pantheon-exclusive armor piece plus a reprised weapon from its original raid. The activity-wide loot pool also includes the two Pantheon-exclusive weapons released with the mode and the original-raid exotics on a low-percentage roll.
- Argos: Pantheon armor piece plus a reprised Eater of Worlds weapon roll.
- Gahlran: Pantheon armor piece plus a reprised Crown of Sorrow weapon (often Gahlran's Right Hand).
- Calus: Pantheon armor piece plus a reprised Leviathan weapon and Calus-specific Triumph progress.
- Pantheon-exclusive: Alone as a God Kinetic Sniper and Bane of Sorrow Void HMG appear in the wider loot pool across the run.
- Final vendor chest: at the original Leviathan ending hallway, lets you repurchase any weapons or armor you saw drop in the run.
- Title progress: every clear feeds the Godslayer Title and the MMXXVI seal.
A clean Standard run lands in 25 to 35 minutes. Coordinated Platinum runs on Custom land closer to 15 to 20 minutes. Adventure tier varies wildly because teams stop to re-explain mechanics between deaths.
Encounter 1: Argos, Planetary Core
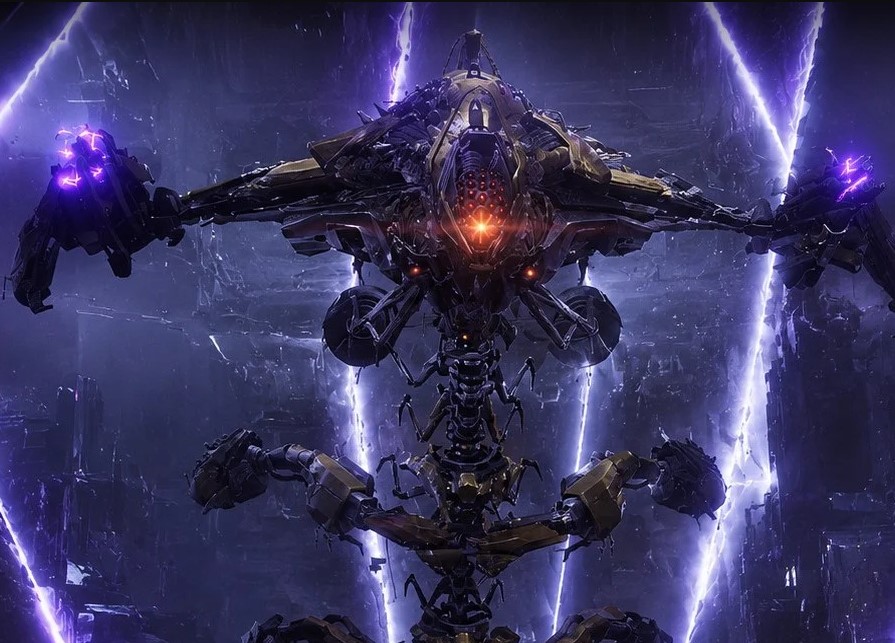
Argos is the cranium-charging fight from Eater of Worlds. This is where most teams wipe because they treat it as a simple DPS race and ignore the cycle cap. You only get three damage cycles before the weak points exhaust. Lose the rotation, watch the Gravity Smasher cast, and the whole team eats it.
Arena Layout and Element Setup
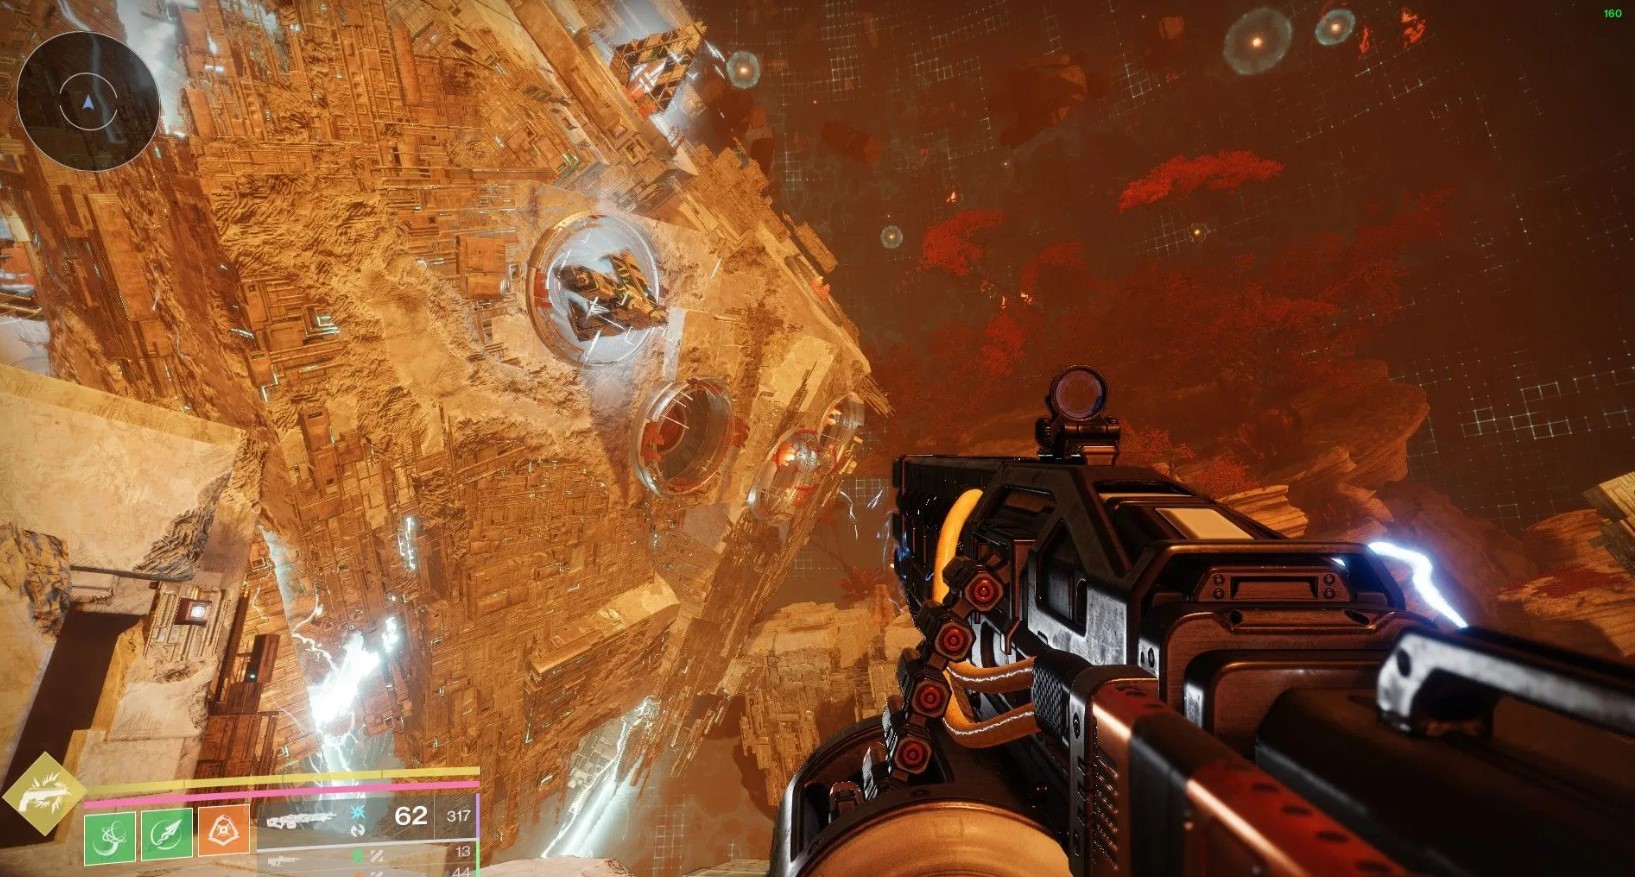
The arena is a central pillar surrounded by three platform thirds, one per element: Arc (blue), Solar (orange), Void (purple). Each third has a Hobgoblin corridor and a charging station. Assign one pair per platform before you start, by element, and keep those assignments for the whole encounter.
Open the encounter by shooting the six Vex Oracles on the central object. Argos spawns with a prismatic shield. Look for the single shield face carrying three elemental orbs at the top. That face is your DPS face for this cycle, and the three orb colors tell you which craniums to charge: two Void plus one Arc means two Void craniums and one Arc cranium.
Vex Cranium Loop and Shield Break
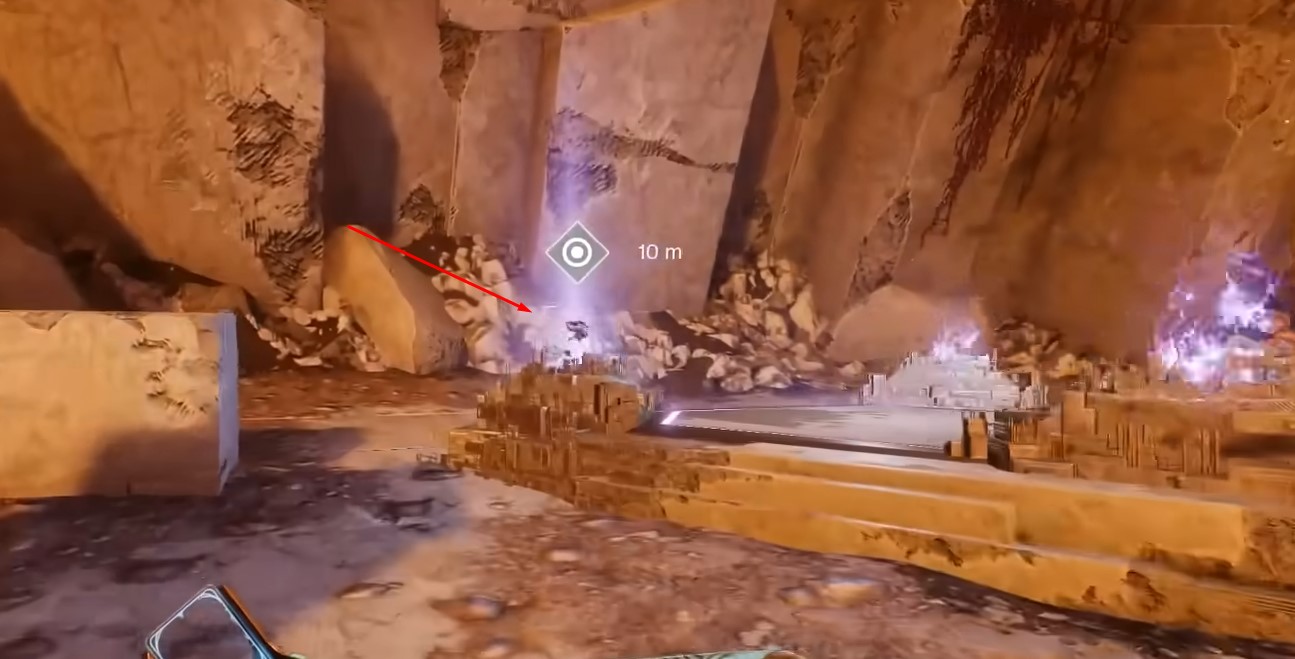
Each pair handles its own platform. One member kills the Malignant Hobgoblins that spawn the Vex Craniums, the other holds the platform and starts the charging station. Charging takes roughly 15 to 20 seconds. Match the colors you read off the shield, then bring the three charged craniums to the DPS face simultaneously.
Pro Tip: shoot the orbs on a 3-2-1 count. Synced shots push the shield faces in together and give a small damage bonus that compounds over three cycles. Out-of-sync shots leave one face up and force a fourth cycle you do not have.
Weak Points and DPS Cycles
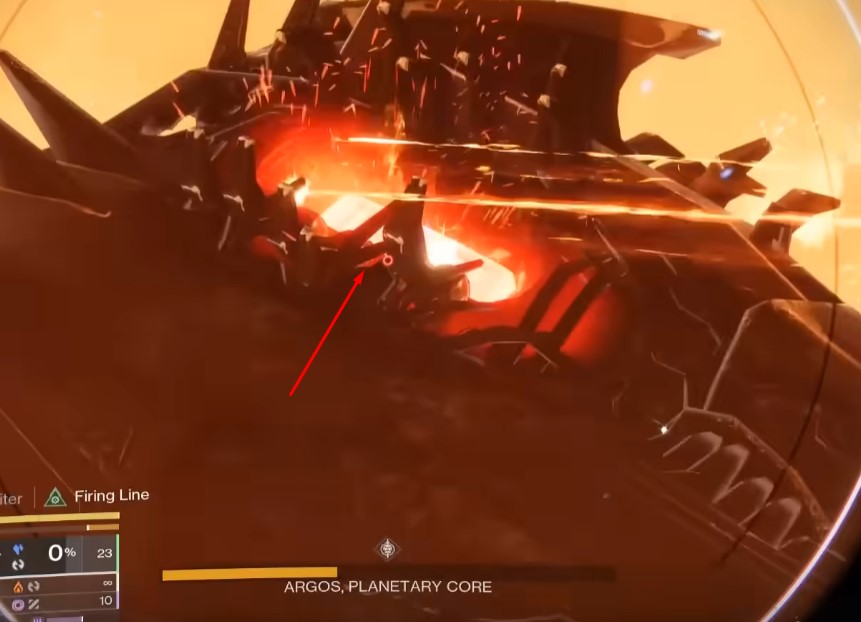
With the shield down, two of Argos's six weak points light up. You shoot two to open the DPS phase. The weak point pairs rotate cycle by cycle:
- Cycle 1: arms.
- Cycle 2: head.
- Cycle 3: back.
Weak points do not regenerate. If Argos is alive after cycle 3, you have run out of openings and the encounter softlocks into a wipe. Plan to one-phase with Truth or a heavy sniper plus Banner Shield or Well of Radiance amp. Two-phasing is acceptable on a learning run, but three cycles is the hard ceiling.
Common Wipes and Fixes
- Gravity Smasher bomb: Argos calls it with "Void energy rips the air". 30-second wipe. Fix: keep the cranium pipeline moving, never stall a cycle.
- Detainment Prism cage: 10 seconds in a Force Cage and you die. A teammate must shoot the prism to free you.
- Stacked DPS: if your team groups up for damage, one Prism cast cages everyone. Spread the team across the DPS face.
- Cycle 4 softlock: kill Argos within 3 cycles or wipe and retry.
Encounter 2: Gahlran, the Sorrow-Bearer
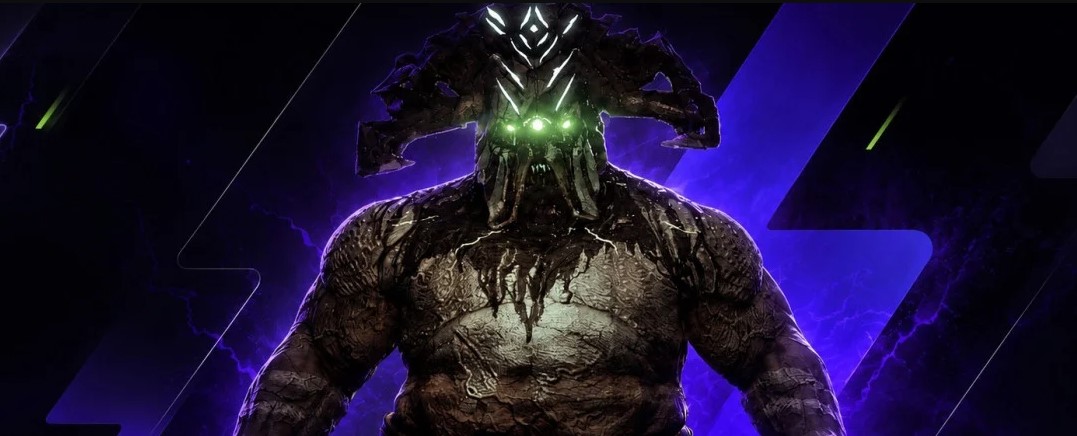
Gahlran is the Crown of Sorrow boss. This is where most teams wipe because someone lets their Witch's Blessing timer tick to zero. The encounter is dense: three sub-arenas, three Gahlran copies, two melee callouts every cycle, a blessing-timer race in parallel, and a real-Gahlran reveal that punishes any team that did not pre-assign the central vessel rotation.
2/2/2 Split and Witch's Blessing
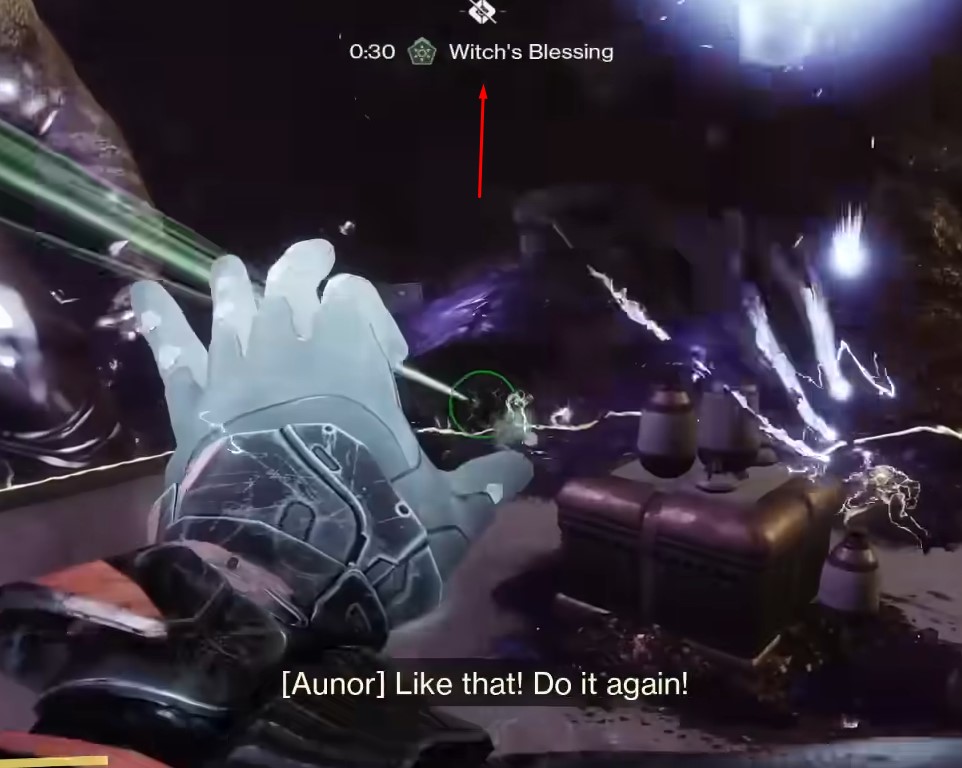
Open by sending one player per pair into the green pool near the rally banner. They pick up Witch's Blessing and a 60-second timer starts. Their partner stays unblessed. Three pairs of one blessed and one unblessed split into the three sub-arenas, one pair per giant Gahlran copy.
Warning: Witch's Blessing hitting zero is instant death. Both pair members must shoot the same Vessel near the Flame Pillar to swap who carries the buff and reset the timer. The blessed player can stand in the swap circle while a teammate shoots the vessel from anywhere, so use that remote-swap trick if the timer is about to run out and you are mid-add-clear.
Deception Stuns and Axe Slam
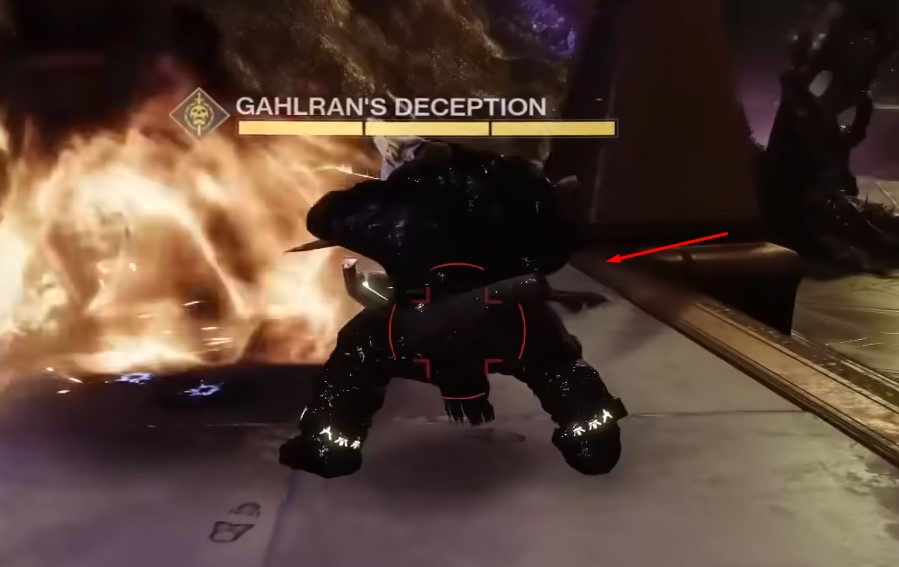
Deceptions spawn clockwise, one per sub-arena. Both pair members melee the Deception simultaneously (blessed plus unblessed) to break its shield. The blessed player loses Witch's Blessing on the melee, so plan a swap immediately after.
With the Deception stunned, watch the giant Gahlran's hand turn green. Shoot it. Gahlran slams a cleaver down onto the Deception. Positioning matters here. Drag the Deception between the two front pillars at the top of the staircase. Too close to Gahlran and the axe overshoots, too far and it lands short.
Real Gahlran Reveal and DPS
After all three Deceptions die, all three Gahlrans channel an attack. Hands and crown light up. Each pair shoots their Gahlran's hands then face. Two Gahlrans vanish, one stays standing. That is the real Gahlran. The whole fireteam rotates to it.
Refresh Witch's Blessing on everyone using the central vessel before DPS opens. Gahlran goes immune mid-damage phase, the hands and head light up again, you shoot them, and DPS resumes. Expect two or three short damage windows per Deception cycle, with a full cycle taking another two or three loops to finish him off. Snipers and Truth carry the hand-shot windows.
Note: some early footage suggests crystals appear in harder or challenge variants and may be inactive in Standard. For Standard runs, focus on Witch's Blessing, Deceptions, hand shots and DPS. If you see crystals on the floor, treat them as priority targets and adjust on the fly.
Common Wipes and Fixes
- Witch's Blessing timeout: instant death. Fix: pre-assign vessel rotations, use the remote-swap trick when the timer is about to run out.
- Out-of-sync Deception melee: no shield break, the pair is exposed to adds. Fix: count "3-2-1 punch" on comms.
- Axe miss on Deception: wasted buff cycle, Gahlran heals back on Standard. Fix: stage the Deception at the staircase top, between the two front pillars.
- Ground deaths during DPS: Cursed Thrall explosions and Gahlran's melee one-shot. Fix: stay on the central boxes, not the floor.
Encounter 3: Emperor Calus
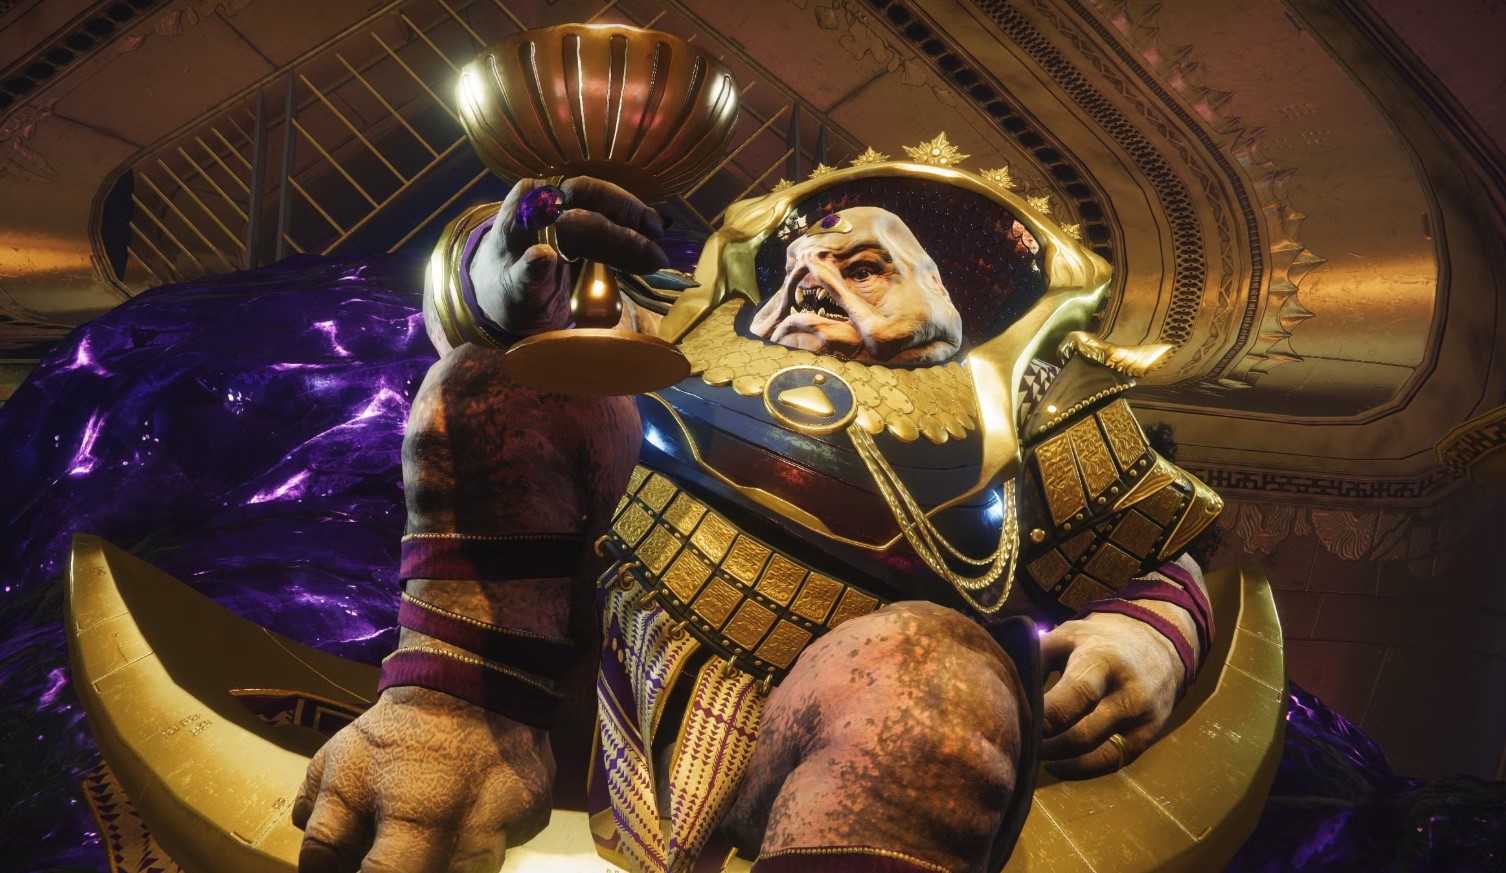
Calus is the longest and most punishing encounter in Calus Resplendent. This is where the run actually ends or fails. Two arenas in parallel: the Throne Room with four symbol pillars and the Shadow Realm where Calus tries to inhale your team. You will run four wall cycles, farm Force of Will stacks off skulls, break a shield, plate-DPS clockwise, switch crit targets mid-phase, and survive a final stand at zero HP.
Shadow Realm and Throne Room Split
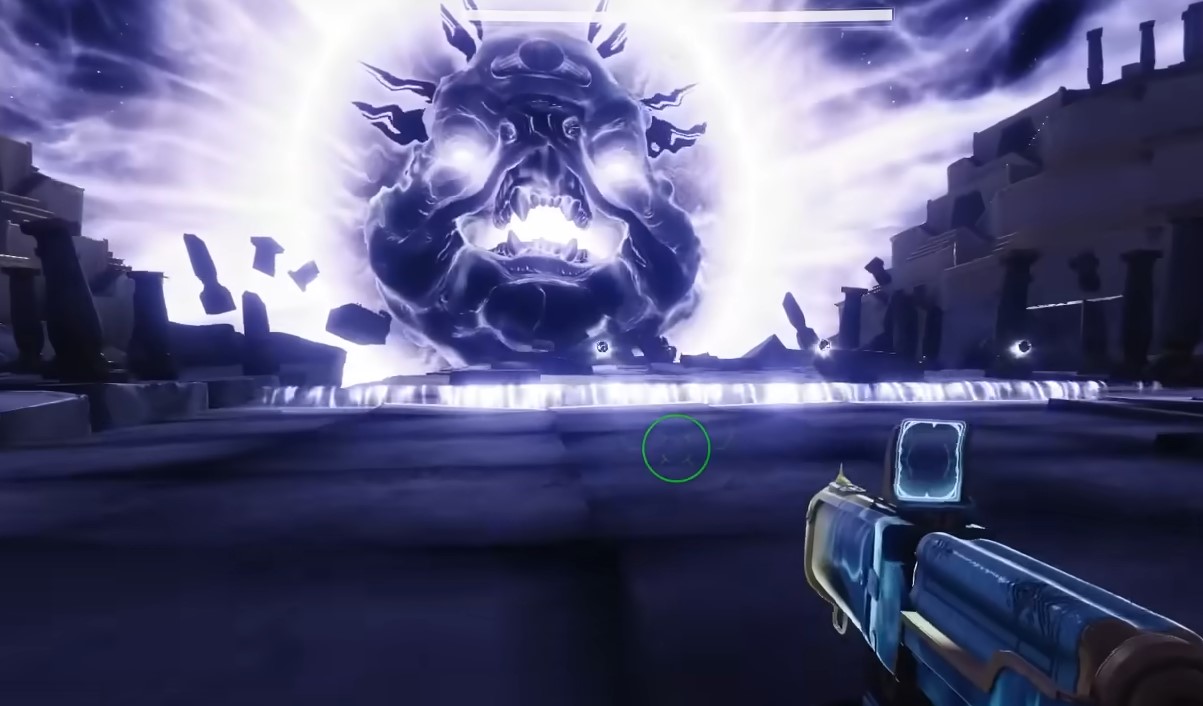
Open by clearing the ad waves, then shoot Calus's Chalice. He claps and teleports all six players to the Shadow Realm. Three players grab the orbs over the short wall to warp back to the Throne Room. The other three stay in the Shadow Realm. Pre-assign left, middle and right warpers so this is not a scramble at the cast.
Important: do not jump near the wall in the Shadow Realm. You will fly straight into Calus's mouth and die. Stand back, walk to the orbs if you are warping, plant yourself behind the wall if you are staying.
Symbol Callouts and Wall Cycles
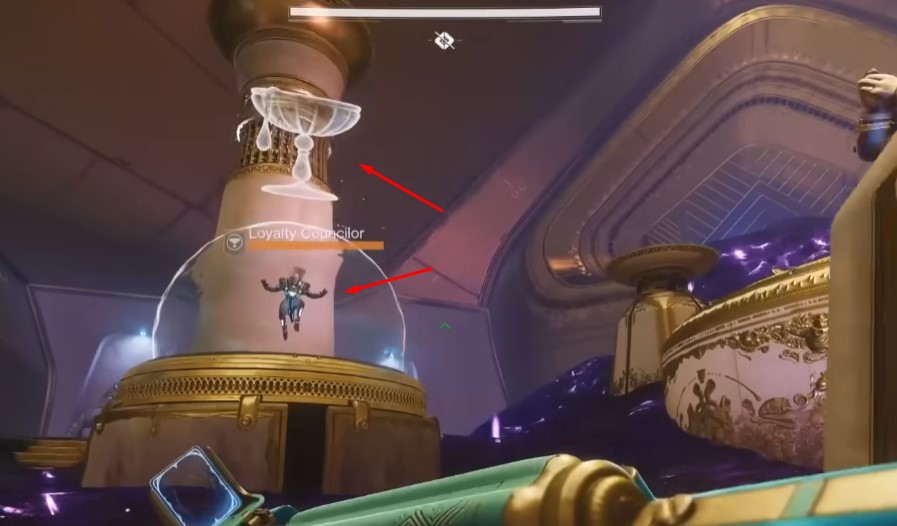
The four symbol pillars in the Throne Room are Sun, Dog, Cup, Axe. In the Shadow Realm, Calus inhales and a symbol appears on his forehead. Each of the three Shadow Realm players sees a different symbol. They call all three on comms. The Throne Room team melees the Psion bearing the un-called symbol, the one that nobody saw. Wrong Psion = wall fails = Shadow Realm team is sucked to death.
The Shadow Realm team also has work to do during each wall cycle. Kill the ground Psions (they knock you out from cover) and then kill the air Ghost Psions before they finish their cast. Air Ghost Psions left alive at the cast = instant wipe. Killing the Ghost Psions plus the synced Throne Room melee spawns the next safety wall. Run this loop four times.
Below is a player-discovered helper for cases where the Shadow Realm callouts are crossed or someone is too late on comms. It is an optional helper, not a guaranteed cheese. The safest method is always to call all three Shadow Realm symbols and punch the missing Psion.
| Shadow Realm Symbol | Throne Room Psion to Melee | Notes |
| Sun | Dog | Most reliable pair |
| Axe | Cup | Most reliable pair |
| Cup (audio cue) | Axe | Listen for the audio overlay |
| Cup (no audio) | Sun | Fall back to standard callouts if unsure |
Treat this table as a backup. If your callers are clean, ignore it and stick to the un-called symbol rule. The audio cue distinction is community-discovered and not always reliable across audio setups, so do not bet a run on it.
Skull Phase and Force of Will
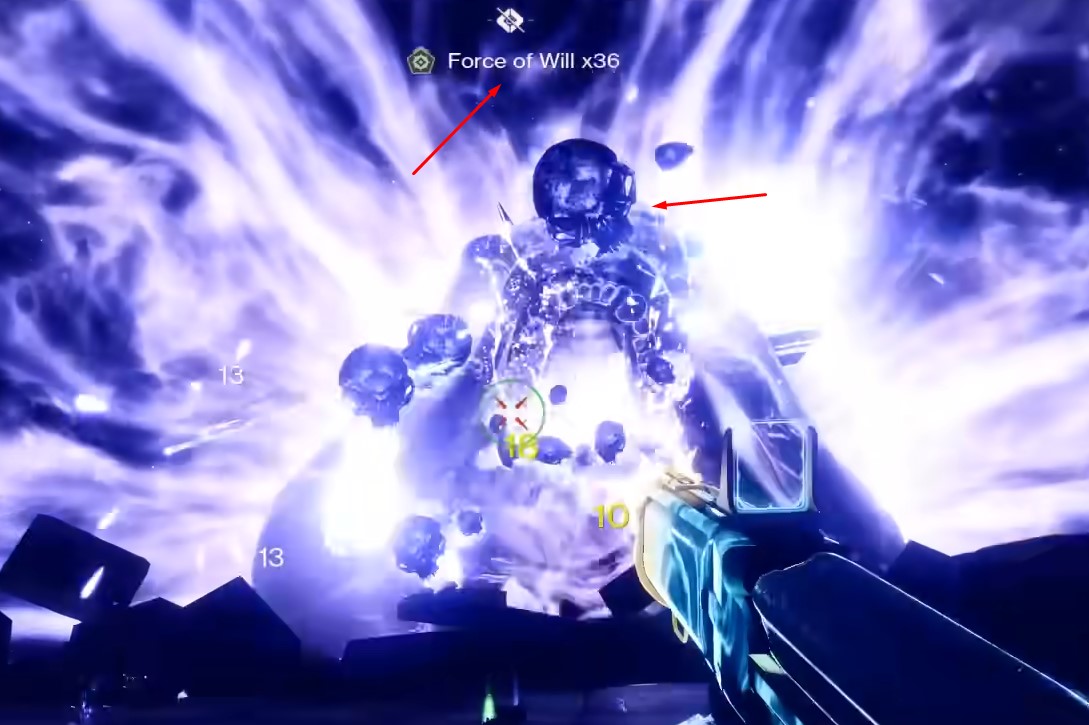
After four wall cycles, Calus stops inhaling and spits skulls into the Shadow Realm. Shoot every skull. Each grants a Force of Will stack. Use high-rate-of-fire weapons: SMGs, autos, trace rifles, Arc Souls. Meanwhile the Throne Room team eats Solar bombs and needs to heal up between waves.
Calus also gains an overshield and starts a DoT on the Throne Room. Breaking the shield summons orbs that warp the Shadow Realm players back. Target around 70 to 100 Force of Will stacks before breaking the shield. Below that and the team's damage will not finish him, you will end the phase with Calus still standing and an angry team with no Force of Will.
Pro Tip: the skull burst at shield break stacks extra Force of Will on the Shadow Realm crew. Hold one weapon swap so the moment you warp back, you swing into your DPS weapon, not your trace rifle.
Plate DPS, Crit Shift and Final Stand
All six players stack on a starting plate (Sun is the common opener). Plates are one-time-use with individual cooldown timers. Rotate clockwise as the active plate burns out, one plate at a time, with the whole team moving together. A lone player on a plate burns its timer instantly and the team loses a DPS station.
At around the halfway HP mark, Calus's true form reveals and his crit spot shifts from head to chest. Truth and rockets stay strong because splash damage does not care, but swap precision weapons (Whisper of the Worm, Still Hunt, heavy snipers) from head shots to chest shots for the back half of the damage phase. Well of Radiance covers the plate-fire AoE; without it, expect chip damage that eats your supers.
At zero HP, Calus raises a final stand shield. Burn it in roughly 10 to 15 seconds of pooled DPS, otherwise the encounter wipes and you start the Calus damage cycle from the top. Save one heavy weapon's worth of ammo and one super for this stand.
Best Loadouts and Subclasses
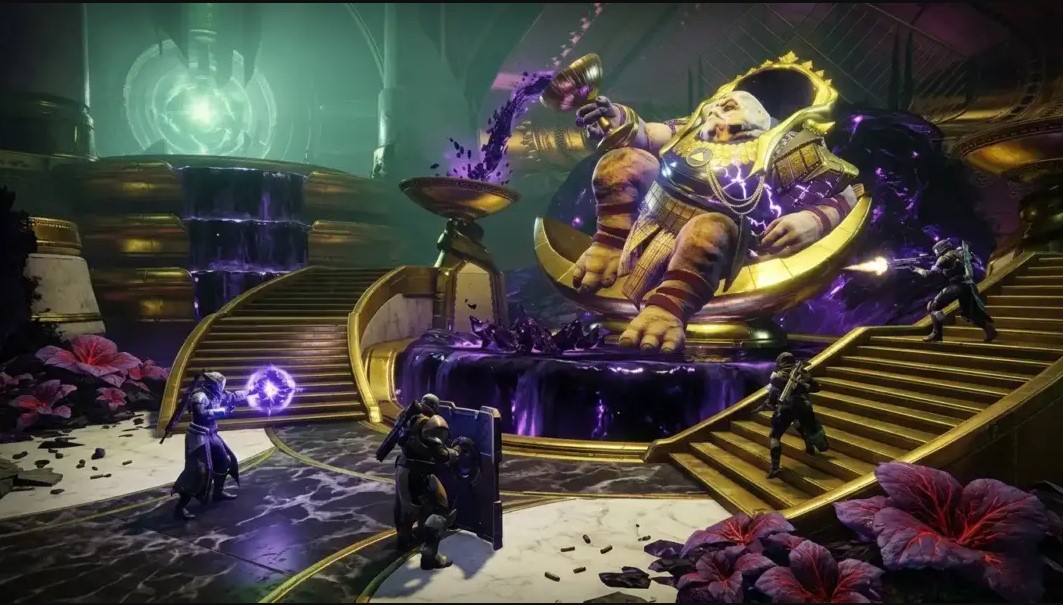
With the mechanics dialled in, the second-biggest factor in a clean Calus Resplendent clear is loadout discipline. These are strong launch options with the post-9.7.0 buffs applied, not a permanent meta. Patch balance shifts; check Bungie patch notes before committing if it has been a couple of months since launch.
Heavy DPS Picks
Strong launch options for heavy include Truth (post-9.7.0 buff makes it the consensus pick), Whisper of the Worm for sustained chest crits on Calus, Still Hunt on Hunter paired with Celestial Nighthawk for burst Golden Gun damage, and Fafnir linear fusion from the Monument of Triumph weapon pool. For catalyst upgrades, see our new catalysts guide .
Support Roles
Two support roles are mandatory for Standard. Well of Radiance Warlock for plate-fire survival on Calus DPS and Argos cycles. Banner Shield Titan with Doom Fang Pauldrons as DPS amp on every damage phase. A third Warlock running Speaker's Sight for healing turret coverage is high-impact in Gahlran sub-arenas. Bubble Titan is a fallback if no Banner Shield user is available.
Per-Encounter Loadout Swaps
| Encounter | Heavy | Special | Primary | Super |
| Argos | Truth | Heavy sniper | Auto with Heal Clip | Banner Shield, Well |
| Gahlran | Whisper | Izanagi's Burden | Riskrunner | Bubble, Well, Banner |
| Calus (Shadow Realm) | Fafnir | Trace rifle (Root of Nightmares) | SMG with Voltshot | Arc Soul, Well |
| Calus (Throne Room DPS) | Truth early, Whisper/Still Hunt post-half | Heavy sniper | Auto with Heal Clip | Nova Bomb, Golden Gun, Blade Barrage |
Use this table as a starting point. The big switch is on Calus: Truth and splash weapons stay strong all phase, but if you are running precision rifles, plan the head-to-chest swap around the halfway HP mark or you will whiff late-phase shots into a moving crit window.
Role Assignments and Wipe Fixes
Most Calus Resplendent wipes are role-assignment failures, not mechanical failures. Six players walking in without pre-assigned pairs and a designated symbol caller will eat the same wall cycle three times in a row before someone realises nobody is watching the un-called Psion. Before splitting the team, the cheat sheet below summarises every mechanic across the three encounters in one screen.
| Boss | Team Split | Core Mechanic | DPS Window | Wipe Risk |
| Argos | 2/2/2 by element | Cranium loop, shield break, weak point cycles | 3 cycles max (arms, head, back) | Gravity Smasher, Cycle 4 softlock |
| Gahlran | 2/2/2 by sub-arena | Witch's Blessing 60s, Deception melee, axe slam | 2 to 3 mini windows on real Gahlran | Blessing timeout, axe miss |
| Calus | 3/3 Throne vs Shadow | Symbol callouts, 4 wall cycles, Force of Will skulls | Plate rotation, head then chest crit | Wrong Psion melee, air Ghost Psions, final stand timeout |
Reference this table during the run if a wipe leaves the team confused. The three encounters share patterns: split, prepare, sync, DPS, repeat. The specifics differ but the rhythm carries over from one boss to the next.
2/2/2 Pair Splits
Argos and Gahlran both run on a 2-2-2 split with locked pair assignments. For Argos, lock pairs by element platform (Arc pair, Solar pair, Void pair) and keep them for the entire encounter. One member kills Hobgoblins, the other holds the platform and charges craniums. For Gahlran, same pair assignments but now each pair has one blessed and one unblessed player. Pre-decide which side of the pair starts with Witch's Blessing.
3/3 Calus Split
Calus is a 3-3 split: Throne Room versus Shadow Realm. Pre-assign left, middle and right warpers so the orb grab is instant when Calus claps. The Throne Room team needs a designated caller who is listening for the three Shadow Realm symbols and meleeing the un-called Psion. One person on this job is faster and more accurate than three people half-listening. Rotate the caller between phases if you want, but never have nobody listening.
Quick Wipe-Cause Reference
| Boss | Wipe Cause | Fix |
| Argos | Gravity Smasher cast | Keep the cranium pipeline moving, never stall a cycle |
| Argos | Cycle 4 softlock | Plan to one-phase or hard two-phase; weak points cap at 3 cycles |
| Argos | Stacked team caged by Prism | Spread out across the DPS face |
| Gahlran | Witch's Blessing timer hits zero | Pre-assign vessel rotations, use remote-swap trick |
| Gahlran | Axe slam misses Deception | Stage Deception between front pillars at staircase top |
| Gahlran | Out-of-sync melee on Deception | Count "3-2-1 punch" on comms |
| Calus | Wrong Psion melee'd | Designated caller listens for the three Shadow Realm symbols |
| Calus | Air Ghost Psions left alive | Kill ground Psions first, then prioritise Ghost Psions before the cast finishes |
| Calus | Plate timer wasted by solo player | Whole team rotates plates together, clockwise |
| Calus | Late-phase precision shots miss the new crit | Swap from head to chest at the halfway HP mark |
Print this table mentally before your first Standard run. The eight to ten wipes above account for the vast majority of Calus Resplendent failures. If you cover every row on comms, the run lands cleanly even on rough nights.
Pro Tip: if your six-stack keeps wiping on the same row, switch tier down to Adventure for one clean teaching run, then go back to Standard with the muscle memory locked in. Faster than four more wipes trying to brute force it.

When your LFG group keeps falling apart on Calus or you need a guaranteed Platinum clear on Custom, a Pantheon 2.0 carry drops you into a coordinated team that has cleared all three encounters dozens of times. Useful for the weekly Adept farm, MMXXVI seal progress and pushing the Godslayer Title.

Calus Resplendent FAQ
Can Calus Resplendent be soloed or duoed?
No. The activity is locked to six players with no fewer-player override. All three encounters use 2-2-2 or 3-3 splits that physically require a full team. There is no solo or duo cheese path published at this time.
Is there matchmaking?
No matchmaking on any tier. You bring a fireteam, use Fireteam Finder or LFG, or buy a carry. Adventure tier still requires a full pre-formed team of six.
How long does a Standard run take?
A clean Standard run lands in 25 to 35 minutes. Platinum-pace runs on Custom land in 15 to 20 minutes with a coordinated team and tuned loadouts. Adventure runs are highly variable because teams stop to teach mechanics between deaths.
What loadout should I bring on a first clear?
Truth or a heavy sniper as your heavy, an auto rifle with Heal Clip as your primary, Well of Radiance on Warlock or Banner Shield Titan as your support. Save complicated per-encounter swaps for clear two and three. Strong launch options are covered in the table earlier in this guide.
Can I repeat Calus Resplendent for loot?
Yes. The activity is fully repeatable. Standard rewards a weekly Adept drop the first time per character per week. Custom rewards masterwork-tier loot and the Platinum emblem on every clear that meets the Platinum bar.
How does the secret exotic mission fit in?
It does not gate Calus Resplendent, but the Oblation and Cull's Shadow guide covers the launch-week secret exotic mission, which drops gear that pairs well with Pantheon runs. Worth doing in the same session.
Final Thoughts and Carry Recommendations
Calus Resplendent rewards team discipline more than raw mechanics knowledge. Lock the 2-2-2 pair assignments for Argos and Gahlran. Lock the 3-3 split and the symbol caller for Calus. Bring Truth or Whisper, Well or Banner, and you will clear Standard inside thirty minutes. The decision logic is simple: Adventure for the first learning run, Standard for the weekly Adept farm, Custom only when your fireteam knows every mechanic cold and is chasing Platinum.
For broader context, sit your Pantheon 2.0 weekly inside the wider patch loot pool. Read the Pantheon 2.0 overview for the full activity schedule, the Monument of Triumph guide for the patch context, and the new catalysts guide for the upgrades that re-shape your DPS picks. The full Grindout support library sits on our Destiny 2 boosting services page.
If your LFG luck is rough this week, you cannot field six on comms, or you want to lock in the weekly Adept and the Platinum emblem in one session, a Destiny 2 Pantheon 2.0 carry drops you into a fireteam that has cleared Calus Resplendent dozens of times across Standard and Custom tiers. Same week, same loot, no scheduling headaches.