
Destiny 2 Oblation Exotic Mission Guide: How to Get Cull's Shadow
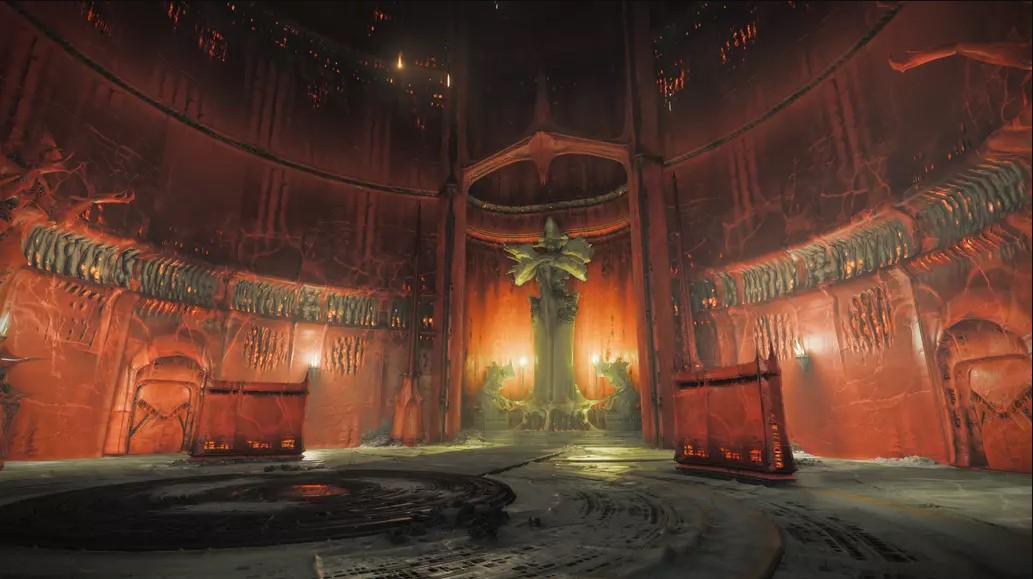
Destiny 2 shipped a hidden exotic mission with the Monument of Triumph update on 9 June 2026. It's called Oblation: Bloodline, and the reward is Cull's Shadow — a Kinetic Exotic Fusion Rifle with glaive-fusion hybrid melee blades, intrinsic Unstoppable stun, and four catalysts that span three missions.
This guide covers the entire chase: the Weapon of Sorrow prerequisite, the four-step Moon unlock chain, the full Bloodline walkthrough, the two-phase Valus Tau'Rig boss fight, and every Cull's Shadow catalyst across Bloodline, Soulfed and Immolation. For broader patch context see our Monument of Triumph guide and for the boss-rush companion see our Pantheon 2.0 guide .
Key Takeaways
- Oblation: Bloodline is hidden. It does not appear on the Director until you finish the four-step Moon unlock chain.
- You need a Weapon of Sorrow equipped at every step. Thorn is the cheapest pick (1 Exotic Cipher + 125,000 Glimmer at Monument to Lost Lights).
- Reward is Cull's Shadow. Kinetic Exotic Fusion Rifle with glaive melee blades, intrinsic Unstoppable stun via Soul Burn, classified as a Weapon of Sorrow.
- Four catalysts spread across three missions. Soulfire Succor (Bloodline post-boss), Rancor (Soulfed chest), Zeal (Soulfed rune-on-weapon puzzle), Skewer (Immolation final chest).
- Soloable at -20 Power delta. A clean Arc Titan clear runs around 15 minutes once you know the route.
- Boss is Valus Tau'Rig, "The Insatiable". Two-phase fight with a strict correct-brazier dunk rule that wipes the wave if you miss.
- Three-mission chain unlocks sequentially. Bloodline gates Soulfed, Soulfed gates Immolation.
What Is Oblation: Bloodline?
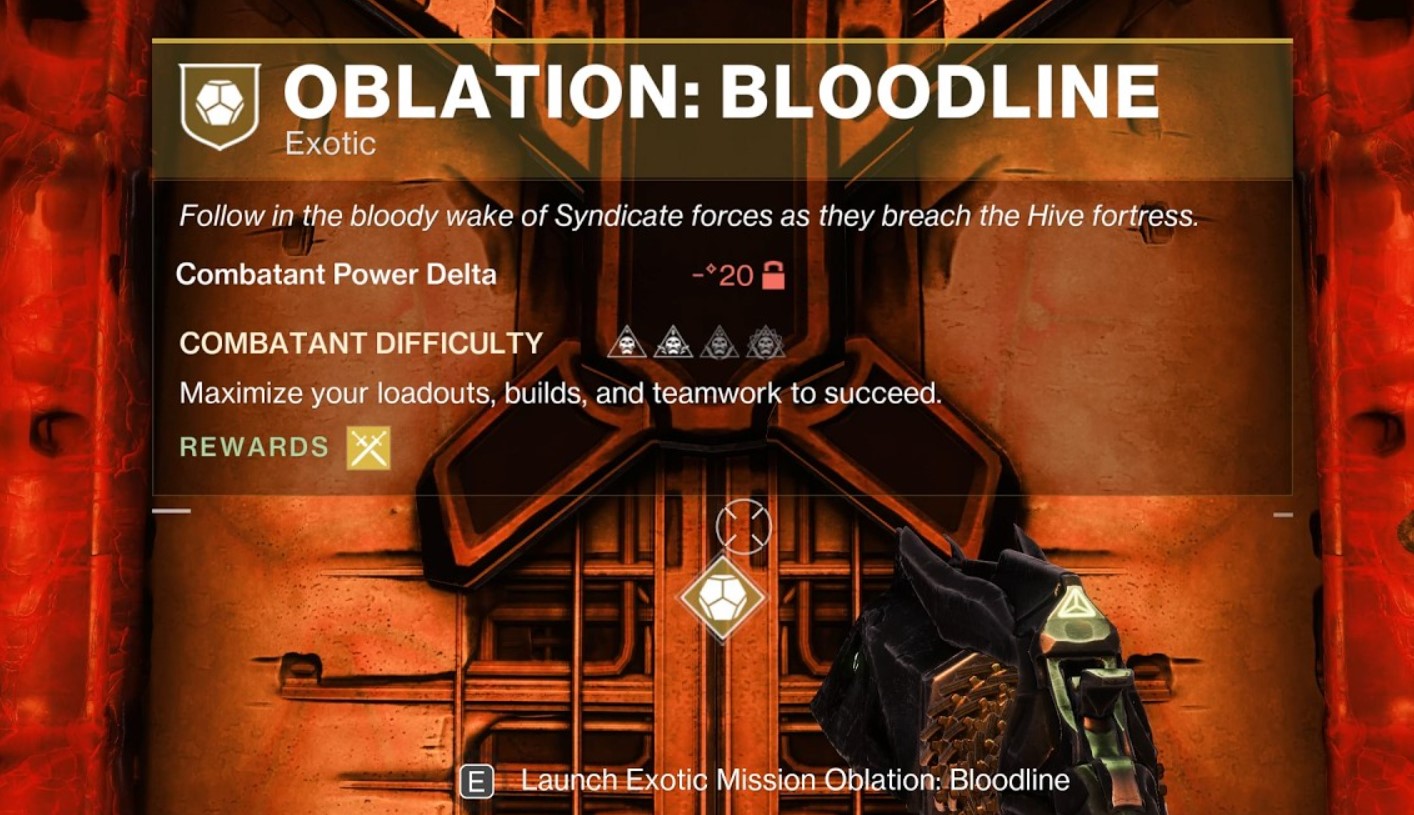
Oblation: Bloodline is the first of three secret exotic missions Bungie tucked into the Monument of Triumph patch. There's no Director icon. The community found it through the Moon, and the unlock chain is a love letter to Zero Hour and Whisper of the Worm players. Plot-wise, Dredgen Bael is hunting Dredgen Yor's lost weapon and you're chasing his shadow on the Moon.
| Quick Stat | Value |
| Mission name | Oblation: Bloodline (hidden, no Director icon) |
| Update | Monument of Triumph (Patch 9.7.0, 9 June 2026) |
| Reward | Cull's Shadow Exotic Fusion Rifle |
| Anti-Champion (intrinsic) | Unstoppable via Soul Burn |
| Prerequisite | Weapon of Sorrow equipped (Thorn cheapest) |
| Solo time (clean) | ~15 minutes mission only, ~60-90 minutes including unlock chain |
| Fireteam size | Up to 3 players, soloable at -20 Power delta |
| Catalysts | 4 total, spread across 3 missions |
Plan the unlock chain for one focused session. Once Bloodline is unlocked, the mission itself runs about 15 minutes per attempt — perfect for catalyst farming.
The 3-Mission Chain
The chain runs Bloodline → Soulfed → Immolation. Bloodline drops Cull's Shadow plus its first catalyst. Soulfed drops two catalysts. Immolation drops the fourth catalyst and an exotic sparrow. Each mission unlocks the next, so you cannot skip ahead — Soulfed only opens once you complete the Soulfire Succor post-boss puzzle in Bloodline.
| Mission | Boss | Catalyst Drops | Key Mechanic |
| Bloodline | Valus Tau'Rig, The Insatiable | Soulfire Succor (post-boss puzzle) | Soulfire Vessel melee + brazier dunks |
| Soulfed | Final 3-boss arena (Ogre + Wizard + Knight) | Soulfire Rancor (chest) + Soulfire Zeal (rune-on-weapon puzzle) | Worm-throwing at Soulfire Crystals |
| Immolation | Ir Gohl, Forger of Sorrow | Soulfire Skewer (final chest) + exotic sparrow | Rotating brazier + Hammer-slam mechanic |
If you only want the gun, Bloodline is the only mission you have to clear. If you want the full Cull's Shadow loop unlocked, all three missions plus all four catalyst objectives are required.
Note: Most current coverage refers to the third mission as Oblation: Immolation, but some early sources use Emulation or Emilation. We use Immolation as the canonical name here and recommend verifying the exact in-game name before relying on it in metadata or external links.
Where It Fits in Monument of Triumph
Monument of Triumph is the Destiny 2 final major update. Pantheon 2.0 covers the boss-rush side of the patch. Oblation covers the secret exotic mission side, in the spirit of the old Zero Hour and Whisper of the Worm hunts. Cull's Shadow itself is a Weapon of Sorrow, which ties it lore-wise to Thorn, Necrochasm, Osteo Striga and Touch of Malice.
Cull's Shadow Weapon Profile and Why It Matters
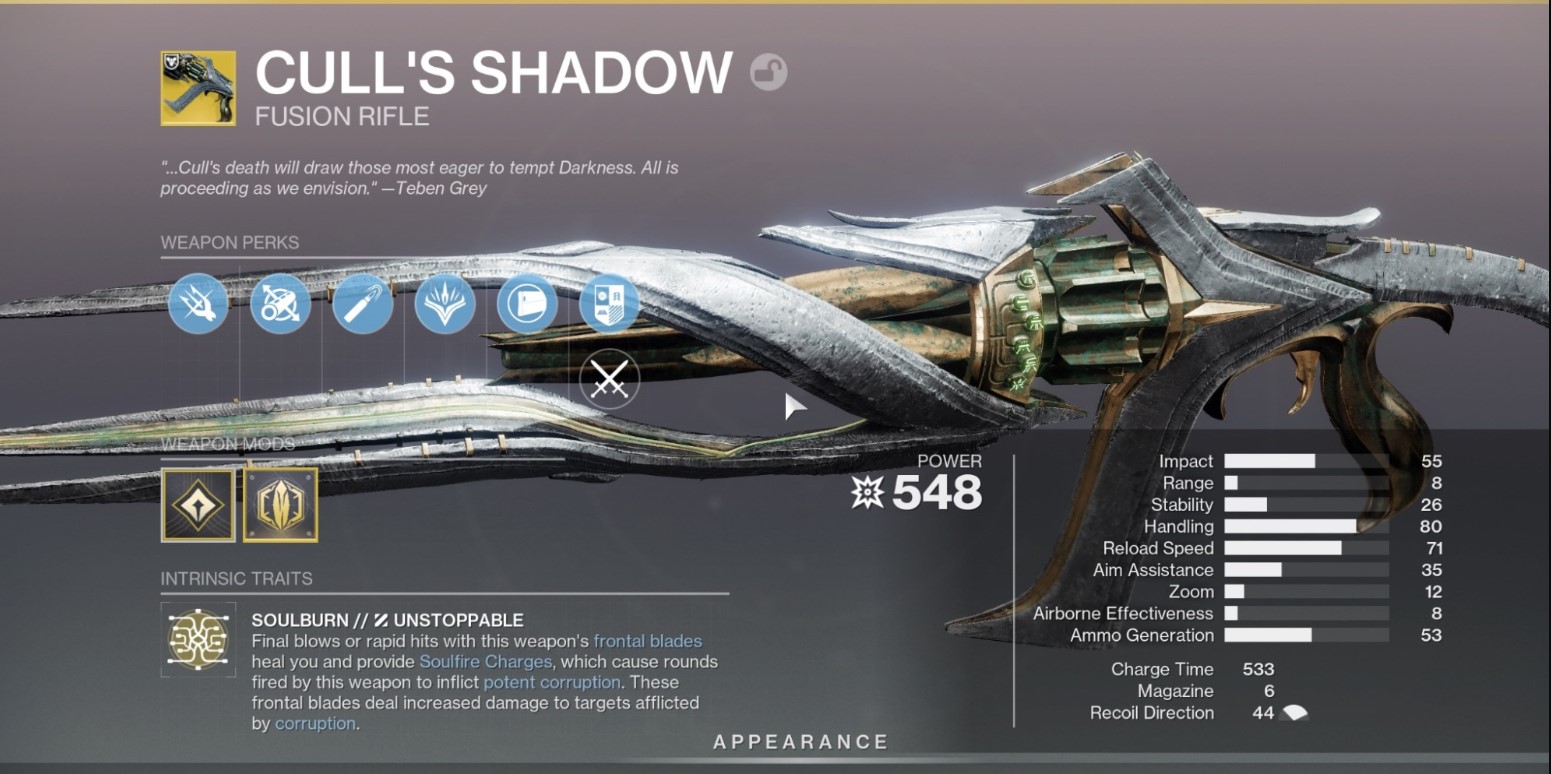
Cull's Shadow is the most unusual Exotic Fusion Rifle ever shipped in Destiny 2. It's a Kinetic-slot fusion with frontal glaive blades welded to the muzzle. You melee with the blades for healing and Soulfire Charges, then fire fusion rounds that "corrupt" enemies, then break the corrupted enemies into Soulfire Crystals that detonate. The catalysts close the loop.
Exotic Kinetic Fusion Rifle Overview
| Field | Value |
| Type | Exotic Fusion Rifle |
| Slot | Kinetic |
| Frame | Glaive-Fusion hybrid (frontal blades + fusion charge-up) |
| Anti-Champion (intrinsic) | Unstoppable (via Soul Burn) |
| Classification | Weapon of Sorrow |
| Source | Oblation: Bloodline (first clear) — Cull's Shadow farm available |
Blades of Unmaking is the intrinsic: melee with the frontal blades, heal on rapid hits or final blows, gain Soulfire Charges. With charges active, fired rounds inflict Corruption. Blades deal increased damage to corrupted targets, so the natural rhythm is melee → fire → finish with blade.
Soulforge is the second perk. Corrupted enemies coalesce into Soulfire Crystals when defeated, and the crystals detonate in a damaging radius when broken.
Weapon of Sorrow and Intrinsic Unstoppable
Cull's Shadow joins the Weapons of Sorrow family — Thorn, Necrochasm, Osteo Striga, Touch of Malice. The classification matters for any lore-locked content that checks for a Sorrow weapon equipped, and it also makes Cull's Shadow itself a valid key for the Oblation unlock chain after your first clear.
The intrinsic Unstoppable stun via Soul Burn is the biggest practical hook. You no longer need a Barrier mod slotted on the artifact if you bring Cull's Shadow plus a Sorrow secondary — the gun handles Unstoppables on its own.
Important: Cull's Shadow stuns Unstoppable Champions intrinsically. No artifact mod required. Free up your Champion slot for Barrier or Overload coverage from another weapon.
Why Catalysts Complete the Loop
Cull's Shadow without catalysts is fine. With all four catalysts active, the loop becomes self-sustaining: Succor reloads on crystal break, Rancor passively detonates near enemies, Zeal grants damage resistance + speed near detonations, Skewer turns crystal explosions into blade-damage boosts. Together they collapse melee → fire → break into a single ad-clear and DPS rotation.
If you want the gun farmed and all four catalysts handled without doing the 3-mission chain yourself, our Destiny 2 Cull's Shadow farm covers the full loop from first clear through every catalyst objective.
Prerequisites: Weapon of Sorrow and Access Checklist
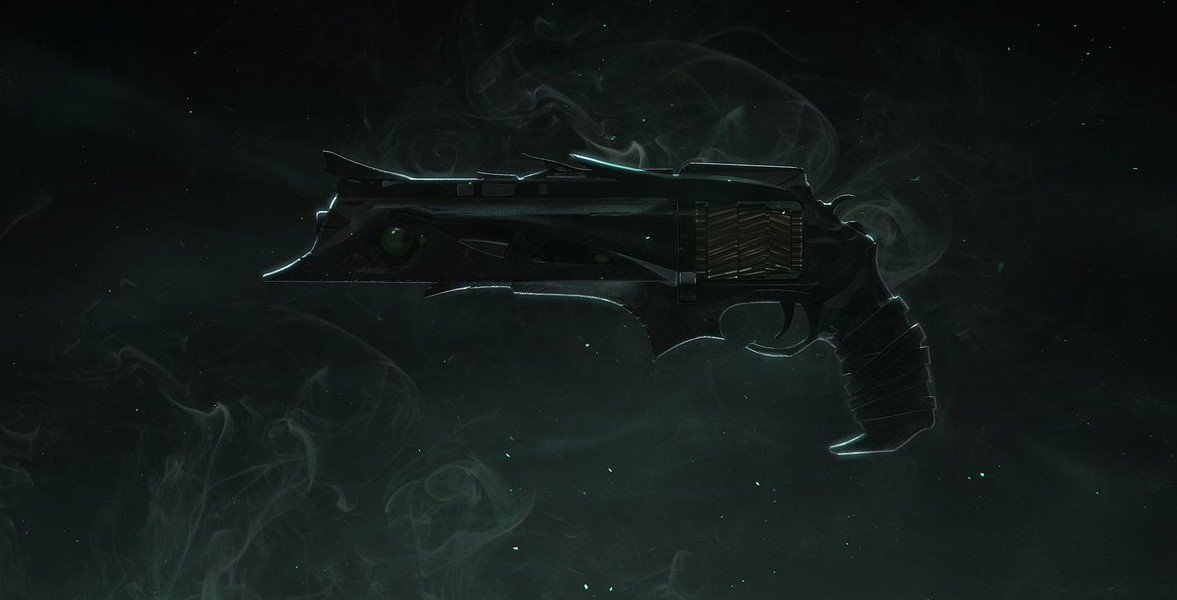
The single hard requirement is a Weapon of Sorrow equipped at every step of the unlock chain. Without one, the Hive runes on the Scarlet Keep gate and the door puzzles around the Moon do not appear. The rune visibility is the entire mechanic — no Sorrow weapon means no progress.
Important: A Weapon of Sorrow must be EQUIPPED, not just owned, at every step. Switching off your Sorrow weapon mid-puzzle hides the runes again. Keep Thorn (or your chosen Sorrow weapon) slotted from the Scarlet Keep gate all the way to the mission entry.
Which Weapon of Sorrow to Use
Any of the four works. The community pick is Thorn because it's the cheapest to acquire if you don't already own one.
- Thorn — Exotic Hand Cannon, buyable from Monument to Lost Lights. Best pick for new returners.
- Necrochasm — Auto Rifle, Crota's End raid quest. Solid backup.
- Osteo Striga — SMG, originally Witch Queen quest. Works fine.
- Touch of Malice — Scout Rifle, King's Fall raid. Works fine if you already have it.
Pro Tip: Buy Thorn from Monument to Lost Lights — 1 Exotic Cipher + 125,000 Glimmer. Cheapest path to a Sorrow weapon and works for the entire unlock chain.
Thorn Cost Reference
Monument to Lost Lights in the Tower courtyard sells Thorn for 1 Exotic Cipher plus 125,000 Glimmer. The Cipher comes from Xur's weekly quest or seasonal challenges. If your Glimmer pool is low, Heroic public events on the Moon top it up fast — and it's the destination you're heading to anyway.

How to Unlock Oblation: Bloodline Step by Step
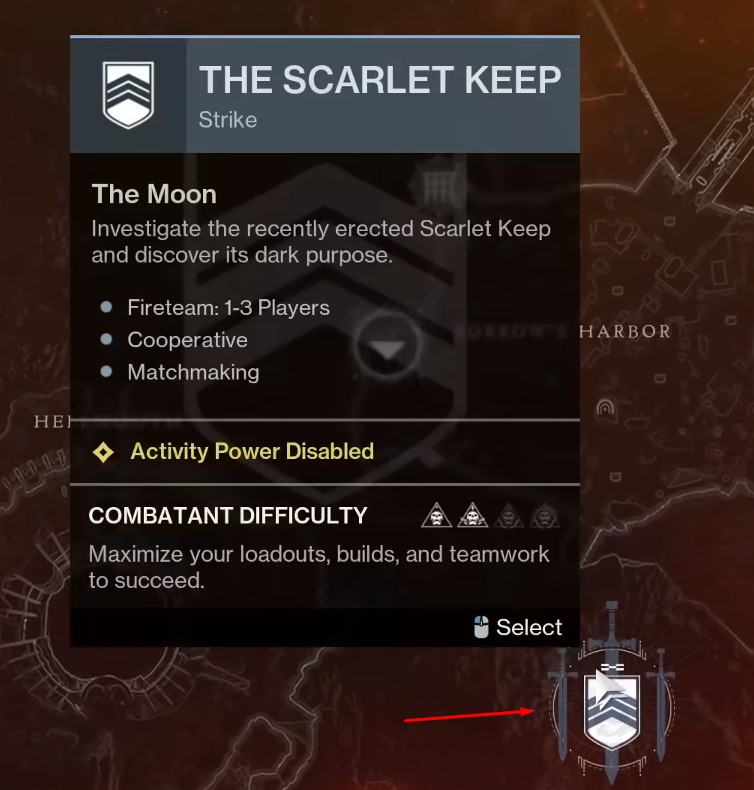
The unlock chain is four steps spread across the Moon. Run the Scarlet Keep strike to trigger the hidden gate, find four Suspicious Syndicate Activity bodies in four destinations, solve four Hive rune door puzzles at four landmarks, then drop into the mission entry under the Scarlet Keep bridge. Plan for roughly 60 to 90 minutes solo on a fresh account.
Scarlet Keep Strike Hidden Gate
Launch The Scarlet Keep strike on any difficulty from the Moon destination. With your Sorrow weapon equipped, push to the final boss room with Hashladûn. Three Hive rune locks appear on the gate behind her. Look around the arena for the matching rune discs and shoot them top to bottom. The bars drop, take the first right past the gate, and interact with the Hive Crystal.
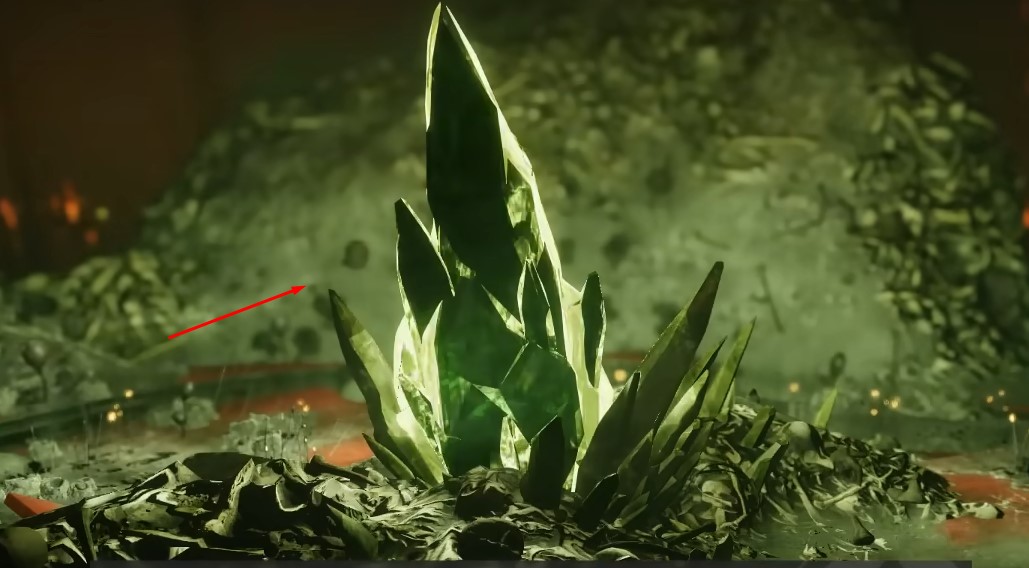
Aunor and Eris will give you a dialogue cue — "the Soulfire crystal resonates with others across the moon." That's your trigger to open the Moon map.
Four Suspicious Syndicate Activity Zones
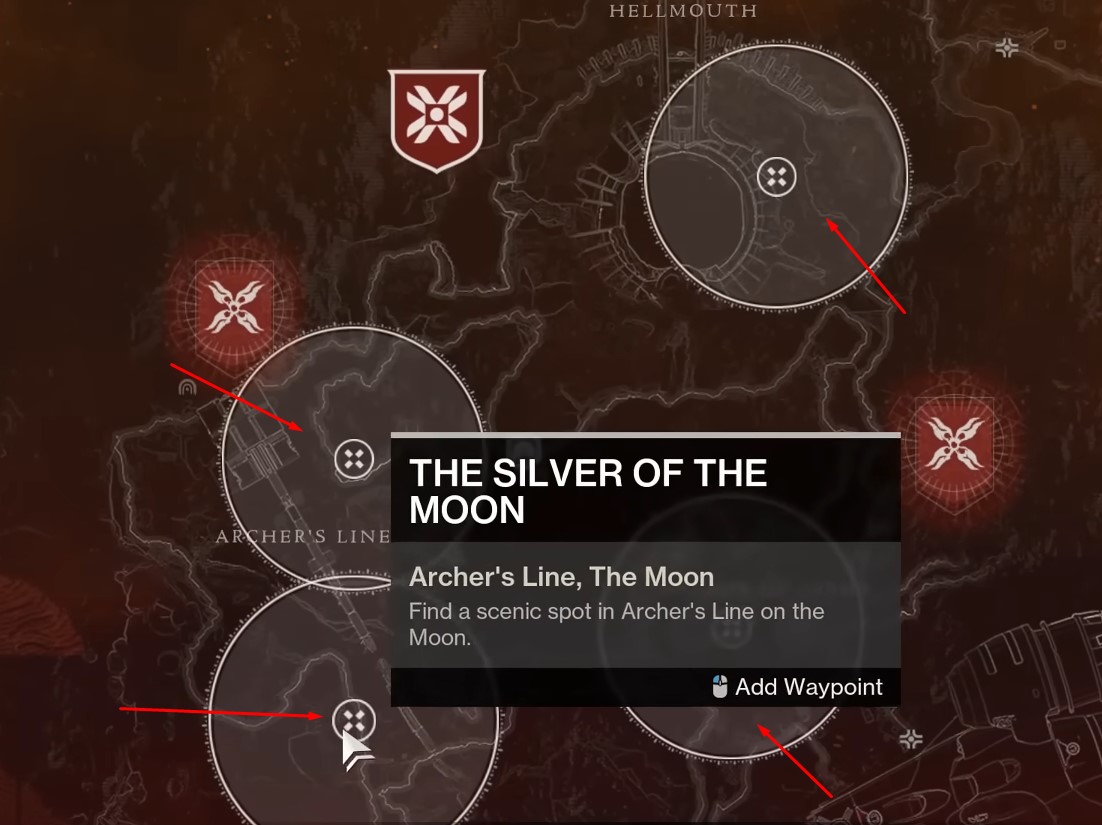
The Moon map now shows four Suspicious Syndicate Activity search areas across Anchor of Light, Archer's Line, Hellmouth and Sorrow's Harbor. Each hides a dead Cabal body glowing green. Use the Soulfire Network Frequency meter (top-right HUD) as a hot/cold indicator while you search.
| Body Zone | Riddle | Landmark Destination |
| Anchor of Light — raised platform, west edge, near yellow structures | "Soulfire thrums deep within a princely temple" | Temple of Crota |
| Archer's Line — small barricade under main bridge, center-low | "Soulfire seethes within a Monarch's Shrine" | Shrine of Oryx |
| Hellmouth — path to first door under overhang | "Soulfire royals within the Nocturnal Chamber" | Chamber of Night |
| Sorrow's Harbor — north ramparts, left of Altars of Sorrow | "Soulfire surges toward a sorrowful revelation" | K1 Revelation Lost Sector |
Read each riddle as a landmark pointer. Glowing green Cabal corpses trail from each body toward the destination — follow the breadcrumbs if you get lost in the geometry.
Four Hive Rune Door Puzzles
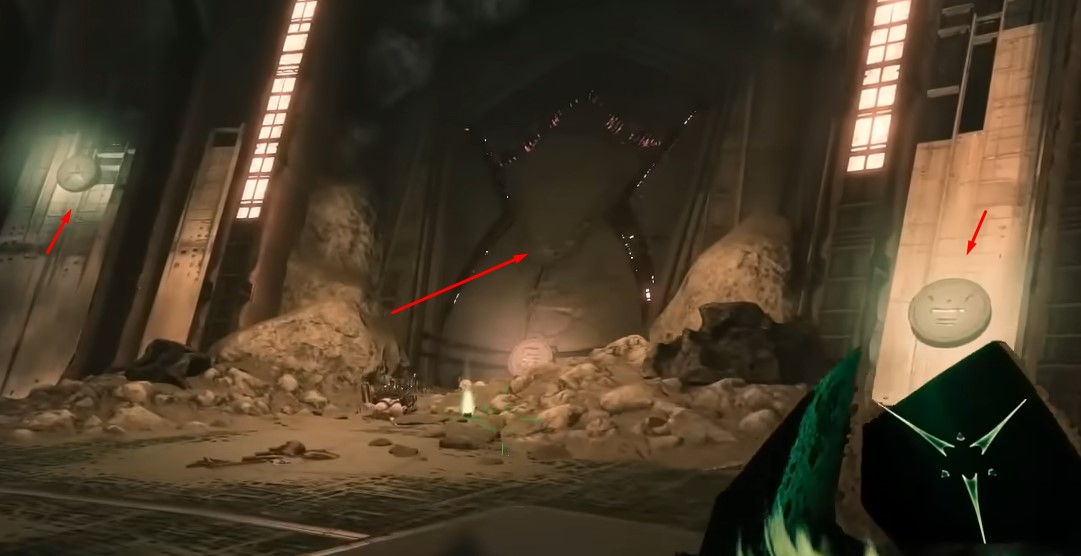
At each landmark, push through ad waves to a Hive door covered in rune symbols (often after a yellow-bar Totality Sapper Scion). Matching rune discs are scattered on the surrounding walls. Shoot the discs in the same top-to-bottom order the door displays.
Wrong order resets the puzzle. Most landmarks use three runes; Shrine of Oryx reportedly uses five — verify the door rune count before you start shooting. Behind each door is a Hive Crystal — interact to bank that landmark.
Mission Entry Under the Scarlet Keep Bridge
With all four crystals activated, the final marker appears at Sorrow's Harbor under the bridge approaching Scarlet Keep. Walk to the east/right side of the bridge, drop into the opening underneath, walk through, interact with the door. Oblation: Bloodline launches.
This is the single most-missed step on solo runs — the entry is below the bridge, not on top of it. Get to the east side of the bridge entrance and look down for the gap.
Mission Walkthrough: Drill Sabotage and Soulfire Crux
The mission opens with a Cabal drill sabotage that takes about 8 minutes, then transitions into a Zero Hour-style upward platforming maze called the Soulfire Crux. No rally banner exists anywhere in the mission, so come fully kitted.
Sabotage the Syndicate Drilling Operation
You spawn at the Pit of Heresy entrance area facing a Cabal energy drill. Speak to Aunor up the trail for the briefing. Drop off the left ledge before the red tower and land on the platform below.
Clear Psion snipers, climb the stairs, and kill the Totality Enforcer (shielded Centurion) at the console. Engage the Manual Safety Override switch. Three blue Cooling Tower Control Fuses open — shoot all three.
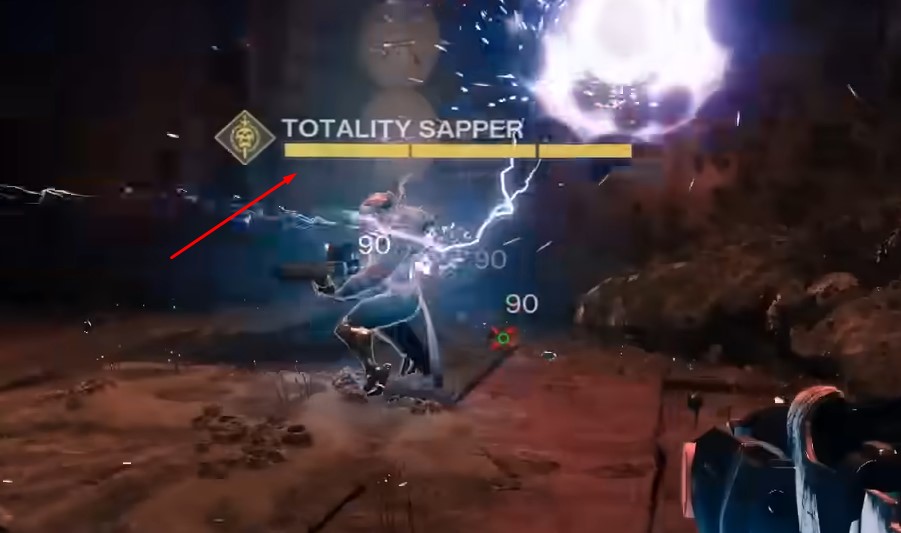
Cooling Pillar 1 activates with four red-hot vents that open and close on a cycle (the same mechanic as Cabal drill public events). Shoot all four vents and the pillar drops. A man cannon shoots you to the next platform.
Cooling Pillars 2 and 3 repeat the same loop: kill the Enforcer, hit the override, shoot the three fuses (positioned above-left, directly across, and across-and-left of the switch respectively), then shoot the vents on both pillars.
Enter the command center carved into the rock face (shield now down), clear it out, flip the final switch to overload the laser. The man cannon shoots you up through the drilled hole into Phase 2.
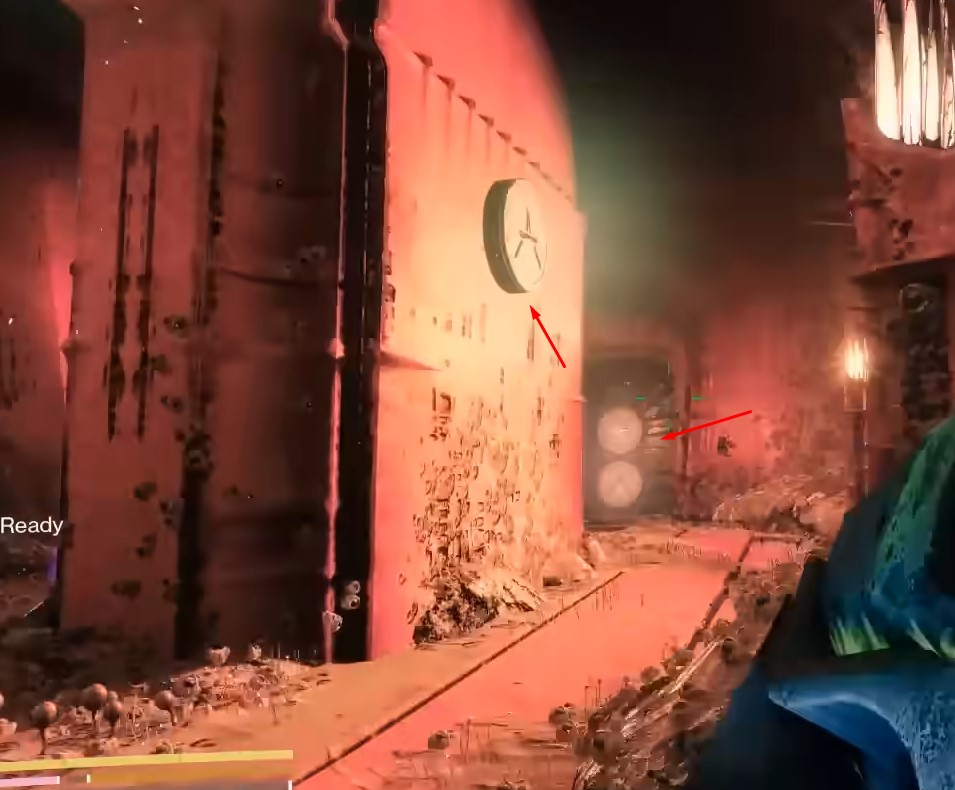
The Soulfire Crux Upward Maze
Go up, not down. Dead-end rooms are lore stops with worm collectibles. Use sniping Acolytes as wayfinding — wherever they're shooting from is a ledge you can reach.
Jump through the light-green cave at the back, scale rock-wall ledges, and in the mid-area hop the chasm right and chain across the hanging sarcophagi. At the top you reach a long iron-barred hallway. Jump on its roof, look over the far side, drop to a back platform, and enter from the rear.
Walk the hall until Dredgen Bael's shadow locks a room ahead. Ignore the locked room — find the crack in the staircase floor and drop through. Continue down through caverns into a pit, up into a room with scarlet towers, then drop to the Soulfire Barrier room.
Traversal exotics that work well: Eager Edge sword, Strand grapple, Icarus Dash, Praxic Vestment. Pick what your class enables fastest.
Boss Encounter: Valus Tau'Rig, The Insatiable
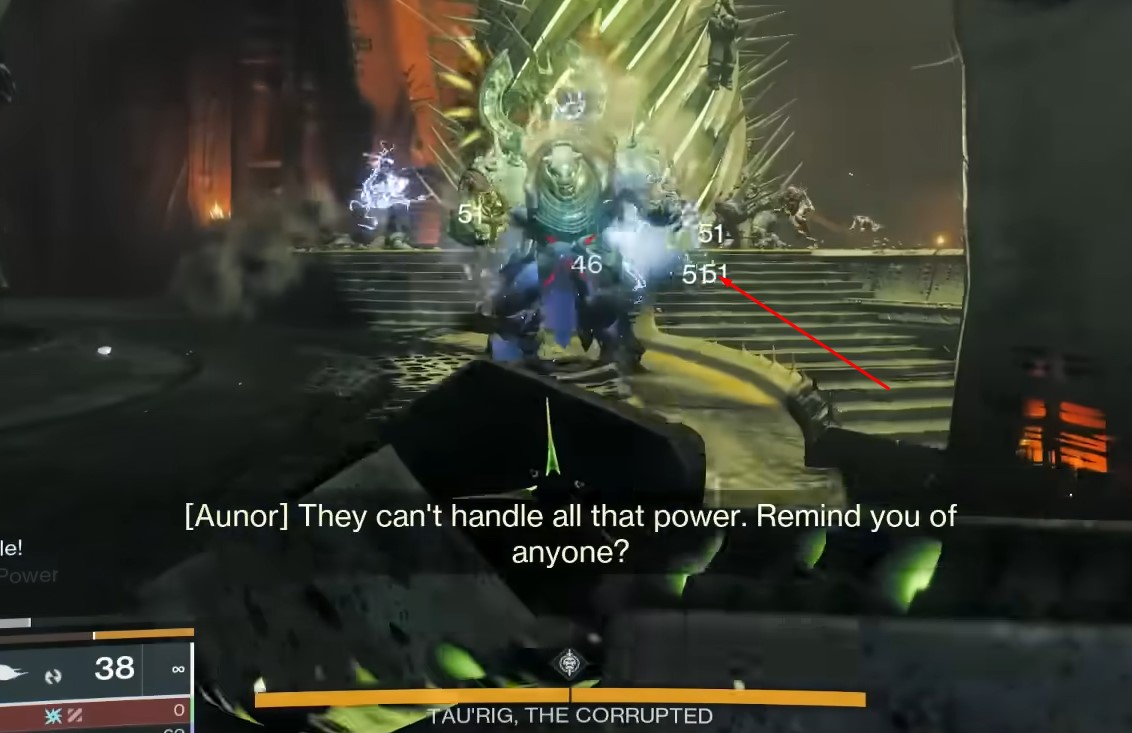
Valus Tau'Rig is a Cabal commander wielding Cull's Shadow, empowered by three Hive Pyre Cantor Wizards. The fight is two phases (technically three with the 50% HP reset). Phase 1 is pure DPS. Phase 2 introduces the brazier dunk mechanic. Phase 3 repeats Phase 2 with more adds.
Soulfire Barrier Mechanic
Before the boss appears you clear the Soulfire Barrier room. A column of Soulfire blocks the way. Three braziers sit around it.
- Kill the central Pyre Matron Wizard — drops the shield on a Soulfire Vessel Thrall.
- Melee or finisher the Vessel — bullets do not kill it. Gain Soulfire Charge buff (~18-20 seconds).
- Run to an unlit brazier and dunk — first brazier lights, adds spawn pointing to the next room.
- Clear three Pyre Matrons in the second room, melee Vessel, dunk second brazier.
- Climb up and left for the third brazier — scale rocky ledges past an Ogre, clear Pyre Matrons + Knight, melee Vessel, dunk.
- All three lit → barrier clears → boss arena opens.
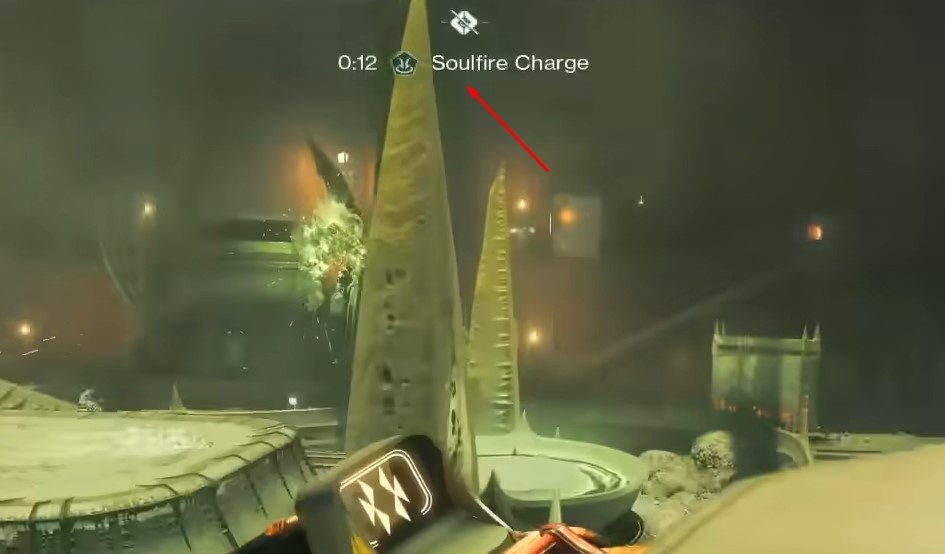
Phase 1 DPS Window
Phase 1 is open damage with a small health bar. Praxic Blade sword combos, rockets, Linear Fusions and Gjallarhorn all melt him. There's no rally banner, so make sure you walk in with your DPS loadout ready.
Resist the urge to burn all your heavy — Phase 2 hits harder than Phase 1 and you'll want at least half a heavy pool for the second damage window.
Correct Brazier Dunk Rule
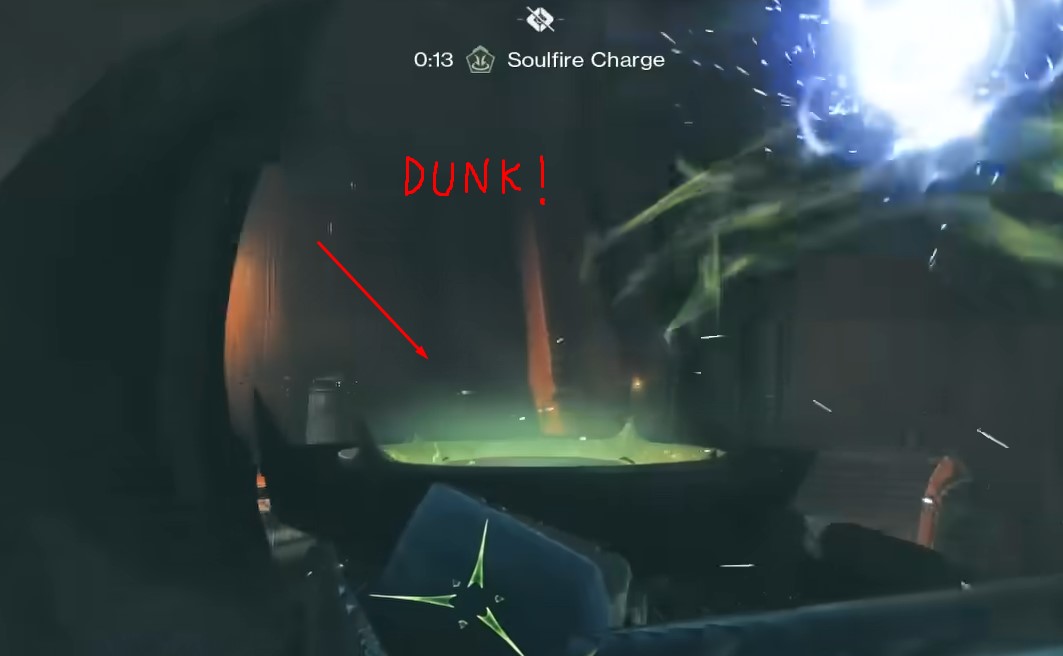
Warning: In Phase 2 and Phase 3, dunk the Soulfire Charge in the brazier Tau'Rig is siphoning from. Dunk the wrong brazier and you wipe the wave — the immunity phase resets and you have to start over.
When Phase 2 starts, three Pyre Cantor Wizards spawn and immediately disappear into the left or right side room (RNG). Watch their flight path so you know where to chase. They land immune; bait the green Soulfire crystal AoE onto them to drop immunity.
Kill the Wizards, melee the Vessel that spawns afterward for your Soulfire Charge, then dunk in the brazier Tau'Rig is currently siphoning from. Shield drops, DPS window opens, repeat for Phase 3 with more Ogres.
Pro Tip: Slot Strand resistance fragments before this fight. Tau'Rig's Strand shackle one-shots stationary Guardians during immunity phases — the resistance keeps you alive while you're tracking Wizard flight paths.
Cull's Shadow drops once Tau'Rig dies. Do not exit the mission yet — the Soulfire Succor catalyst is unlocked via a post-boss puzzle covered in the next section.
If LFG groups and solo learning curves are not your scene, our Destiny 2 Oblation mission carry handles the unlock chain, the walkthrough and the boss for you so you walk away with Cull's Shadow in a single session.

All Four Cull's Shadow Catalysts
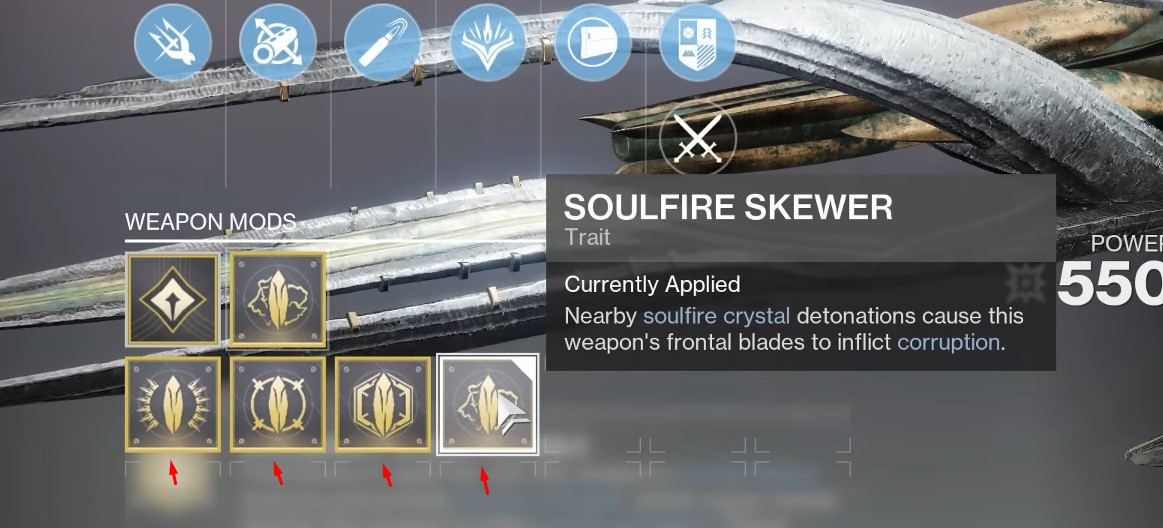
All four catalysts are gated behind the three-mission chain: Succor in Bloodline, Rancor and Zeal in Soulfed, Skewer in Immolation. Each catalyst targets a different part of the Cull's Shadow loop, and the four together turn the gun from "good" into "self-sustaining ad-clear and DPS rotation".
| Catalyst | Mission Source | Effect | Objective Summary |
| Soulfire Succor | Bloodline (post-boss) | Crystal break grants charges + partial reload from reserves | Climb to third brazier position, interact with floating Hive grimoire, shoot rune door |
| Soulfire Rancor | Soulfed (chest drop) | Crystals auto-detonate near enemies (passive AoE) | Complete Soulfed end-to-end, chest at final 3-boss arena |
| Soulfire Zeal | Soulfed (rune-on-weapon puzzle) | Crystal detonations grant damage resistance + movement speed | Interact with second Hive book; shoot arena runes in the order shown on Cull's Shadow itself |
| Soulfire Skewer | Immolation (final chest) | Crystal detonations boost blade damage briefly | Beat Ir Gohl boss with rotating brazier + hammer-slam mechanic |
Succor first (passive reload sustain), then Skewer for the DPS payoff. Zeal and Rancor are nice-to-have utility, but Succor and Skewer are the loop closers.
Soulfire Succor
After Tau'Rig dies, equip Cull's Shadow and re-enter the Soulfire Barrier room. Clear remaining ads, climb to the third (left/upper) brazier position. Text appears: "The Weapon of Sorrow craves profane wisdom..."
Jump across the hanging sarcophagi to your right to a floating Hive grimoire. Interact ("Indulge Cull's Shadow"). Return to the boss room — runes now appear on a back-right door. Shoot the runes top to bottom. Succor catalyst drops and the door to Oblation: Soulfed unlocks.
Soulfire Rancor
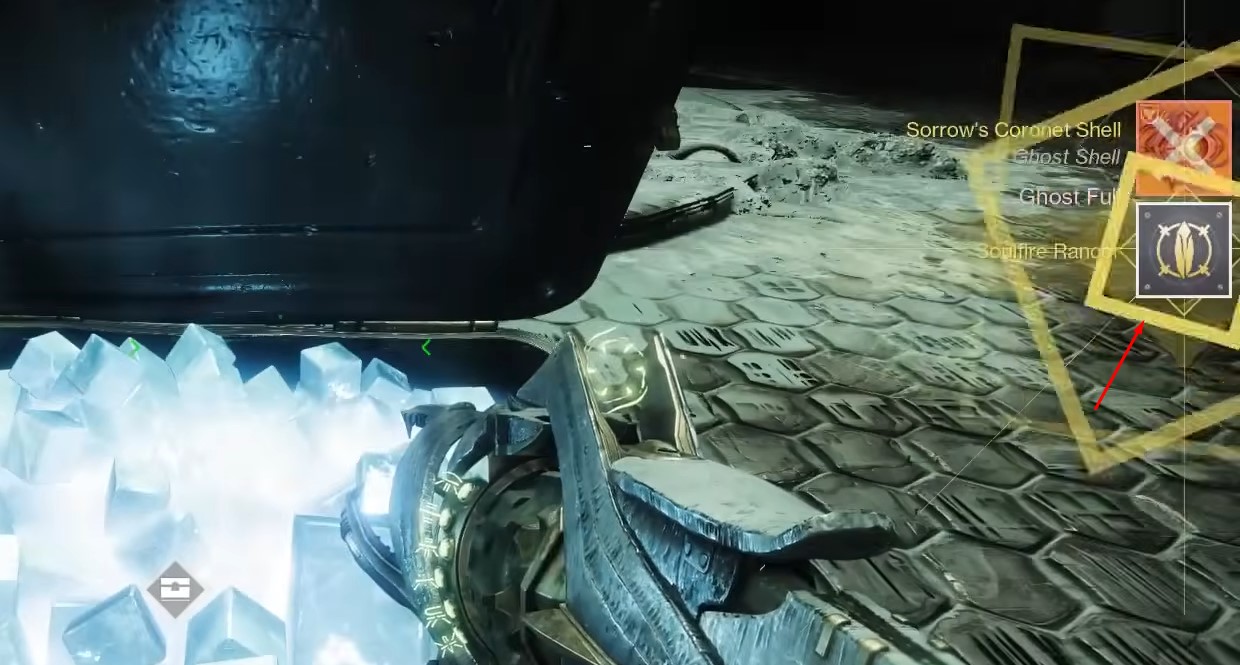
Run Oblation: Soulfed start to finish. The mission introduces a worm mechanic — dunked Soulfire Charges spawn worms you throw at Soulfire Crystals to open paths. After the final 3-boss fight (Ogre + Wizard + Knight, shields dropped via worm-at-crystal), Rancor drops from the loot chest.
Soulfire Zeal
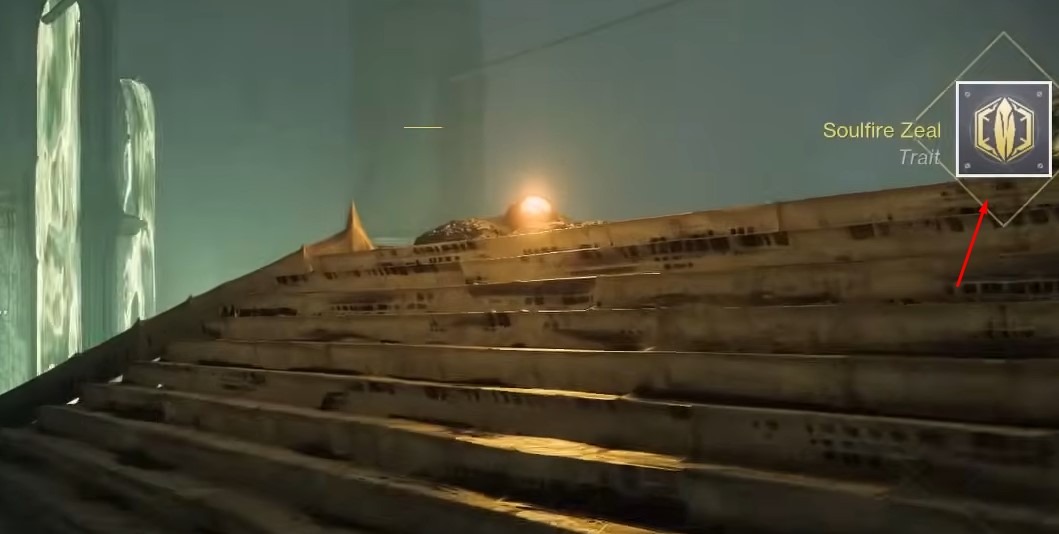
Once the Soulfed bosses die, interact with the second Hive book in the arena center. Runes appear on the outside walls of the arena AND on Cull's Shadow itself — look at the side of the weapon for a descending list. Shoot the room runes in the order shown on the weapon. Zeal catalyst drops and the third mission door opens.
Soulfire Skewer
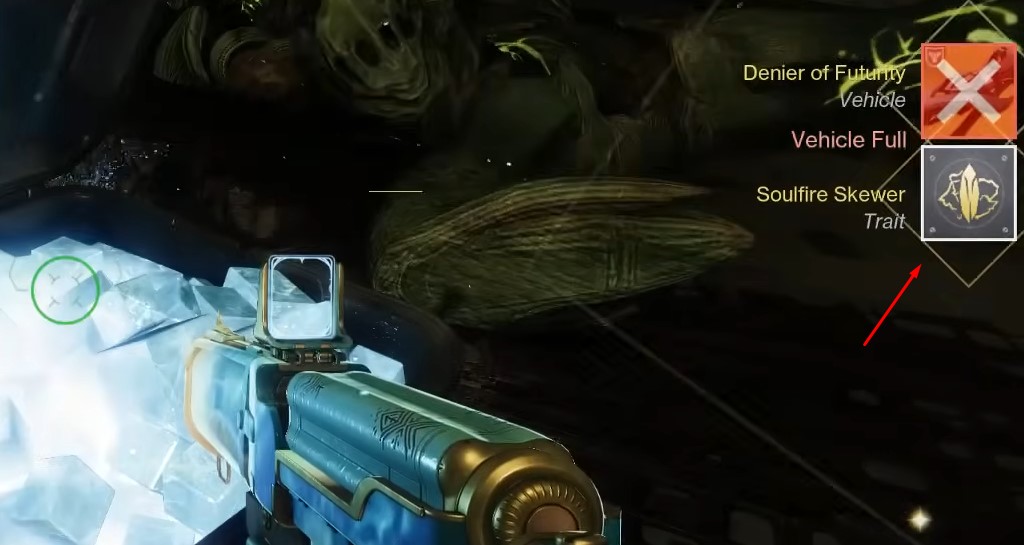
Run Oblation: Immolation to the end. Mid-mission a Soulfed Bellow Stoker Knight needs the wizards-above-capture-plates routine — kill the wizards, stand on the plate (on the sides to dodge the Soulfire jet) to redirect Soulfire and drop immunity.
Final boss is Ir Gohl, Forger of Sorrow, spawn-camping a Dredgen Lightbearer. Clear three side-room Wizards, throw worms at two crystals to drop Ir Gohl's shield, DPS. Hammer slams rotate the active brazier and trigger Soulfire explosions — the bubble closing on the Lightbearer means a hammer is incoming. Chest drops Skewer catalyst plus an exotic sparrow.
For the full Cull's Shadow loop unlocked without grinding three missions yourself, our Destiny 2 Cull's Shadow farm covers every catalyst objective end-to-end.
Best Loadouts, Solo Strategy and Fireteam Tips
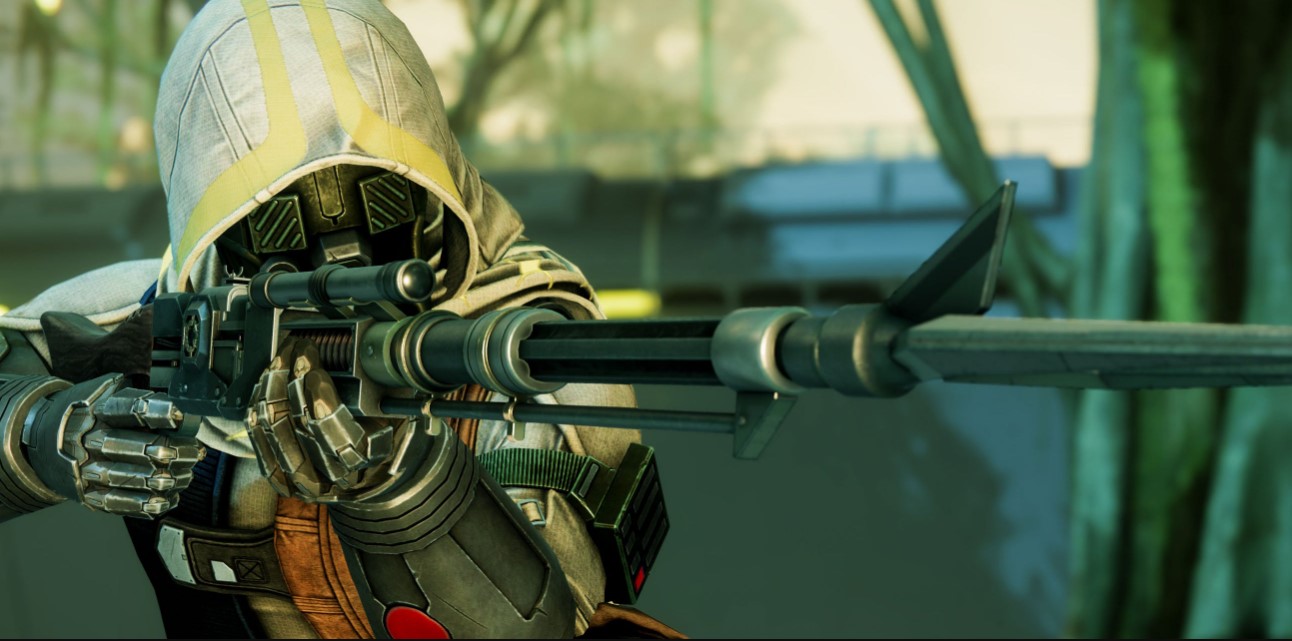
Oblation: Bloodline is soloable at -20 Power delta with no special build prep. Clean clears land around 15 minutes once you know the layout. The hardest mechanical bits are the boss brazier dunks and the Strand shackle dodge — most other failures come from poor traversal.
Solo Loadout Example: Arc Titan
This is one community-tested setup for a ~15 minute clean clear. Any build with survivability, traversal and reliable boss DPS clears Bloodline — Arc Titan is featured because it's well-documented, not because it's the only viable build.
| Slot | Gear | Why It Works |
| Subclass | Arc Titan — Fists of Havoc, Thunderclap, Pulse Grenade | Storm's Keep + Knockout for ad clear; super covers add-density rooms |
| Aspects + Fragments | Spark of Resistance (Wasp), Shock, Focus, Frequency + Strand resistance fragment | Strand resistance is the single biggest survival item for Tau'Rig's shackle |
| Exotic Armor | Crest of Alpha Lupi | Self-revive on death (key for solo) |
| Kinetic | Tarnation hand cannon (or any Sorrow weapon during unlock) | Reliable mid-range damage + headshot consistency |
| Energy | Particle-Reconstruction fusion rifle | Massive boss damage with artifact mod active |
| Heavy | Eager Edge sword | Traversal across the Soulfire Crux maze + emergency DPS |
| Artifact priority | Particle Reconstruction, Volatile Marksman, Dielectric, Defeat Blast | Fusion boss damage stacking + Arc support |
Boss DPS Options
- Praxic Blade sword combos — heavy-light-heavy from melee range. Top damage option if you can safely hug the boss.
- Gjallarhorn + rockets — classic burst window. Slot two rocket frames if you have heavy ammo discipline.
- Linear Fusion Rifles — high range, reliable Phase 1 damage. Strong if you struggle to stay close.
- Particle-Reconstructed fusion rifles — current artifact synergy makes these top-tier for the season.
Solo vs Fireteam Decision
Solo is the cleanest learning lap because the mechanics scale on you alone. Fireteam advantages are real but situational: one player tracks left Wizards while another tracks right, faster DPS, and split ad-clear duties.
The most common solo mistakes are forgetting Strand resistance, losing track of which side room the Pyre Cantors flew into during the boss's immunity phase, and burning heavy ammo in Phase 1.
Oblation FAQ, Carry Recommendations and Final Thoughts
How long does the Oblation: Bloodline unlock take?
Roughly 60 to 90 minutes solo for a fresh run through the Scarlet Keep gate, four Suspicious Syndicate Activity zones, four rune door puzzles and the mission itself. Subsequent runs of the mission alone are ~15 minutes.
Can I do Oblation without a Weapon of Sorrow?
No. Without a Sorrow weapon equipped, the Hive runes on the Scarlet Keep gate and the door puzzles do not appear. Buy Thorn from Monument to Lost Lights for 1 Exotic Cipher + 125,000 Glimmer if you don't already own one.
Is the mission soloable?
Yes. Soloable at -20 Power delta with a survivability-focused build. The boss is the only real difficulty wall, and it comes down to the brazier dunk discipline + Strand shackle dodge.
Do I have to do all three missions for Cull's Shadow?
No — Cull's Shadow drops from Bloodline alone. The other two missions (Soulfed and Immolation) gate the other three catalysts. If you only want the gun, Bloodline is enough.
Is there a Master difficulty?
Not at launch. The standard -20 Power delta is the only version available right now. Bungie may add a Master variant later.
When should I buy a carry?
If you don't have a Weapon of Sorrow, hate solo puzzles, or want all four catalysts handled without grinding three missions: a carry collapses ~3 to 5 hours of grind into one session. Our Destiny 2 Oblation mission carry covers the unlock + first clear.Final Thoughts
Destiny 2 Oblation: Bloodline is the best secret exotic mission Bungie has shipped since Zero Hour. The unlock chain rewards exploration, the walkthrough rewards platforming, the boss rewards clean execution, and the catalyst chain rewards completion. Cull's Shadow itself is a genuinely new weapon archetype — glaive-fusion hybrid with intrinsic Unstoppable — and the four catalysts make the loop self-sustaining.
The decision logic for most players: if you have a Sorrow weapon and 90 free minutes, do the unlock chain solo today. If you don't have Thorn and don't want to chase a Cipher, buy it at Monument to Lost Lights for 125,000 Glimmer. If your weekend looks more like work than gaming and you want Cull's Shadow plus all four catalysts handled, the carry path is the time-efficient option.
For the focused boss carry, see our Destiny 2 Oblation mission carry . For the full Cull's Shadow plus four catalysts chase, see our Destiny 2 Cull's Shadow farm . For broader support, the full Destiny 2 boosting services page covers everything from Trials to raids.