
The Division 2 Builds – Best PvE & PvP Builds in 2026

Are you still looking for that perfect build for your character in Division 2? Then you've come to the right place, Agent! Here you can find an up-to-date collection of the best builds for PvE and PvP in 2026. Choosing the right build for your character significantly impacts your gaming experience, so you must make the best decisions regarding your weapons, gear, and playstyle.
First, we will cover the basics and clarify what a build is, the different types of builds, and their particularities, to determine what kind of build would suit the best for your playstyle. Then, we introduce you to the best builds the year 2026 has brought to the Division 2 universe.
By the end of this guide, you will become a master of build-making and learn how to optimize your favorite builds for a swift gaming experience, whether you are a PvE or PvP fan. Sounds good, right? Let's get started!
What is a Division 2 Build?
In Division 2, builds represent a specific arrangement of weapons, gear, skills, and stats selected by the player to prepare the character with the best equipment for certain PvE or PvP encounters. Also known as "setups" or "loadouts," builds are divided into multiple categories based on the purpose they are used for.
Like any looter-shooter, Division 2 has a complex character progression system that revolves around different weapons, gear, skills, and various end-game activities that automatically require specific builds to be prepared and taken care of.
In this guide, we will go into detail through all these builds and categories so you can easily decide on the best build for your Division 2 character.
My build-making experience in The Division games
As a Day One Division Agent, I proudly consider myself one of the most dedicated players that had the opportunity to try out and experience the amazing universe that this franchise brought to the looter-shooter scene over the past six years. At this point, I have invested over 10000 hours in The Division games, and I spent most of my time trying to figure out the best builds for different PvE and PvP scenarios.
Due to the games' complexity, things constantly change, and so do the meta builds. I have personally tested dozens of builds in TD2, so it's safe to say that I know all the tips and tricks on build-making and min-maxing in the game. In this guide, I want to share the best Division 2 builds to use nowadays, in 2026. PvE or PvP, I got your back, Agent!
Table of Contents
Before we start, here's a little breakdown of our Division2 build guide:
- What is a Division 2 build made of?
- What is the fastest way to create a build?
- How to choose the best build for your character in Division 2
- How to min-max your builds
- Types of builds in Division 2
- Best Division 2 PvE builds in 2026 for Solo and Group
- Best PvP Builds in 2026 for Division 2 for Solo and Group
- Best Builds in Red Horizon (Year 8 Season 3)
- Best Builds for Escalations
- Best Builds for Incursions
- Best Builds for Raids
- Best SHD & XP Farming Builds
- Best Builds for Master & Legendary
- Best Prototype Builds
- Best Striker, St Elmo's, and Ouroboros Builds
- Conclusion
Are you ready to learn how to create the perfect loadout for your character and discover the best Division 2 builds in the ongoing meta? I’m looking forward to seeing what fits the best for you. Let's dive in!
What is a Division 2 build made of?
The core elements of a Division 2 build are:
- The Weapons
- The Gear
- The Skills
- The Stats & Attributes
- The Mods
- The Specialization
These are the key components you must focus on when creating a build for your character. When these elements are wisely chosen and put together, they create a synergy that will reflect your build's power and capability.
Note: Please keep in mind that in Division 2, the gearing for the end-game builds comes as a package with the grinding for the rarest items or mods out there. So if you aim high, get ready for some serious time investments, and rest assured that it's worth it, by all means. The rare items used in the best Division 2 builds are real game-changers!
The Division 2 Weapons
In Division 2, weapons play a huge role when choosing the perfect build for your character. You have access to various weapon types, so the game covers it all, whether you prefer a close-combat playstyle or sniping the enemies from long distances. There are plenty of weapons to choose from and use for your favorite builds.
You can use three types of weapons in the game: high-end weapons, named weapons (better variants of the standard weapons), and exotic weapons. Your character comes with three weapon slots so that you can equip and use up to three weapons in your builds at the same time: 2 primary weapons and a secondary sidearm.
Now let's see what weapons are the best to use for your loadout based on the combat style. We'll briefly go through the main weapon types and see the correlation between the weapons and the playstyle they imply.
Below you can find the main weapon types you can choose from in the game:
- Assault Rifles: best for medium-long range combat
- Rifles: best medium-long range combat
- Marksman Rifles: exclusively for long-range combat
- Submachine Guns: best for close combat
- Light Machine Guns: for medium-long range combat
- Shotguns: exclusively for close combat
- Sidearms: best for close combat
If you are looking for the best exotics, the most popular Division 2 exotic weapons in 2026 are:
- Eagle Bearer: the best raid weapon for the assault rifle DPS builds
- Ouroboros: the best exotic SMG in the game, perfect for close-combat builds
- St Elmo's Engine: the best weapon for most of the DPS builds
- The Regulus: the best weapon for pistol builds
- Scorpio: the best weapon for close-combat DPS and support builds
- Capacitor: the best assault rifle for skill builds
- Mantis: the best marksman rifle for sniper builds
- Pestilence: the best LMG for DPS and support builds
So once you figure out what type of playstyle you prefer, choose the best weapon type for your build. To optimize your build, you have to make sure you use the best weapons with the proper stats and talents.
The Gear
Like the weapons, in Division 2, players get to choose from various gear for their builds, such as Brand Sets, Gear Sets, and Exotic Armor. There are six gear slots that you must fill in with the best variants for your build: mask, backpack, chest, gloves, holster, and kneepads.
The game has improved a lot since its launch, so nowadays, you have the opportunity to choose from 23 Gear Sets and 33 Brand Sets when going for that perfect build for your character. All these armor sets come with unique set bonuses and talents, which is a significant factor in the build diversity the Division 2 players face.
BEST DIVISION 2 SEASONAL SERVICES


There are many cases when the players get discouraged when they find out there are so many gearing options available in the game, and they don't know what to choose out of all these armors, where to start from, or how to mix and match the items when working on their builds. To make it easier, we'll briefly go through the best exotic armor and gear sets used in the ongoing meta.
The most popular Division 2 gear sets in 2026 are:
- Striker Set: best for assault rifle and SMG builds
- Heartbreaker Set: ideal for assault rifle and LMG DPS builds
- Negotiator's Dilemma Set : best for legendary content builds
- Hunter's Fury Set: best for SMG builds
- Foundry Bulwark Set: best for tank builds
- Future Initiative Set: exclusively for healer builds
- Eclipse Protocol Set: best for status effect builds
- Rigger Set: the perfect choice for skill builds
As for the best exotics, the most popular exotic armor items used in the 2026 meta builds are:
- Memento: the best exotic backpack in the game
- Ninja Messenger Backpack: best-in-slot backpack for hybrid builds
- Waveform: the best holster for skill builds
- Coyote's Mask: the best exotic mask for firearm builds
- Vile Mask: the perfect choice for status effect builds
- Catharsis Mask: ideal for PvP builds
- Tardigrade: the best exotic chest for tank builds
- BTSU Datagloves: the best gloves for healer builds
This is the main reason we created this guide: to make your build-making experience a lot easier. Later in the guide, we will show you exactly what items to combine to create some of the best Division 2 builds in 2026. On top of that, if you ever encounter any difficulty getting the desired items for your builds, we provide boosting services as well, so you can buy Division 2 Exotics or God Roll Farming and complete your builds in no time!
The Skills in Division 2
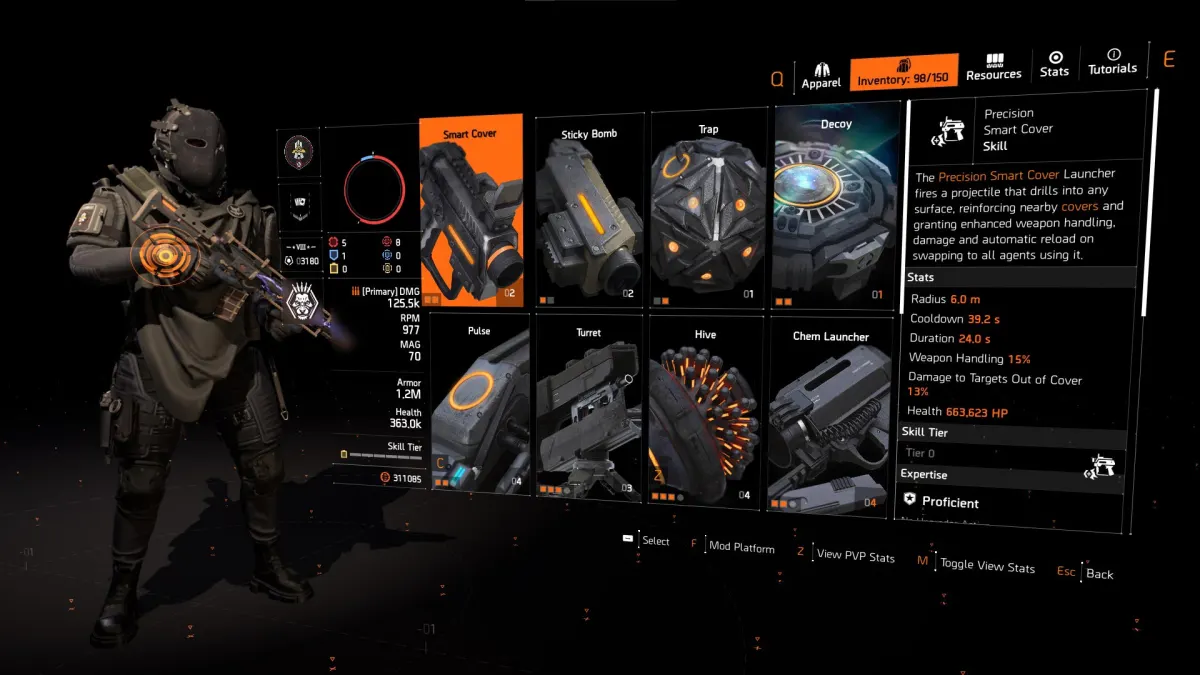
Now that we've covered the weapons and the gear, it's time to move on to the next aspect you must focus on when creating your Division 2 build: the Skills you will be using. There are 11 skills you can choose from in the game, each having multiple variants. Though the character comes with only two skill slots, so you can equip and use a maximum of 2 skills at any given time.
However, you have the freedom to combine ANY two of the skills available in the game, as no restrictions are forcing you to use a particular skill based on your equipped loadout or stats. We won't insist too much on this aspect right now as we'll get more into details when showcasing the builds and the best skills to use for each of them.
Here are some of the skills that you can use in Division 2:
Division 2 Specializations
Moving on to the following key component: The Specialization. Each specialization has its skill tree that unlocks a unique signature weapon, unique skills, skill mods, and a special type of grenade related to the specialization build. Based on the desired build you want to focus on, there are six specializations you can choose from:
| Specialization Name | Signature Weapon | Skill Variant | Grenade Type |
| Sharpshooter | TAC-50 Sniper | Tactician Drone | Flashbang Grenade |
| Demolitionist | Grenade Launcher | Artillery Turret | Fragmentation Grenade |
| Survivalist | Crossbow | Mender Seeker Mine | Incendiary Grenade |
| Gunner | Minigun | Banshee Pulse | Riot Foam Grenade |
| Technician | Missile Launcher | Artificer Hive | EMP Grenade |
| Firewall | Flamethrower | Striker Shield | Cluster Grenade |
Talents, Attributes & Mods
At this stage, we approach the fine-tuning of the build. What comes next focuses mainly on min-maxing and getting the optimal stats for the build. In Division 2, each item has a core attribute, and by case, 1 or 2 secondary attributes. Apart from the attributes, the items can also come with talents, which are special bonuses that improve specific weapon or armor stats.
Items can also be socketed with mods. There are two types of mods based on the item type: gear mods and weapon mods. Players use the mods to improve the stats on the desired items. We call the "best-in-slot" or "perfect" gear piece the item with the best talent, the perfect attributes, and the best mod for a particular build. A build is 100% optimal only when you have the right talents, stats, and mods on your items.
What is the fastest way to create a build in Division 2 in 2026?
Once you've figured out all the items that you need for your build, it's time to get to work and start farming for them. Now let's see where you can find the required items for your builds.
When the game was released, going for specific items was a pain. There was no targeted loot, so you were dealing with a ridiculous RNG factor as any enemy could have dropped any item in the game. Nowadays, in 2026, with new activities and features such as Countdown or The Summit, build-making in Division 2 has become a lot easier.
Now, the fastest way to get items in Division 2 is to use the targeted loot feature in Countdown and The Summit activities. Here, you can select the desired item type to drop as targeted loot upon killing enemies. So basically, you can filter the drops you will be getting by weapon type, armor slot, brand set, gear set, or mods.
Example: Let's say you are looking for a particular exotic mask, Coyote's Mask. To increase the odds of dropping this exotic mask, you must select the desired item slot – in this case, masks. You will notice that all the named enemies will drop masks as targeted loot, which speeds up getting your desired mask. Once you get the desired item, you can reset the selected targeted loot at any time by accessing the menu and targeting the next one, and so on.
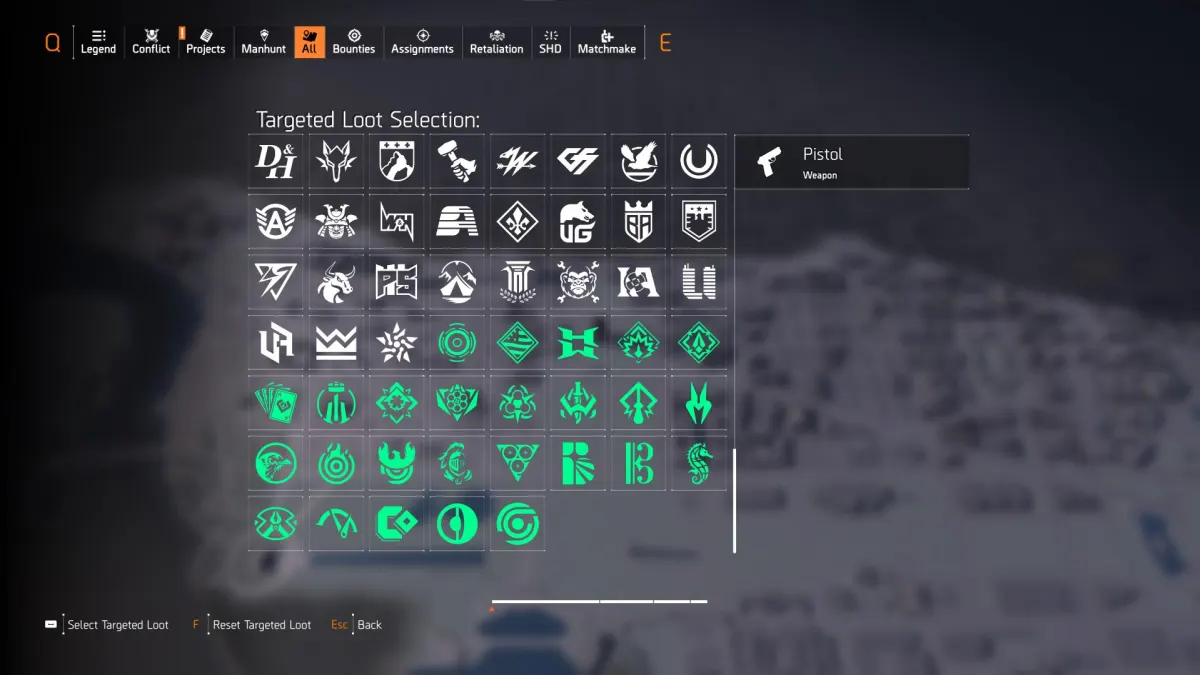
Exception: The only exceptions here are the raid-exclusive items that drop only in the raids (The Eagle Bearer, The Ravenous, and Regulus) and the crafted items locked behind exotic quests (such as Nemesis, Liberty, and Ridgeway's Pride). You can still drop the items that belong to the second category as targeted loot, but only after you would have already crafted them at the crafting station.
Apart from the two game modes, another targeted loot feature is available in the Open World. In this case, you complete Control Points and Missions on the highest difficulties possible. You can still maintain it as a farming process, but the downside is that you cannot change the loot type by yourself. Each zone or mission on the map has its own targeted loot that resets on a 24-hour cooldown.
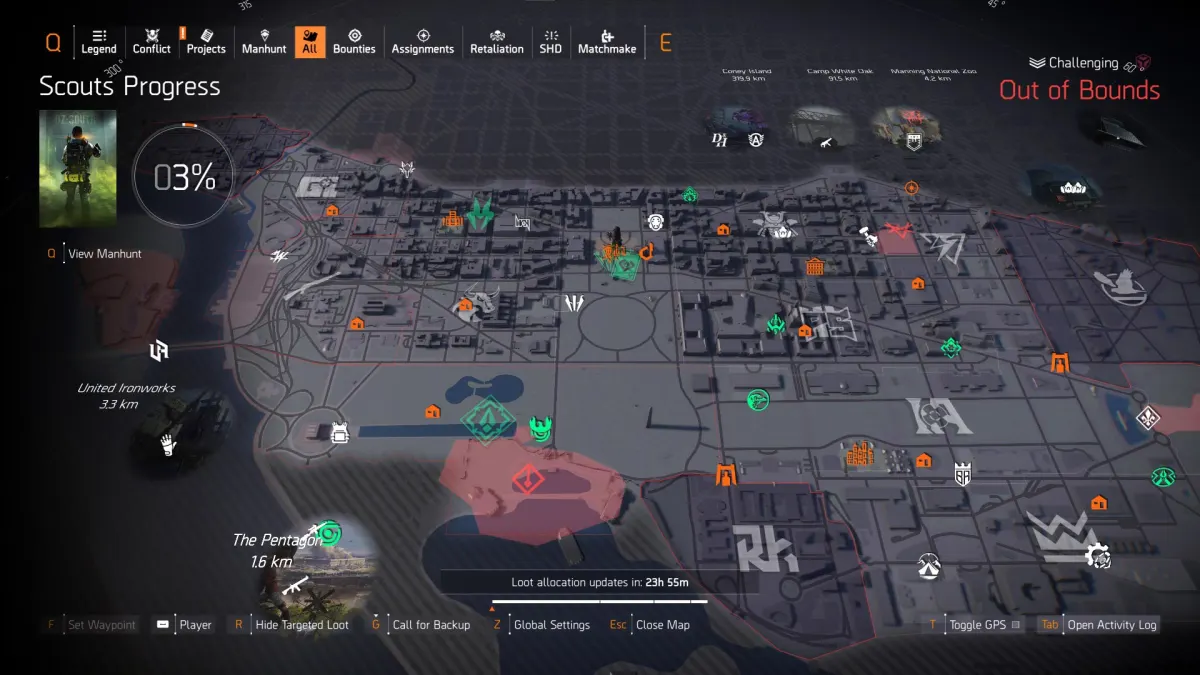
Regardless of what method you prefer the most, make a list of all the items required for your build and farm for them as targeted loot one by one until your loadout is complete. Now that you know the best ways to obtain the gear and create loadouts, let's move on and teach you how to choose the best build for your character in Division 2.
How to choose the best build for your character in Division 2
Generally, we all have a hard time figuring out the perfect build to match our playstyle. Given the game's complexity, with so many items and options to choose from, sometimes it's hard to figure out what the best build for you would look like and where to start. Let me help you with that.
Here's a little trick that works like a charm every single time. Try to answer the following questions when choosing the best build for your Division 2 character:
- What kind of combat type do you prefer? Close, medium, or ranged?
- What type of weapons have you enjoyed the most in other shooter games?
- What are your favorite weapons in Division 2?
- What about your playing sessions? Do you mostly play solo or as part of a group?
- What type of activities do you want to focus on? PvE or PvP?
- How much time are you willing to invest into your build?
- Are you looking for an easy-to-get build or something that uses rare items in the game?
To start with, figure out the answers to these questions, and you'll have a pretty good idea of what your build should look like and focus on it. Then, check out our recommendations for the best Div 2 builds in 2026 based on these criteria and see what fits the best for you.
I'm sure we have already covered a similar build to what you're looking for. You can either create replicas of the builds we posted on our website or take them as reference points, improvise, and create your own builds – your call!
How to min-max your builds in Division 2
In Division 2, min-maxing represents the act of creating a build around a specific concept or game mechanics, such as a particular playstyle (solo/group), combat style (close range, medium, or long-range), or a specific role in a group (DPS, tank, healer, etc.).
You will optimize and focus on a specific playstyle and everything that comes with it (the gear, weapons, stats, mods, etc.) while minimizing everything else. So the result of a min-maxed build is an extremely powerful character in one particular way but exceedingly weak in others.
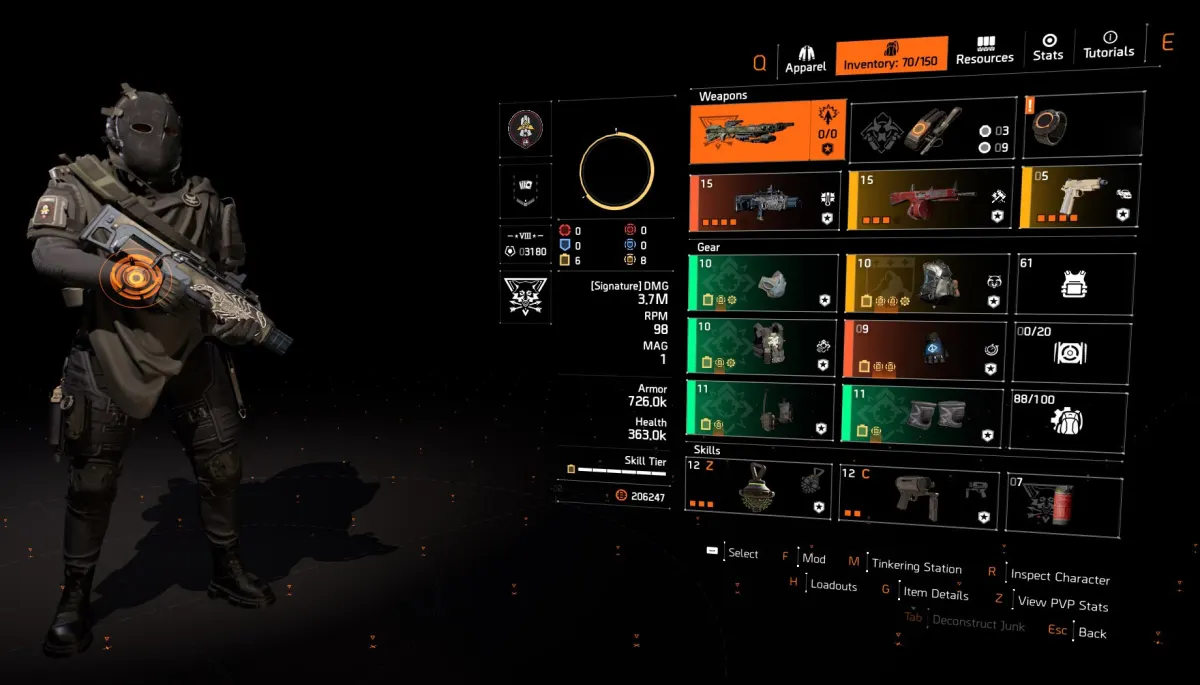
Example: Let's say you aim for the best healer build for your character, and your whole build revolves around healing and keeping your teammates alive. You must be fully equipped with healing items, such as a healer set (Future Initiative), healer attributes and unique gear mods that improve your healing skills (+% Repair Skills), and specific weapon talents such as "Reformation" (Headshots grant +30% skill repair for 15s).
So right now, this is your trade-off: you are highly efficient in healing your teammates, but you can't take or deal an insane amount of damage as a healer. To make an idea, this is what a healer build looks like:
Min-maxing is all about getting those perfect items for your build. You aim for the best-in-slot items for the build, with maximum stats, perfect mods, and talents. It's an easy guess that min-maxing equals grinding. So what's the fastest way to get that ideal loadout for your character?
Here are some tips on how to min-max your build in Division 2:
- If you run solo, use the Matchmaking system in The Summit and Countdown to get more players.
- Play efficiently on the highest difficulty possible. The higher the difficulty, the better the rewards.
- Always use Targeted Loot. It's the fastest way to get specific items for your builds.
- Play in a group with loot share, so you get extra chances of obtaining the missing items.
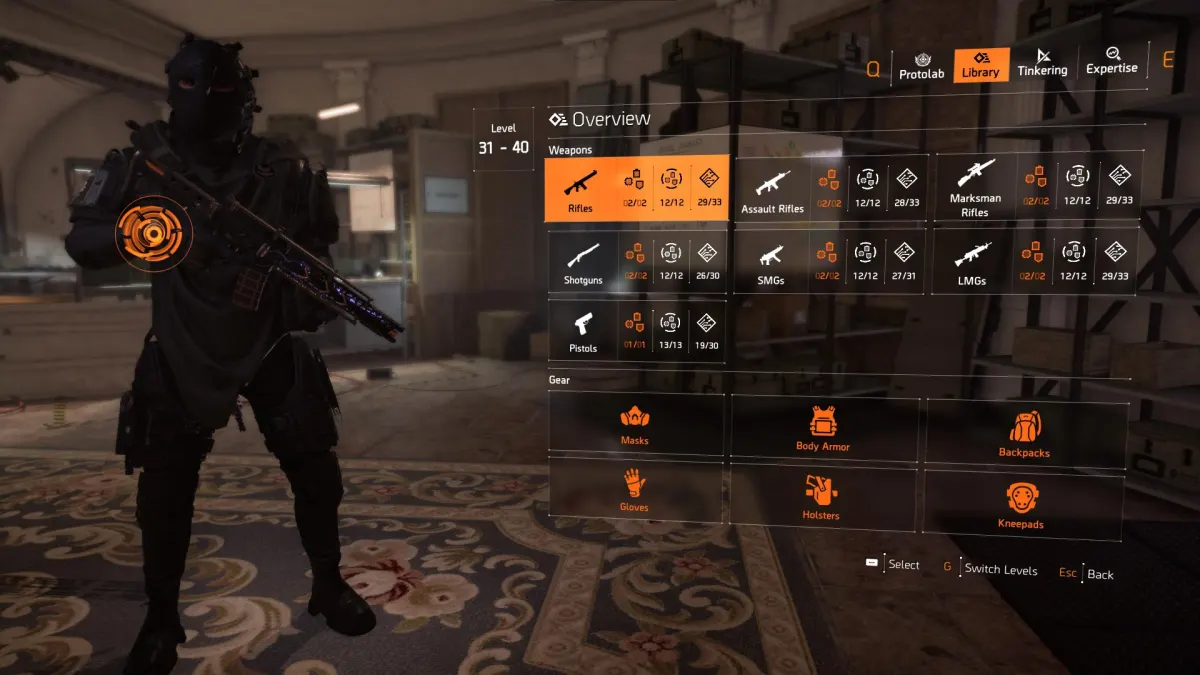
- Use the Tinkering Station (Recalibration and Optimization) to recalibrate and optimize your gear.
- Once you have recalibrated and optimized the items for the build, work on your Proficiency and Expertise Levels.
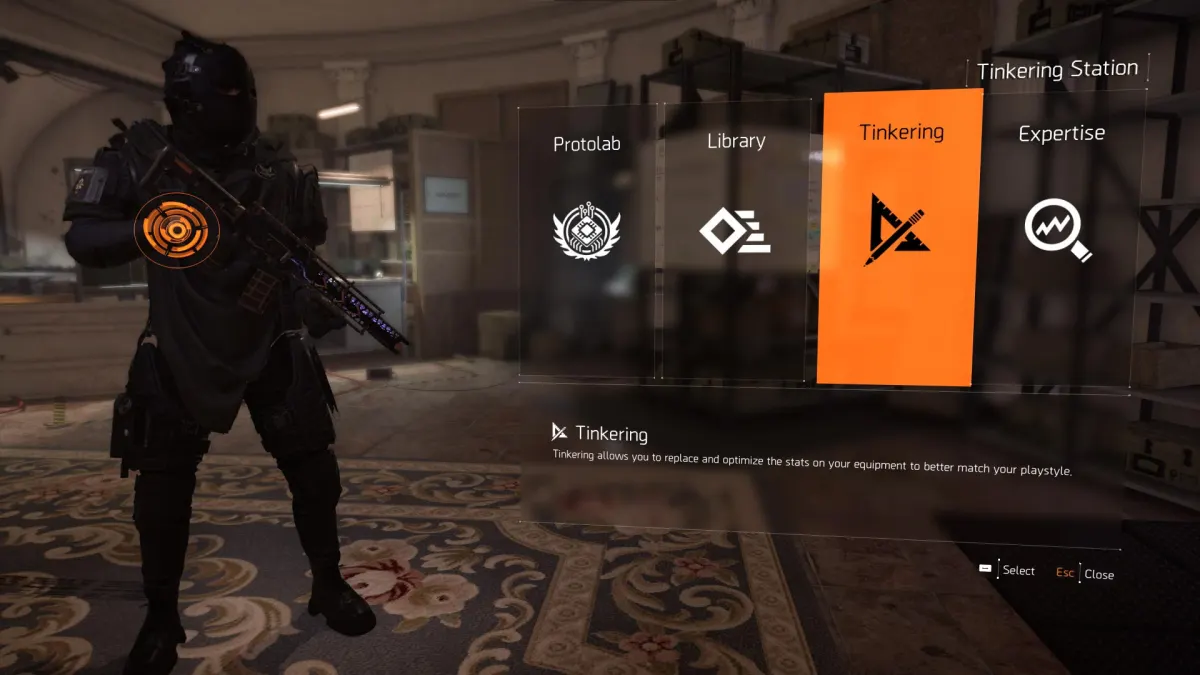
Nowadays, in 2026, you can open the Tinkering Station by pressing "M" by default anywhere in the game. You are no longer required to visit the Base of Operations or the other Settlements to upgrade your gear. Here is what the Tinkering Station looks like:
Once you obtain the perfect items for your builds, the whole min-maxing relies on the Tinkering Station. Here you will recalibrate, optimize, and increase the proficiency and expertise levels for your gear:
That's pretty much everything you should know about choosing the best build for your character and how to optimize it and make it top-level. Now it's time to see what type of builds you can opt for and what are the best Division 2 builds in 2026. Let's dive in deeper!
Types of builds in Division 2
The game's complexity has forced its community members and dedicated content creators to develop Division 2 builds to cover all the various playstyles, combat styles, or roles for all the PvE and PvP activities available in the game.
This has been an ongoing process since the game's launch, and the Internet is now flooded with variants of the same type of builds that share the same principles and serve the same roles but come with minor adjustments. So to make it a bit easier for you, let's see the main build categories you get to choose from.
The main types of (meta) builds in Division 2 in 2026 are:
- PvE Builds: these builds are used exclusively in PvE activities (Summit, Countdown, Missions, etc.)
- PvP Builds: these are the best builds to use for PvP activities such as Dark Zone and Conflict
- Solo Builds: extremely powerful builds for solo players that don't require a team to play with
- Group Builds: these builds focus on covering various roles in a party for both PvE or PvP fights
- Raid Builds: special builds to use in raids to cover multiple raid roles
- DPS Builds: these are the damage-dealing builds, as they provide the highest damage in the game
- Support Builds: these builds cover support roles in parties, such as healer, tank, crowd control, etc
Moving on, in the following sections of the guide, we'll discuss all of these build types in particular and present you with the best builds that stand out in each of these categories. Stay tuned!
The best Division 2 PvE Builds (for DPS) in 2026
In this category, you can find the most powerful loadouts to use as a damage dealer (DPS) for any PvE activity in Division 2, such as Escalations, Retaliations, The Summit, Countdown, Heroic Control Points, Missions, or Legendary Strongholds. These builds revolve around various weapon classes and different playstyles, and they provide the highest damage output in the game.
The best DPS builds to use for PvE in Division 2 in 2026 are:
- Striker Build with Overdogs and Equalizer
- Red Striker Build with Memento
- Blue Striker Build with Memento
- Tipping Scales Builds
- Heartbreaker PvE Build
- Umbra PvE Build
- Skill Builds
- Negotiator's Pestilence Build
- Hunter's Fury SMG Build
- One-Shot Sniper Build
- One-Shot Pistol Build
- Armor Regen Build
1. Striker Build with Overdogs and Equalizer
| Build Component | Description |
| Weapon Slot #1 | St. Elmo's Engine |
| Weapon Slot #2 | GR9 or MK46 with Damage to Armor and Frenzy |
| Specialization | Gunner |
| Mask | Red Core Striker with Crit Chance or Crit Damage |
| Backpack | Red Core Striker with Crit Chance or Crit Damage |
| Chest | Red Core Equalizer with Crit Chance & Crit Damage |
| Gloves | Overdogs |
| Holster | Red Core Striker with Crit Chance or Crit Damage |
| Kneepads | Red Core Striker with Crit Chance or Crit Damage |
| Gear Mods | Crit Chance | Crit Damage |
| Skills | Crusader Ballistic Shield | Decoy | Pulse | Reviver Hive |
| Pro Tip | Aim for 60% Crit Chance, then use Crit Damage rolls and mods |
Build showcase:
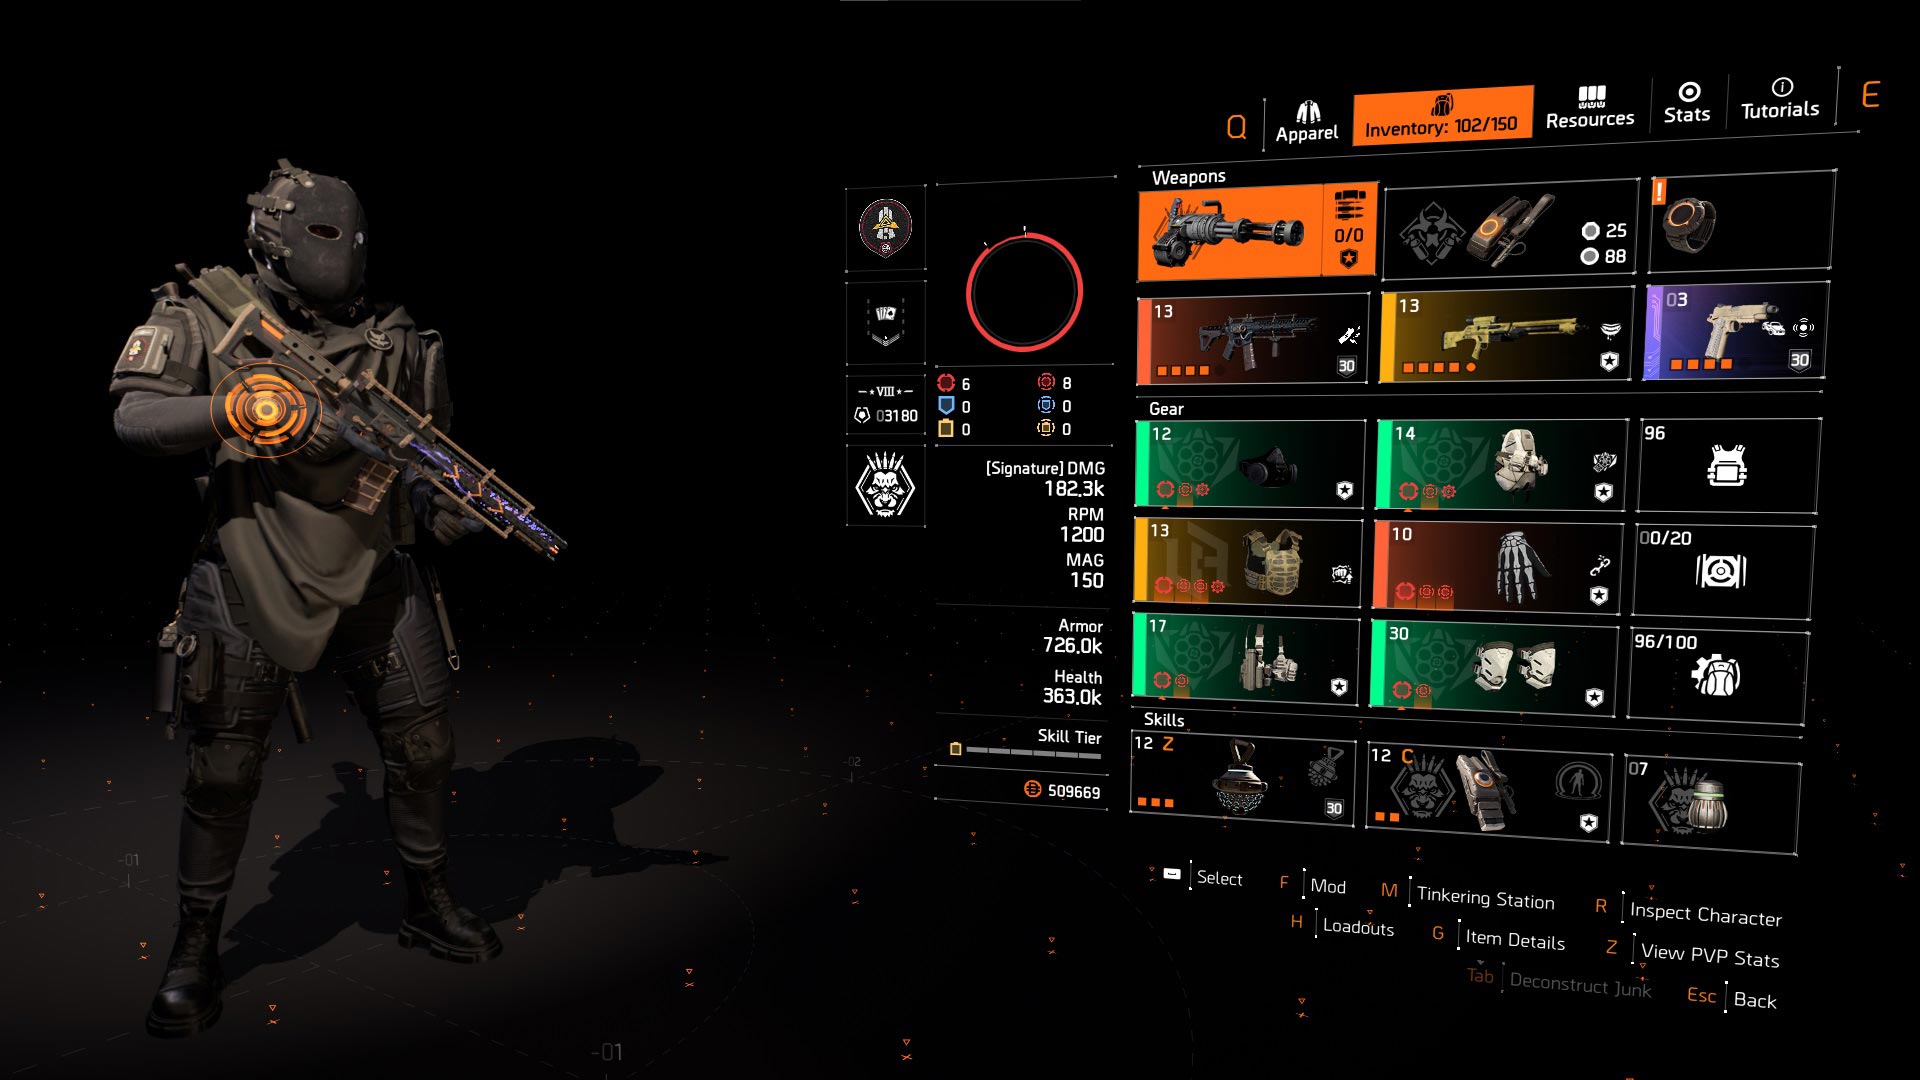
Build store link: Striker Build with Overdogs and Equalizer for Sale (variant 1).
2. Red Striker Build with Memento
| Build Component | Description |
| Weapon Slot #1 | St. Elmo's Engine |
| Weapon Slot #2 | GR9 or MK46 with Damage to Armor and Frenzy |
| Specialization | Gunner |
| Mask | Red Core Striker with Crit Chance or Crit Damage |
| Backpack | Memento |
| Chest | Red Core Equalizer with Crit Chance & Crit Damage |
| Gloves | Red Core Striker with Crit Chance or Crit Damage |
| Holster | Red Core Striker with Crit Chance or Crit Damage |
| Kneepads | Red Core Striker with Crit Chance or Crit Damage |
| Gear Mods | Crit Chance | Crit Damage |
| Skills | Crusader Ballistic Shield | Decoy | Pulse | Reviver Hive |
| Pro Tip | Aim for 60% Crit Chance, then use Crit Damage rolls and mods |
Build showcase:
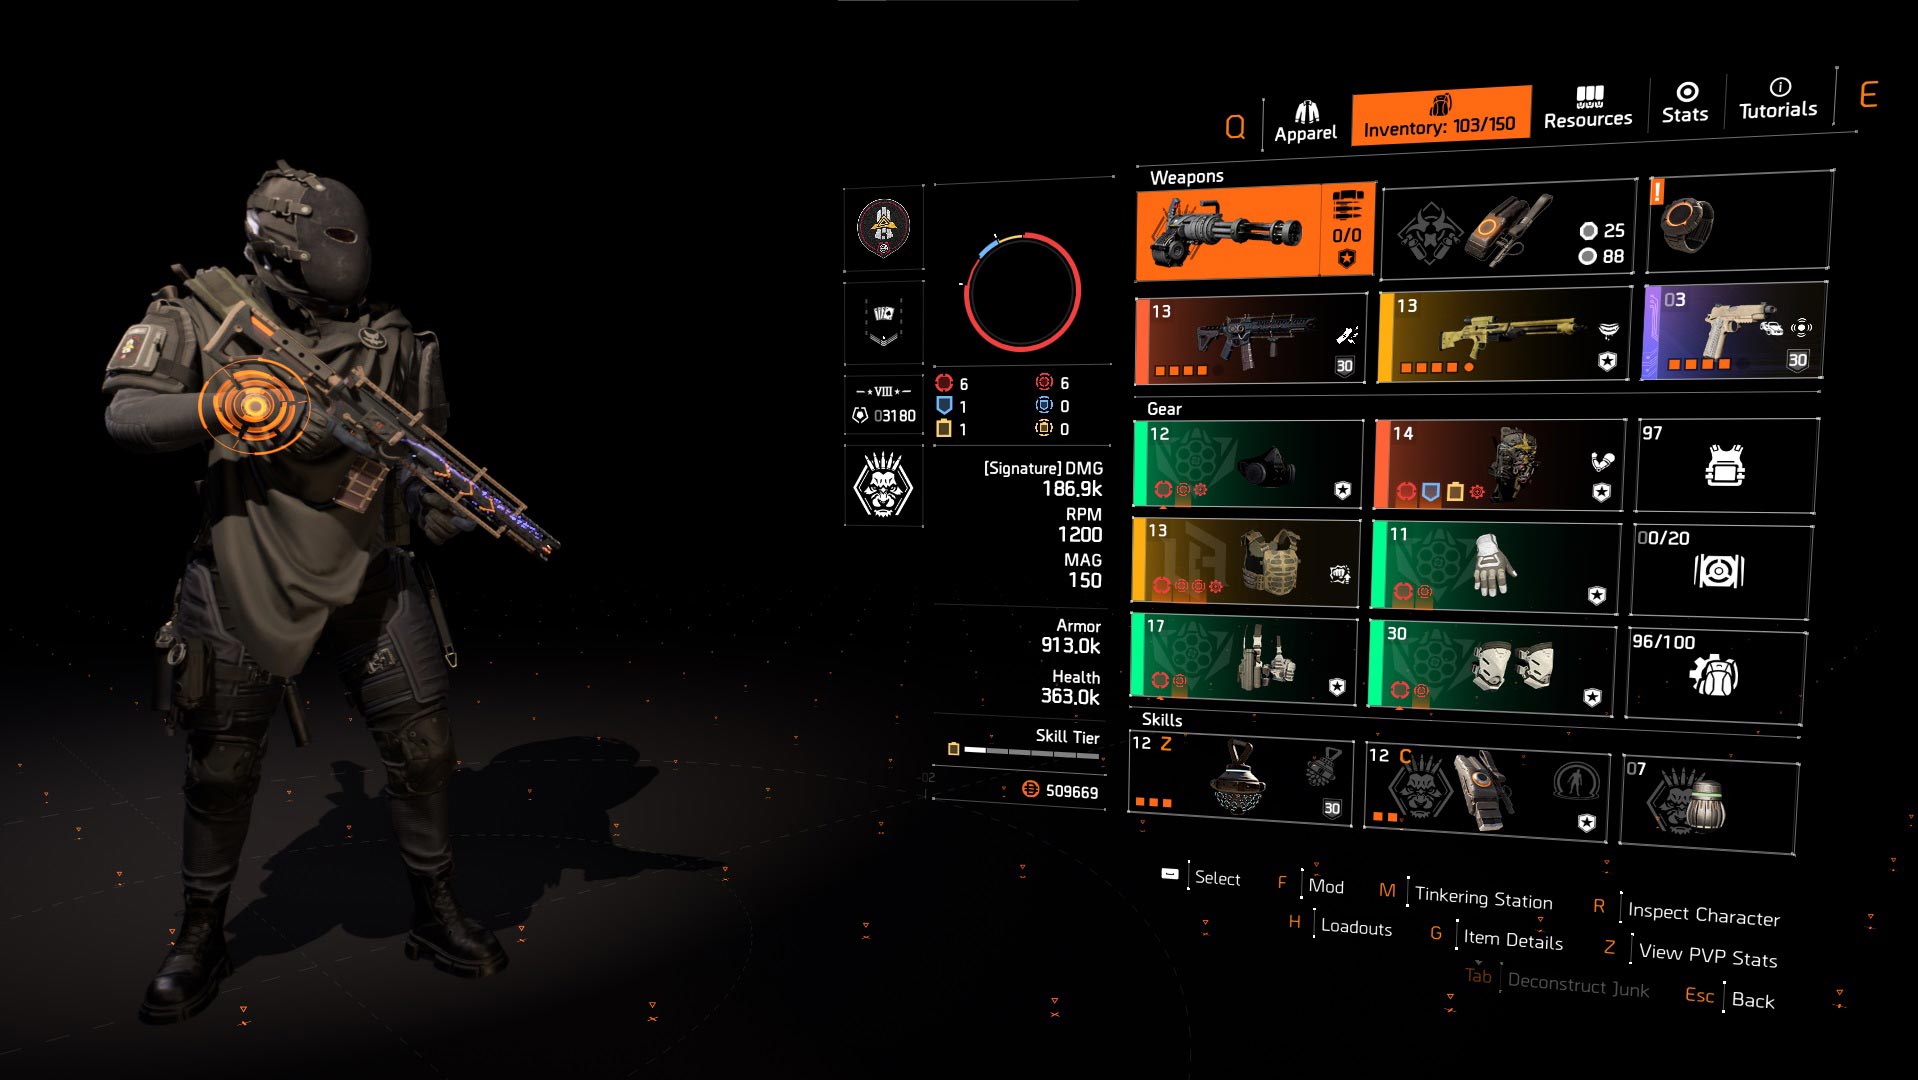
Build store link: Red Striker Build with Memento for Sale (variant 2).
3. Blue Striker Build with Memento
| Build Component | Description |
| Weapon Slot #1 | St. Elmo's Engine |
| Weapon Slot #2 | GR9 or MK46 with Damage to Armor and Frenzy |
| Specialization | Gunner |
| Mask | Blue Core Striker with Crit Chance or Crit Damage |
| Backpack | Memento |
| Chest | Blue Core Palisade with Crit Chance, Crit Damage & Obliterate |
| Gloves | Blue Core Striker with Crit Chance or Crit Damage |
| Holster | Blue Core Striker with Crit Chance or Crit Damage |
| Kneepads | Blue Core Striker with Crit Chance or Crit Damage |
| Gear Mods | Crit Chance | Crit Damage |
| Skills | Crusader Ballistic Shield | Decoy | Pulse | Reviver Hive |
| Pro Tip | Aim for 60% Crit Chance, then use Crit Damage rolls and mods |
Build showcase:
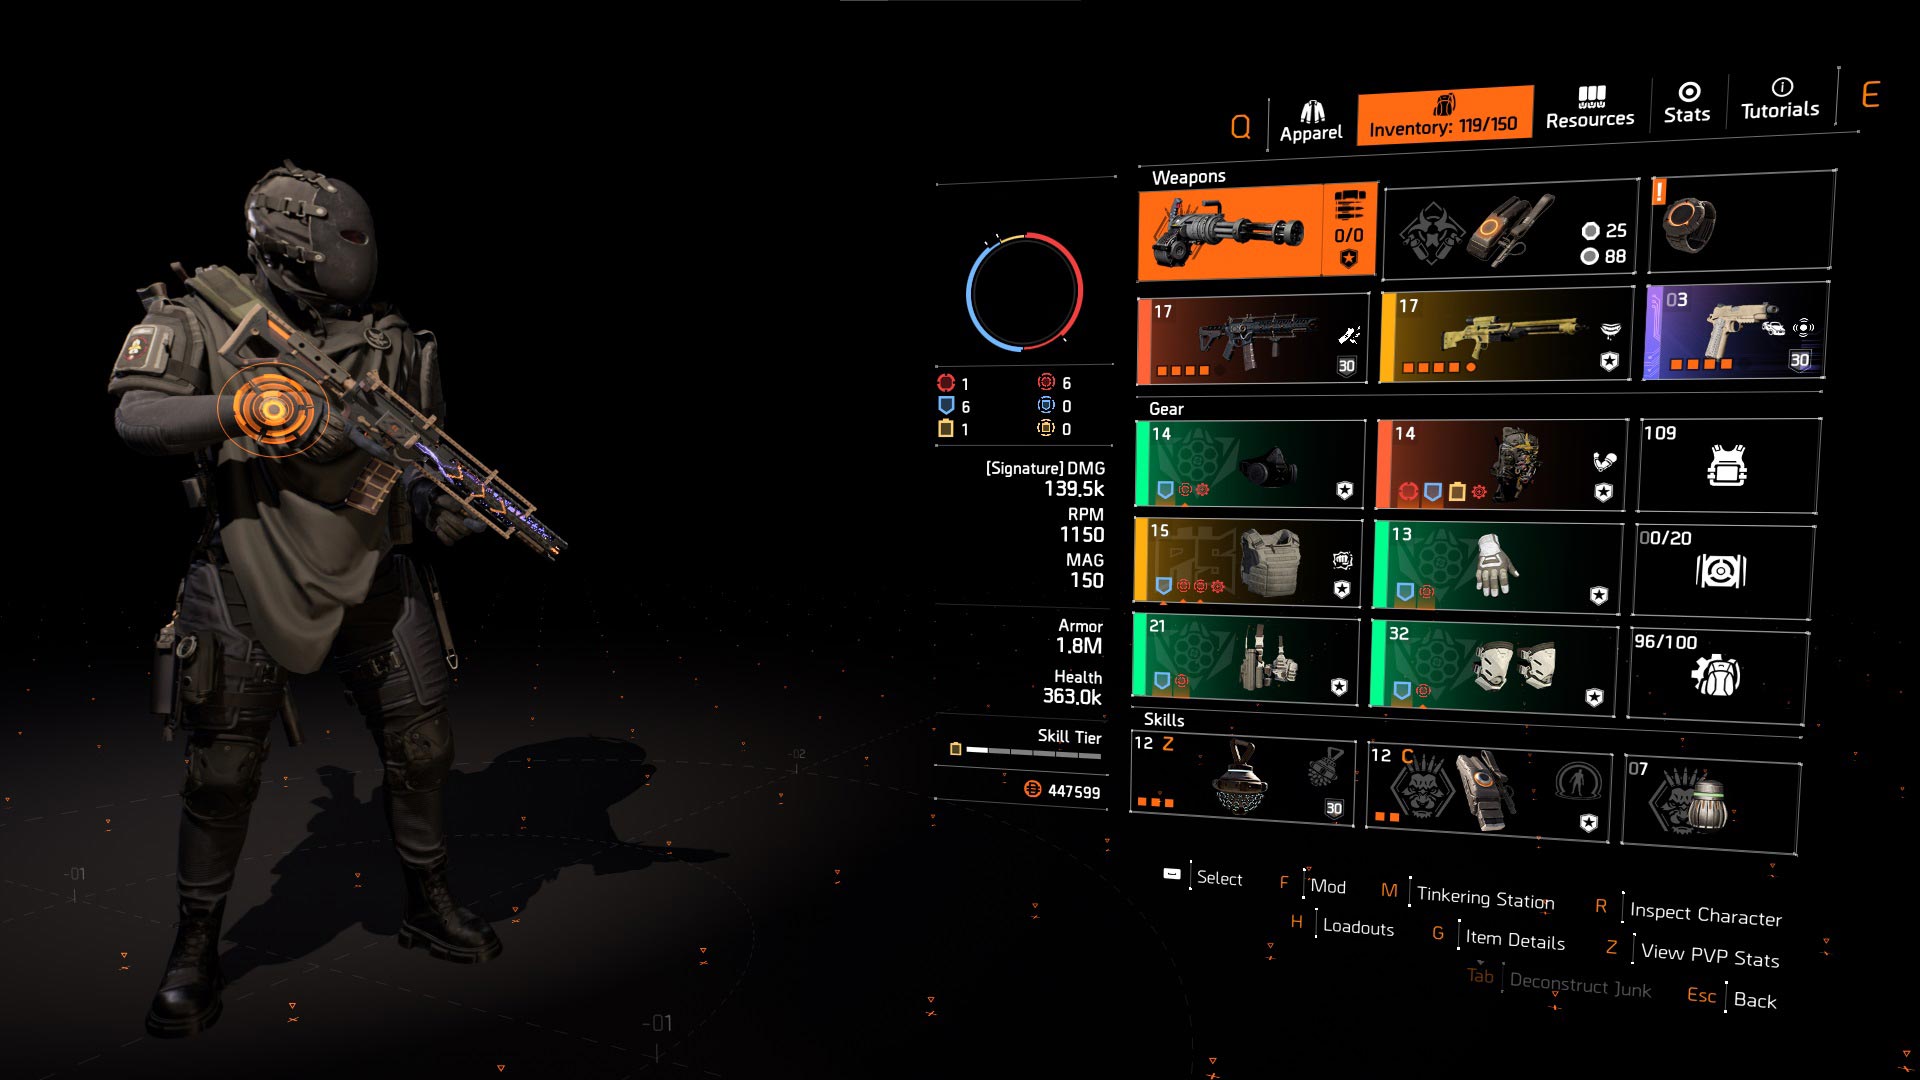
Build store link: Blue Striker Build with Memento for Sale (variant 3).
4. Tipping Scales Builds
These builds use the recently introduced Tipping Scales gear set and are arguably some of the best builds in the ongoing meta, providing incredible damage output and survivability!
Variant #1: Tipping Scales LMG Build with Tinkerer
| Build Component | Description |
| Weapon Slot #1 | GR9 or MK46 with Damage to Armor and Frenzy |
| Weapon Slot #2 | GR9 or MK46 with Damage to Armor and Fast Hands |
| Specialization | Gunner |
| Mask | Tinkerer |
| Backpack | Red Core Tipping Scales with Crit Chance or Crit Damage |
| Chest | Red Core Tipping Scales with Crit Chance or Crit Damage |
| Gloves | Red Core Contractor's Gloves with Crit Chance or Crit Damage |
| Holster | Red Core Tipping Scales with Crit Chance or Crit Damage |
| Kneepads | Red Core Tipping Scales with Crit Chance or Crit Damage |
| Gear Mods | Crit Chance | Crit Damage |
| Skills | Defender Drone | Decoy | Pulse | Reviver Hive |
| Pro Tip | Aim for 60% Crit Chance, then use Crit Damage rolls and mods |
Build showcase:

Build store link: Tipping Scales LMG Build with Tinkerer for Sale (variant 1).
Variant #2: Tipping Scales Build with Pestilence
| Build Component | Description |
| Weapon Slot #1 | Pestilence with Damage to Armor |
| Weapon Slot #2 | GR9 or MK46 with Damage to Armor and Frenzy or Fast Hands |
| Specialization | Gunner |
| Mask | Red Core Tipping Scales with Crit Chance or Crit Damage |
| Backpack | Red Core Tipping Scales with Crit Chance or Crit Damage |
| Chest | Red Core Tipping Scales with Crit Chance or Crit Damage |
| Gloves | Overdogs |
| Holster | Red Core Salvo with Crit Chance or Crit Damage |
| Kneepads | Red Core Tipping Scales with Crit Chance or Crit Damage |
| Gear Mods | Crit Chance | Crit Damage |
| Skills | Defender Drone | Decoy | Reviver Hive | Banshee Pulse |
| Pro Tip | Aim for 60% Crit Chance, then use Crit Damage rolls and mods |
Build showcase:
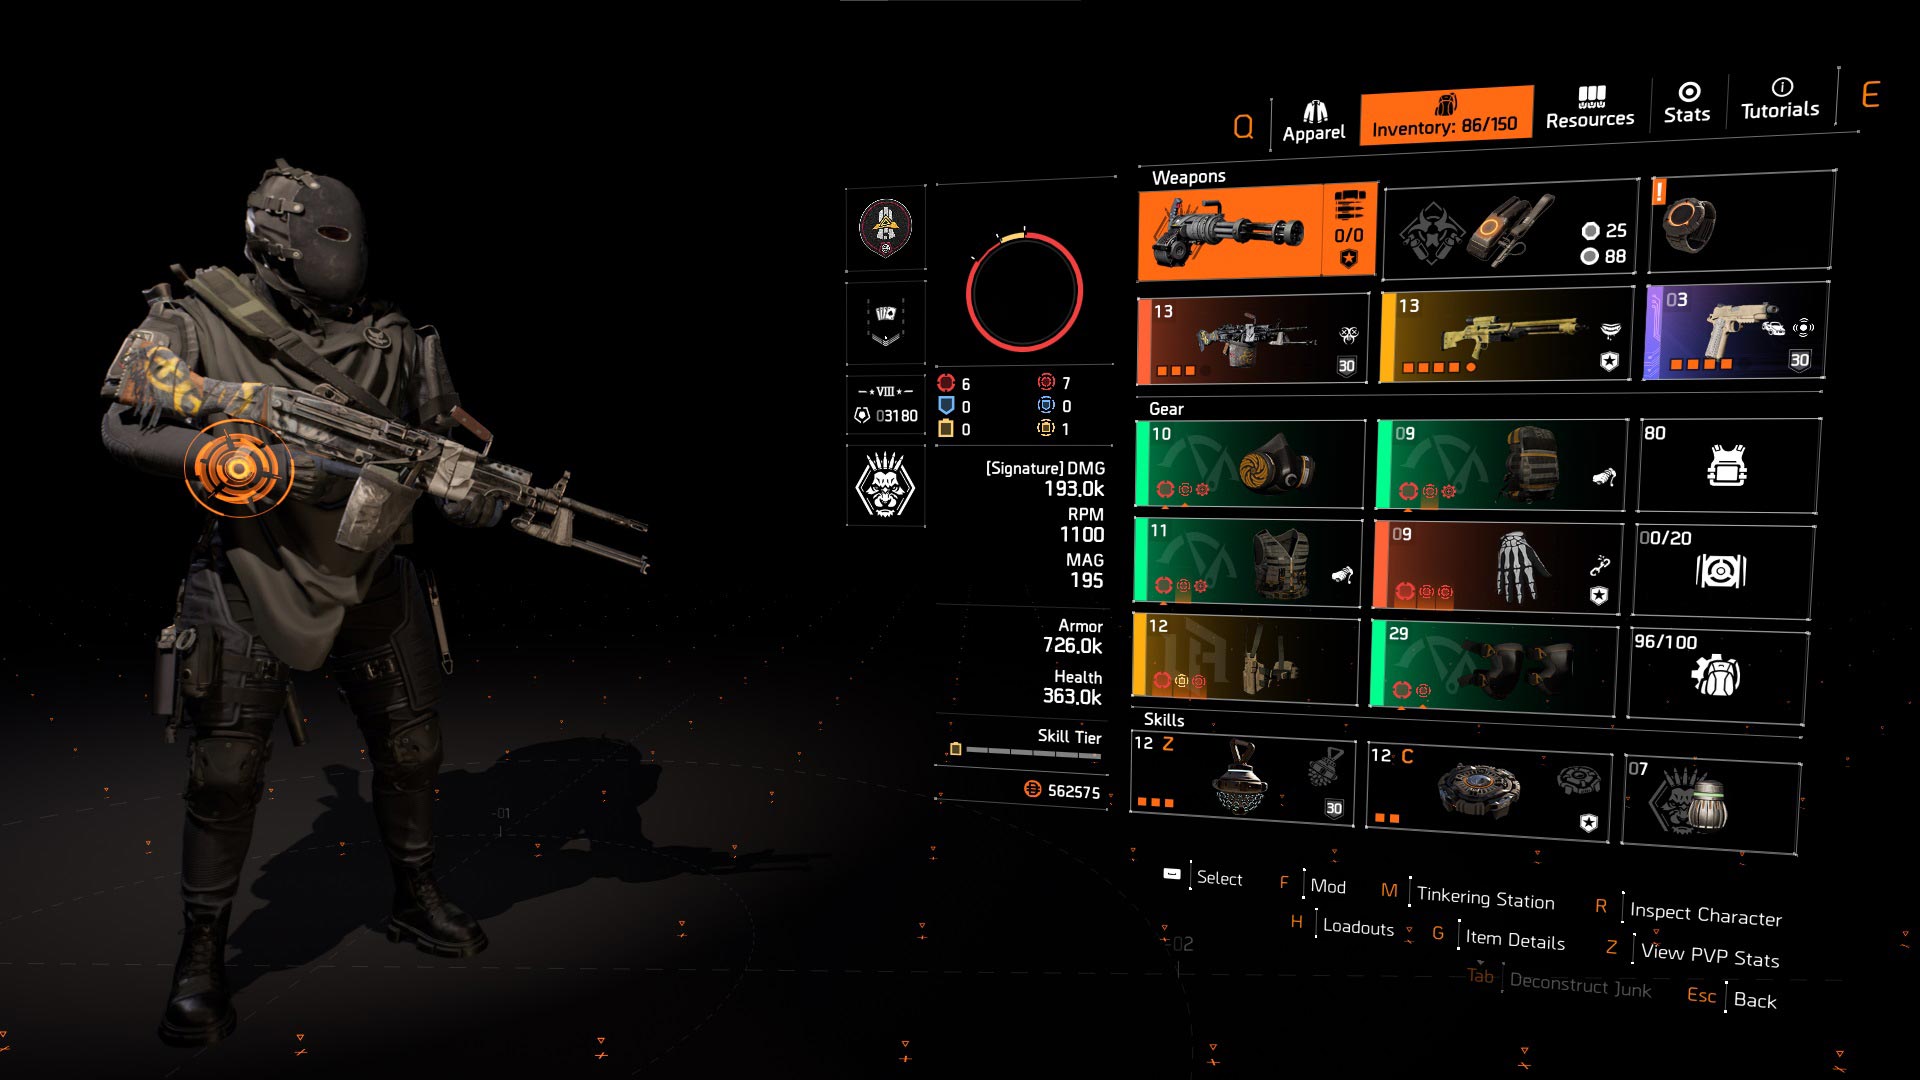
Build store link: Tipping Scales LMG Build with Pestilence for Sale (variant 2).
Variant #3: Tipping Scales Build with Caduceus
| Build Component | Description |
| Weapon Slot #1 | Caduceus |
| Weapon Slot #2 | GR9 or MK46 with Damage to Armor and Frenzy |
| Specialization | Gunner |
| Mask | Red Core Tipping Scales with Crit Chance or Crit Damage |
| Backpack | Red Core Tipping Scales with Crit Chance or Crit Damage |
| Chest | Red Core Equalizer with Crit Chance and Crit Damage |
| Gloves | Overdogs |
| Holster | Red Core Tipping Scales with Crit Chance or Crit Damage |
| Kneepads | Red Core Tipping Scales with Crit Chance or Crit Damage |
| Gear Mods | Crit Chance | Crit Damage |
| Skills | Decoy | Reviver Hive | Banshee Pulse |
| Pro Tip | Aim for 60% Crit Chance, then use Crit Damage rolls and mods |
Build showcase:
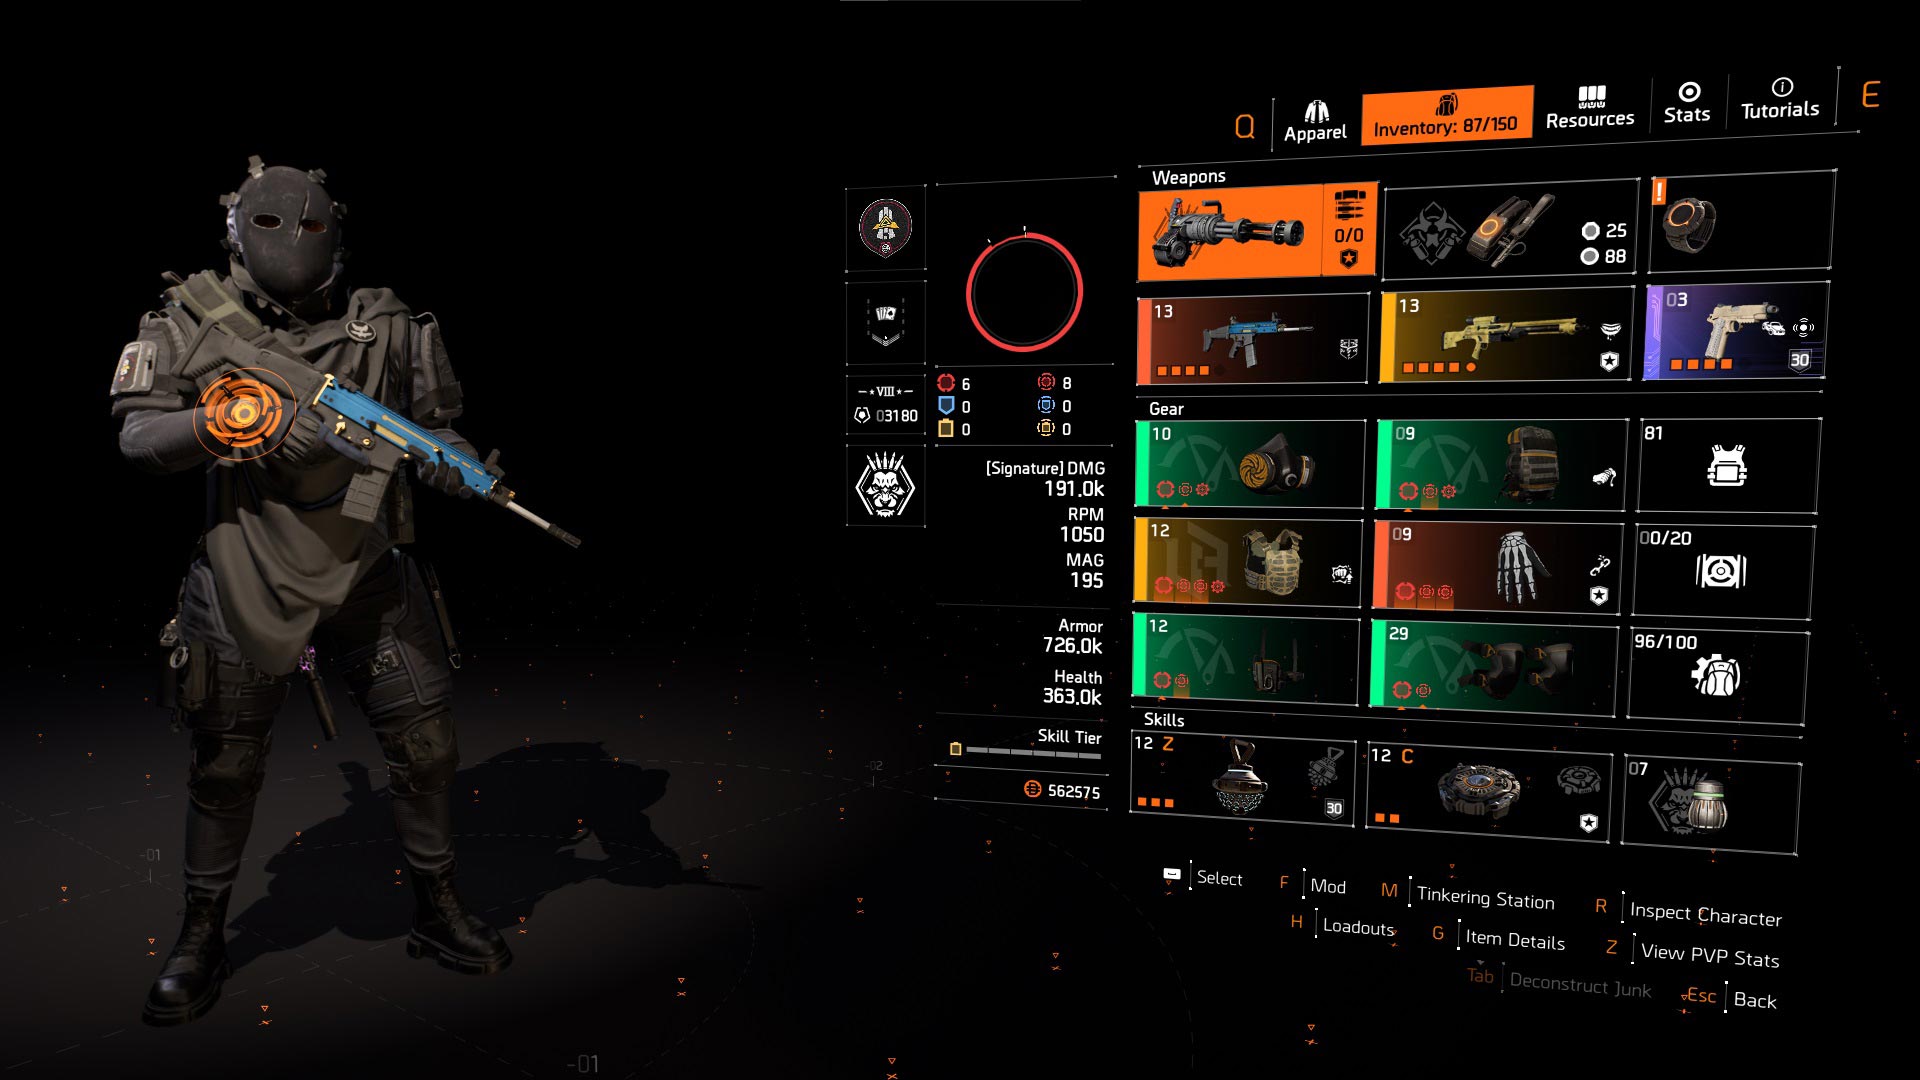
Build store link: Tipping Scales Build with Caduceus for Sale (variant 3).
5. Heartbreaker PvE Build
| Build Component | Description |
| Weapon Slot #1 | Lexington, Carbine 7, or Police M4 with Flatline |
| Weapon Slot #2 | ACS-12 with Flatline |
| Specialization | Technician (for the Linked Laser Pointer) |
| Mask | Blue Core Heartbreaker with Crit Chance or Crit Damage |
| Backpack | Blue Core Heartbreaker with Crit Chance or Crit Damage |
| Chest | Blue Core Heartbreaker with Crit Chance or Crit Damage |
| Gloves | Overdogs |
| Holster | Blue Core Heartbreaker with Crit Chance or Crit Damage |
| Kneepads | Red Core Fox's Prayer with Crit Chance or Crit Damage |
| Gear Mods | Crit Chance | Crit Damage |
| Skills | Crusader Ballistic Shield | Decoy | Pulse | Reviver Hive |
| Pro Tip | Aim for at least 55% Crit Chance, then use Crit Damage rolls and mods |
Build showcase:
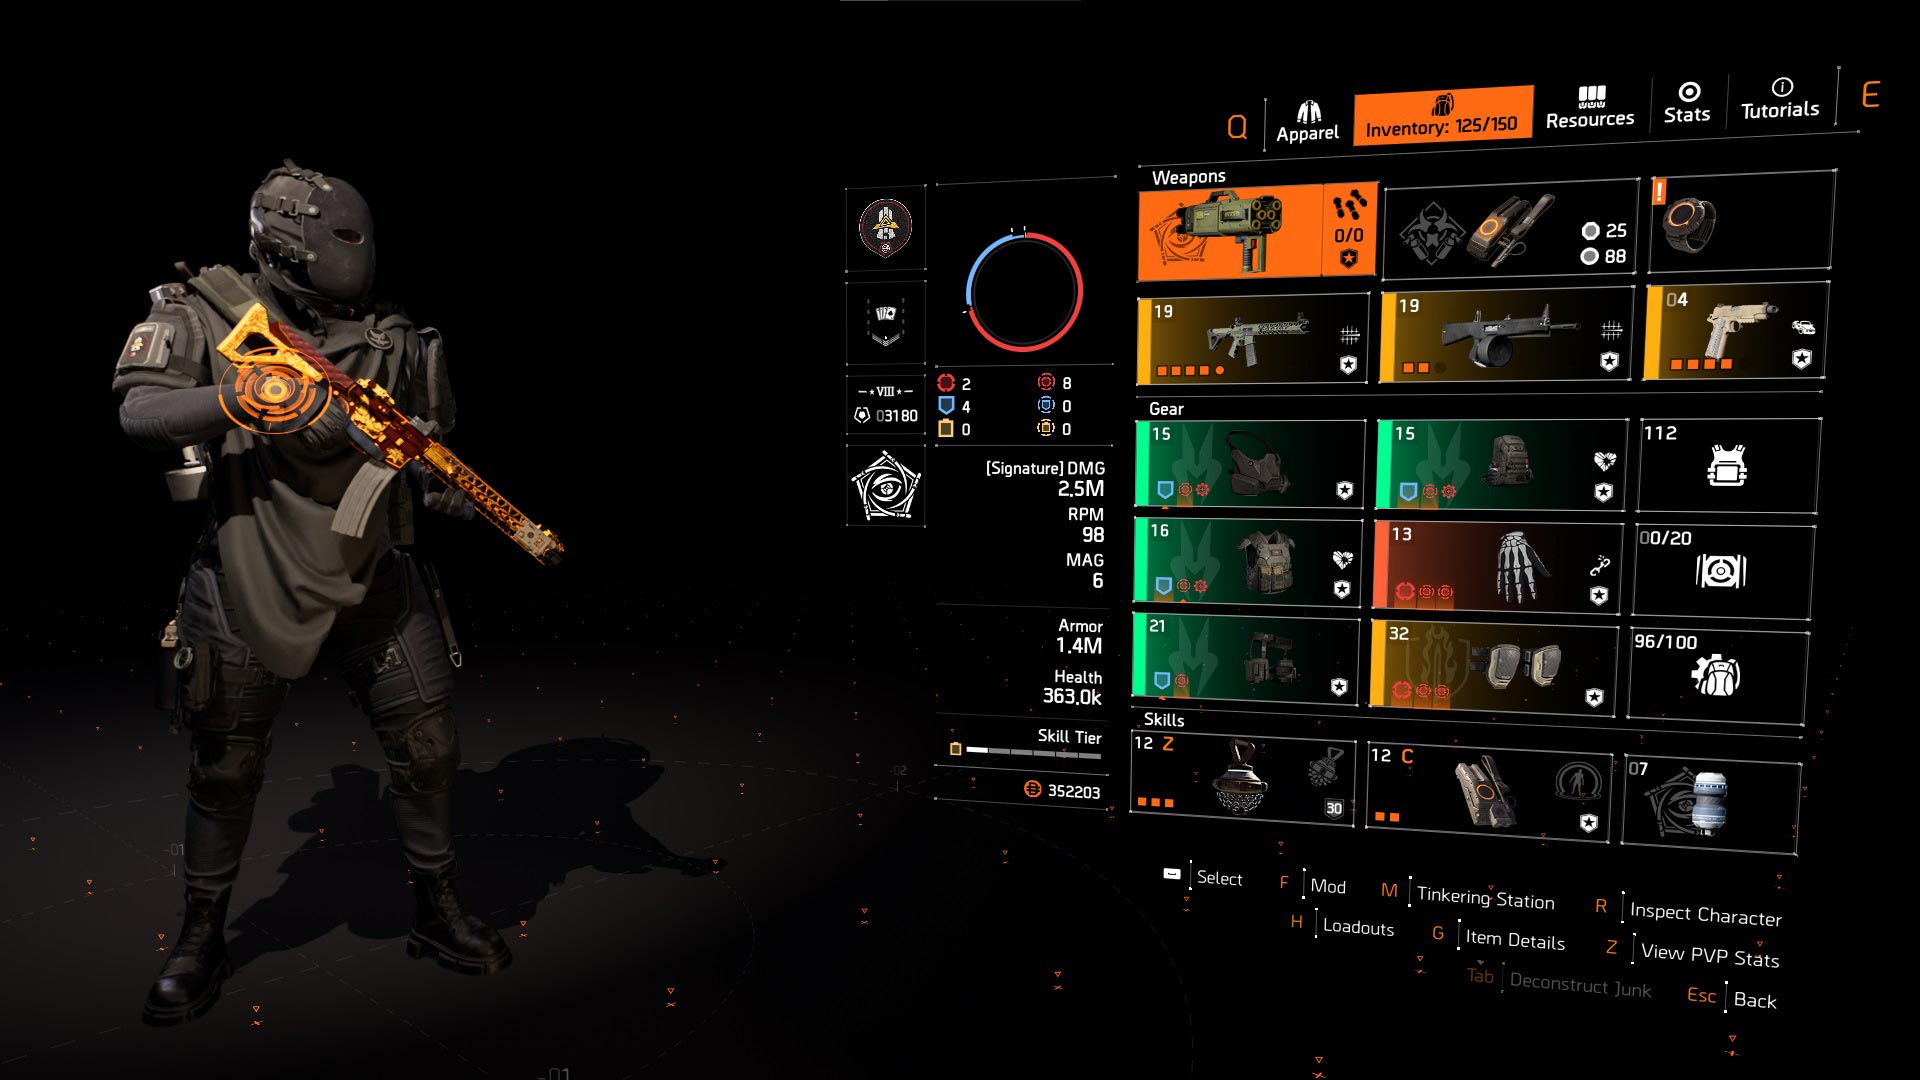
Build store link: Heartbreaker PvE Build for Sale (variant 6).
6. Umbra PvE Build
| Build Component | Description |
| Weapon Slot #1 | St. Elmo's Engine |
| Weapon Slot #2 | GR9 or MK46 with Damage to Armor and Frenzy |
| Specialization | Gunner |
| Mask | Red Core Umbra with Crit Chance or Crit Damage |
| Backpack | Red Core Unit Alloys with Crit Chance, Crit Damage & Vigilance |
| Chest | Blue Core Umbra with Crit Chance or Crit Damage |
| Gloves | Blue Core Umbra with Crit Chance or Crit Damage |
| Holster | Red Core Salvo with Crit Chance or Crit Damage |
| Kneepads | Blue Core Umbra with Crit Chance or Crit Damage |
| Gear Mods | Crit Chance | Crit Damage |
| Skills | Crusader Ballistic Shield | Decoy | Pulse | Reviver Hive |
| Pro Tip | Aim for at least 55% Crit Chance, then use Crit Damage rolls and mods |
Build showcase:
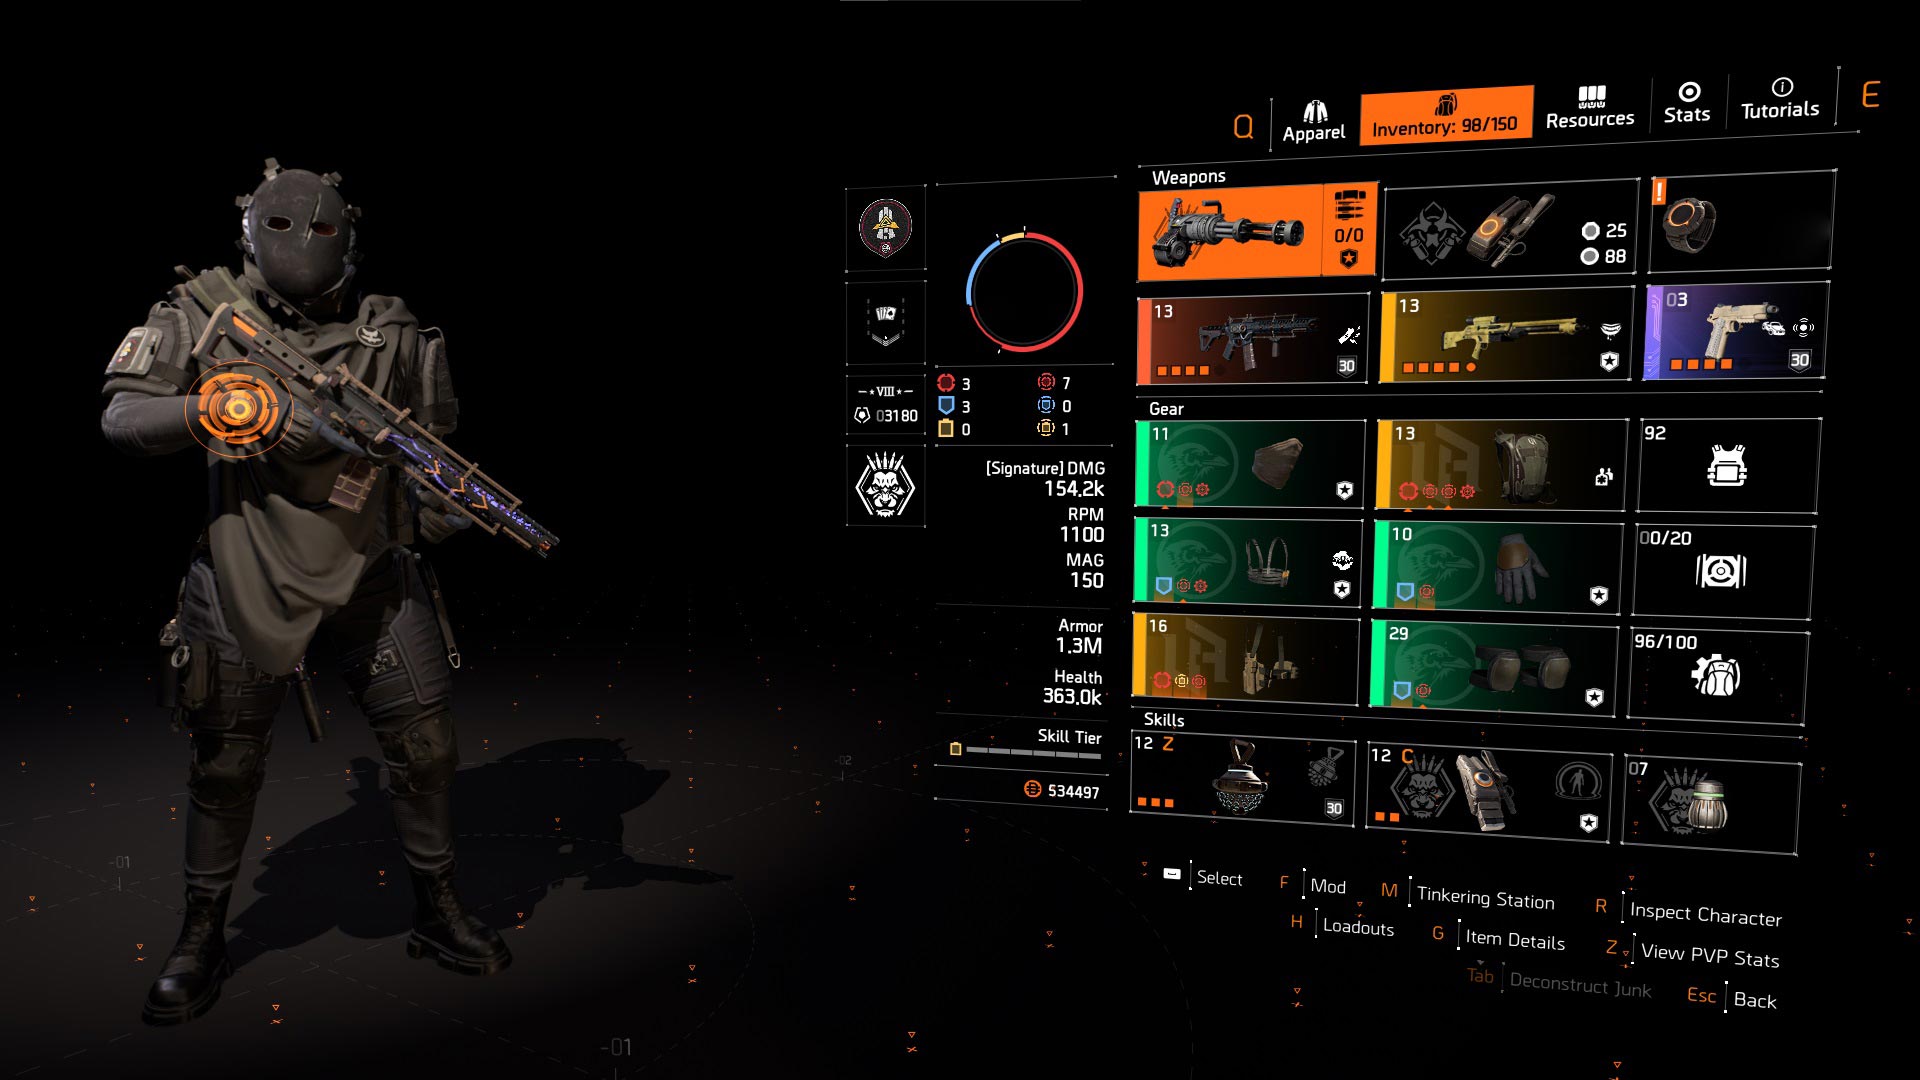
Build store link: Umbra PvE Build for Sale (variant 7).
7. Skill Builds
Variant #1: Refactor Force Multiplier Build
| Build Component | Description |
| Weapon Slot #1 | Capacitor |
| Weapon Slot #2 | Rifle or SMG with In Sync |
| Specialization | Technician |
| Mask | Red Core Refactor with Skill Damage |
| Backpack | Yellow Core Force Multiplier with Skill Damage & Skill Haste |
| Chest | Yellow Core Wyvern/Hana-U with Skill Damage & Skill Haste & Glass Cannon or Kinetic Momentum |
| Gloves | Yellow Core Refactor with Skill Damage |
| Holster | Yellow Core Refactor with Skill Damage |
| Kneepads | Yellow Core Refactor with Skill Damage |
| Gear Mods | Skill Haste |
| Skills | Striker Drone | Assault Turret |
| Pro Tip | By using the Technician specialization, we can use a red core for extra weapon damage while still having 6x skill tiers. Can be used on any item. |
Build showcase:
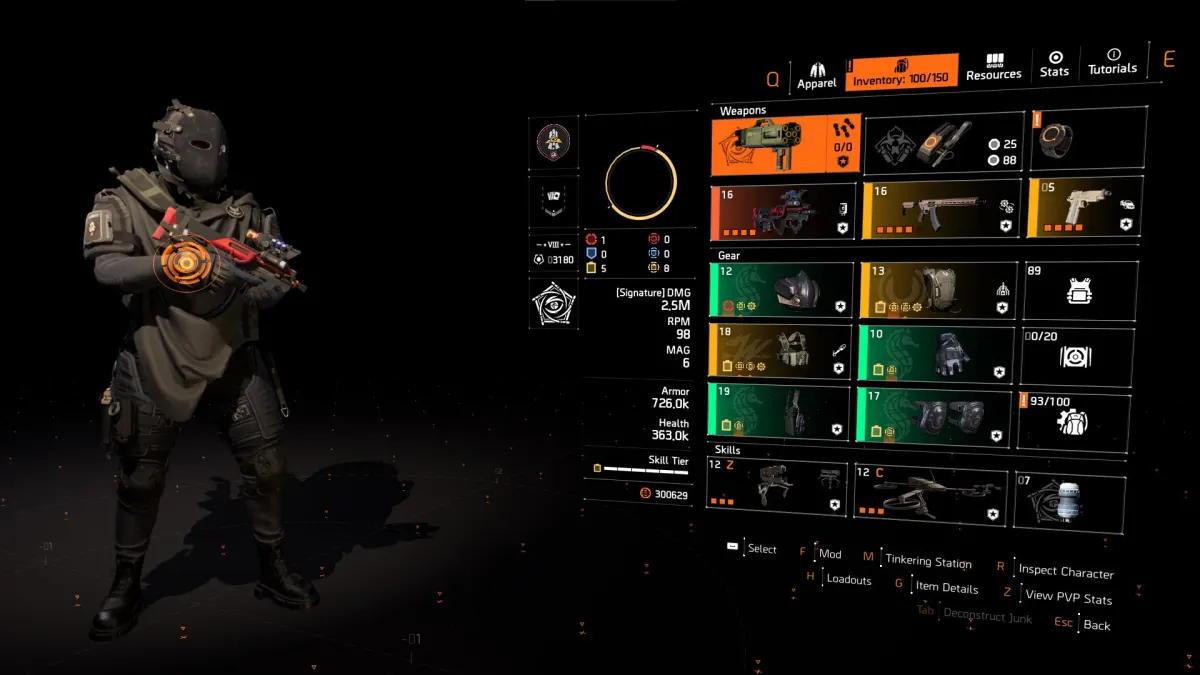
Build store link: Refactor Force Multiplier Build for Sale (variant 1).
Variant #2: Refactor Tech Support Build
| Build Component | Description |
| Weapon Slot #1 | Capacitor |
| Weapon Slot #2 | Rifle or SMG with In Sync |
| Specialization | Technician |
| Mask | Red Core Refactor with Skill Damage |
| Backpack | Yellow Core Hana-U with Skill Damage, Skill Haste & Tech Support |
| Chest | Yellow Core Wyvern/Hana-U with Skill Damage, Skill Haste & Glass Cannon or Kinetic Momentum |
| Gloves | Yellow Core Refactor with Skill Damage |
| Holster | Yellow Core Refactor with Skill Damage |
| Kneepads | Yellow Core Refactor with Skill Damage |
| Gear Mods | Skill Haste |
| Skills | Striker Drone | Assault Turret |
| Pro Tip | By using the Technician specialization, we can use a red core for extra weapon damage while still having 6x skill tiers. Can be used on any item. |
Build showcase:
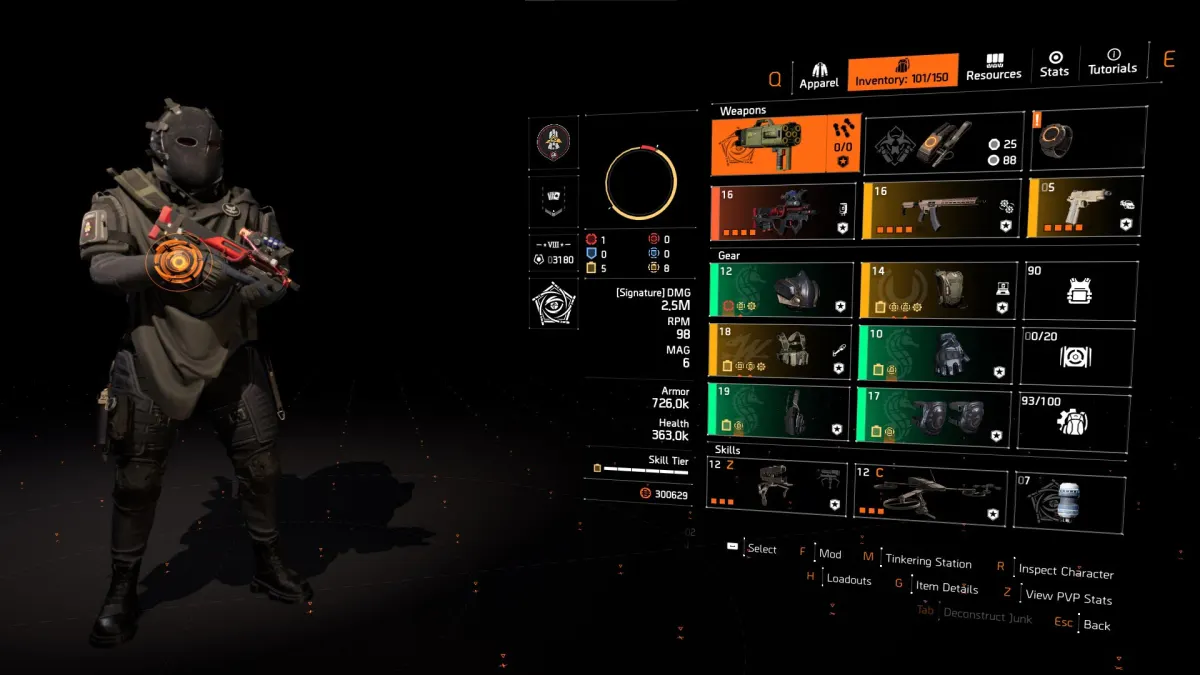
Build store link: Refactor Tech Support Build for Sale (variant 2).
Variant #3: Refactor Ninja Build
| Build Component | Description |
| Weapon Slot #1 | Capacitor |
| Weapon Slot #2 | Rifle or SMG with In Sync |
| Specialization | Technician |
| Mask | Red Core Refactor with Skill Damage |
| Backpack | Ninja Backpack |
| Chest | Yellow Core Refactor with Skill Damage |
| Gloves | Yellow Core Empress with Skill Damage & Skill Haste |
| Holster | Yellow Core Refactor with Skill Damage |
| Kneepads | Yellow Core Empress with Skill Damage & Skill Haste |
| Gear Mods | Skill Haste |
| Skills | Striker Drone | Assault Turret |
| Pro Tip | By using the Technician specialization, we can use a red core for extra weapon damage while still having 6x skill tiers. Can be used on any item. |
Build showcase:
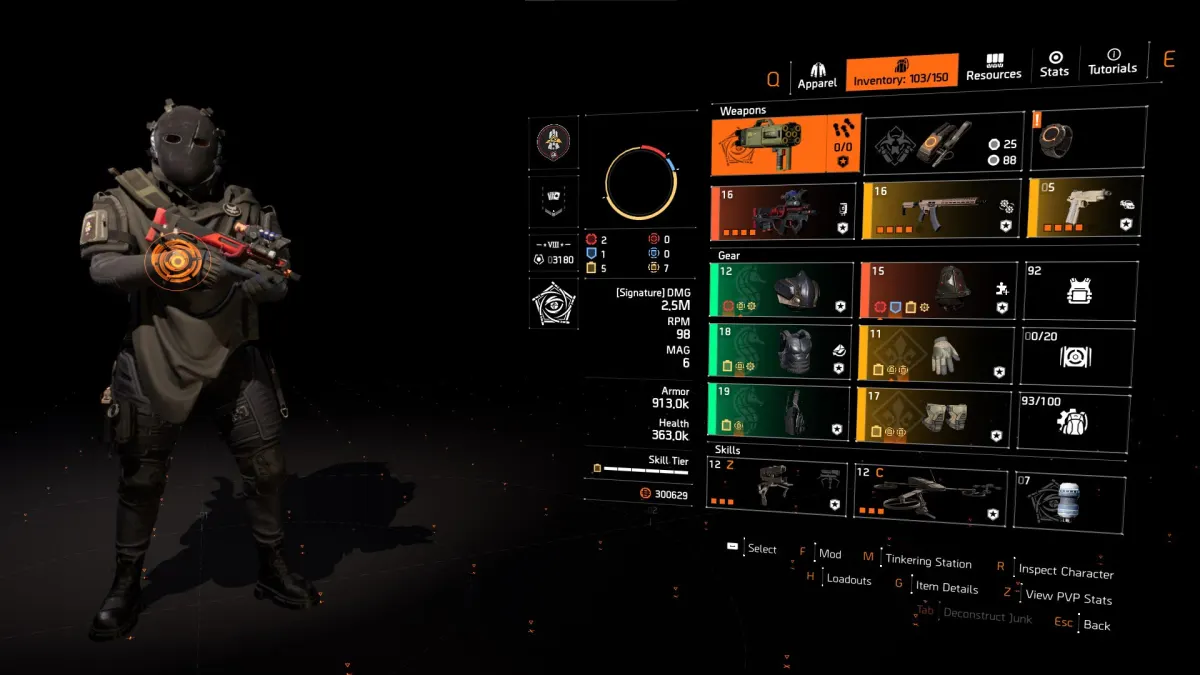
Build store link: Refactor Ninja Build for Sale (variant 3).
Variant #4: Yellow Empress Skill Build
| Build Component | Description |
| Weapon Slot #1 | Capacitor |
| Weapon Slot #2 | Rifle or SMG with In Sync |
| Specialization | Tehnician |
| Mask | Yellow Core Empress with Skill Damage & Skill Haste |
| Backpack | Yellow Core Wyvern/Hana-U with Skill Damage, Skill Haste & Combined Arms |
| Chest | Yellow Core Empress with Skill Damage, Skill Haste & Glass Cannon |
| Gloves | Yellow Core Empress with Skill Damage & Skill Haste |
| Holster | Waveform |
| Kneepads | Red Core Hana-U with Skill Damage & Skill Haste |
| Gear Mods | Skill Duration |
| Skills | Striker Drone | Assault Turret |
| Pro Tip | You aim for 3x Empress + 2x Hana-U |
Build showcase:
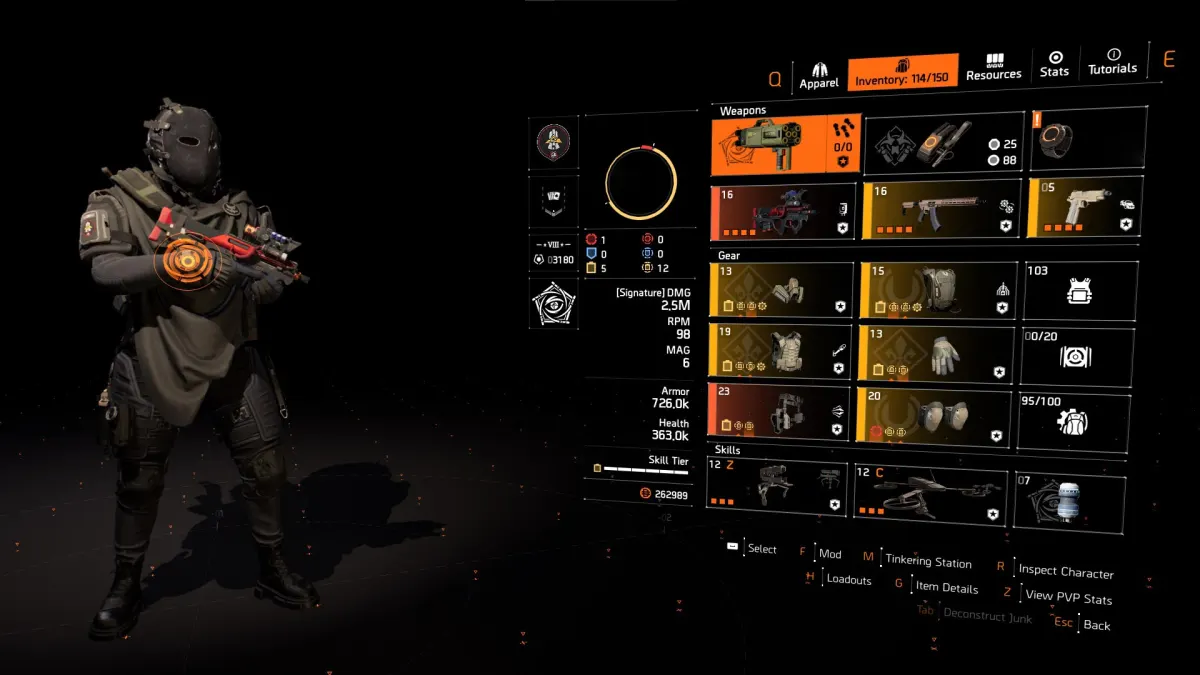
Build store link: Yellow Empress Skill Build for Sale (variant 4).
Variant #5: Infinite Seeker Mines Hard Wired Build
| Build Component | Description |
| Weapon Slot #1 | Capacitor |
| Weapon Slot #2 | Rifle or SMG with In Sync |
| Specialization | Demolitionist |
| Mask | Yellow Core Hard Wired with Skill Damage |
| Backpack | Yellow Core Hard Wired with Skill Damage |
| Chest | Yellow Core China Light with Skill Damage, Skill Haste & Glass Cannon |
| Gloves | BTSU Datagloves |
| Holster | Yellow Core Hard Wired with Skill Damage |
| Kneepads | Yellow Core Hard Wired with Skill Damage |
| Gear Mods | Skill Haste |
| Skills | Cluster Seeker Mine | Stinger Hive | Restorer Hive |
Build showcase:
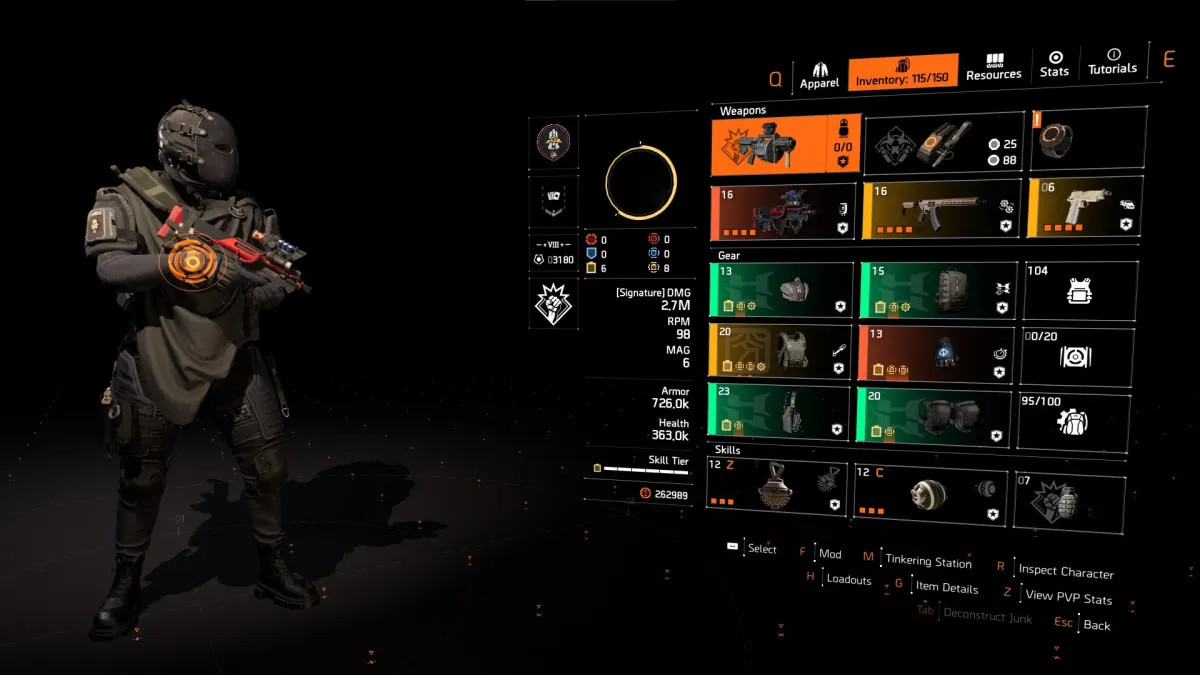
Build store link: Infinite Seeker Mines Hard Wired Build for Sale (variant 5).
Variant #6: Rigger Skill Build
| Build Component | Description |
| Weapon Slot #1 | Capacitor |
| Weapon Slot #2 | Rifle or SMG with In Sync |
| Specialization | Tehnician |
| Mask | Yellow Core Rigger with Skill Damage |
| Backpack | Yellow Core Rigger with Skill Damage |
| Chest | Yellow Core Rigger with Skill Damage |
| Gloves | Yellow Core Wyvern with Skill Damage & Skill Haste |
| Holster | Waveform |
| Kneepads | Yellow Core Rigger with Skill Damage |
| Gear Mods | Skill Duration |
| Skills | Striker Drone | Assault Turret |
| Pro Tip | You aim for 4x Rigger while using the set's chest and backpack |
Build showcase:
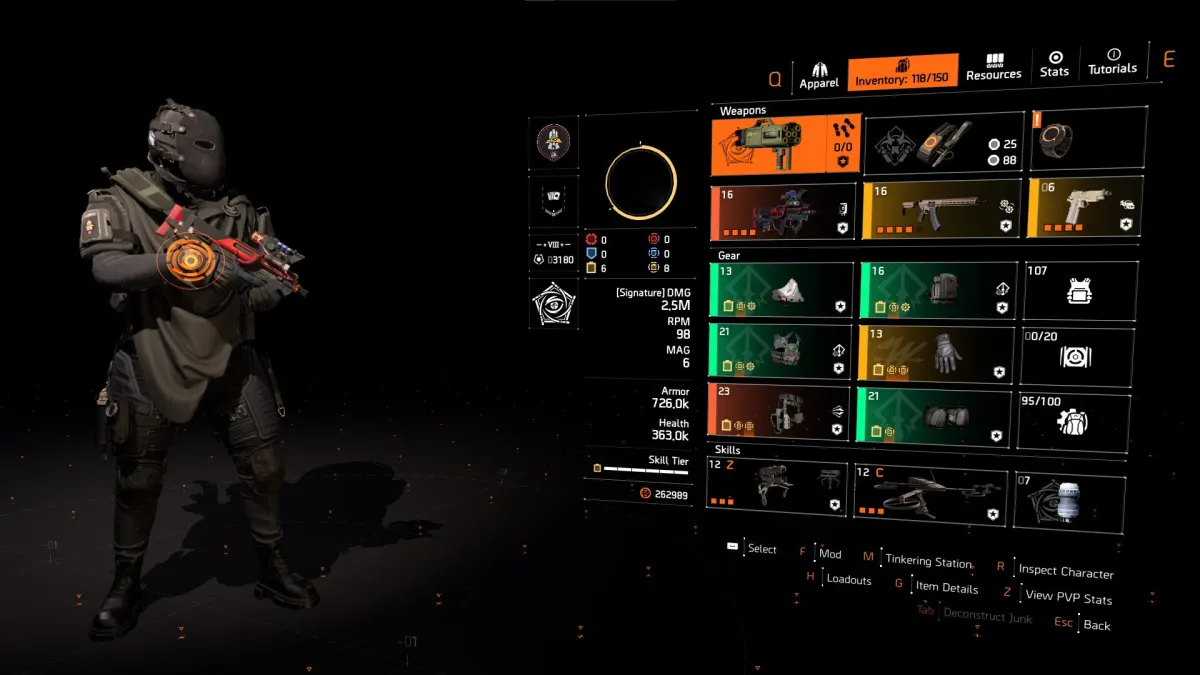
Build store link: Rigger Skill Build for Sale (variant 6).
8. Negotiator's Pestilence Build
| Build Component | Description |
| Weapon Slot #1 | Pestilence |
| Weapon Slot #2 | Any preferred weapon |
| Specialization | Gunner |
| Mask | Red Core Negotiator's with Crit Chance or Crit Damage |
| Backpack | Red Core Negotiator's with Crit Chance or Crit Damage |
| Chest | Red Core Negotiator's with Crit Chance or Crit Damage |
| Gloves | Overdogs |
| Holster | Red Core Negotiator's with Crit Chance or Crit Damage |
| Kneepads | Red Core Turmoil with Crit Chance & Crit Damage |
| Gear Mods | Crit Chance | Crit Damage |
| Skills | Decoy | Pulse | Reviver Hive |
| Pro Tip | Aim for 60% Crit Chance, then use Crit Damage rolls and mods |
Build showcase:
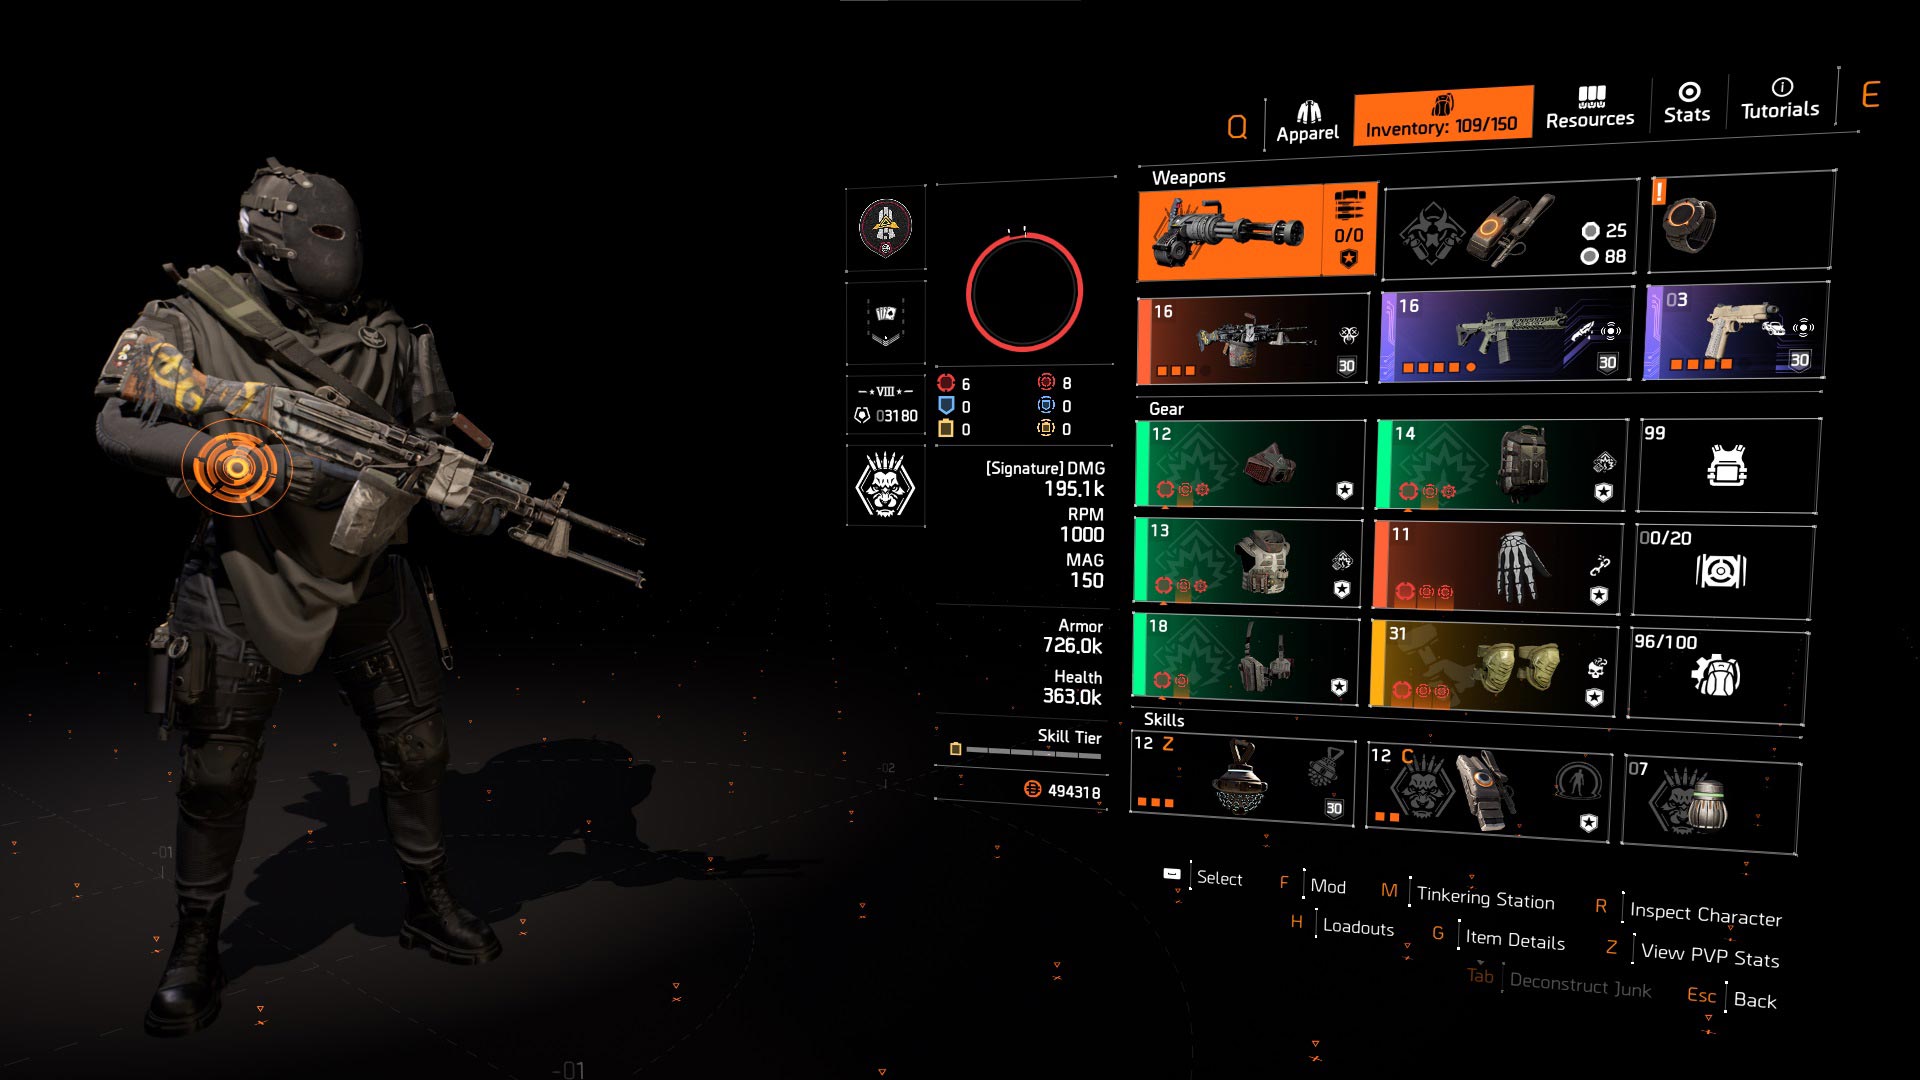
Build store link: Negotiator's Pestilence Build for Sale (variant 9).
9. Hunter's Fury SMG Build
| Build Component | Description |
| Weapon Slot #1 | Chatterbox |
| Weapon Slot #2 | Any preferred weapon |
| Specialization | Gunner |
| Mask | Blue Core Hunter's Fury with Crit Chance or Crit Damage |
| Backpack | Memento |
| Chest | Blue Core Palisade with Crit Chance, Crit Damage & Intimidate |
| Gloves | Blue Core Hunter's Fury with Crit Chance or Crit Damage |
| Holster | Red Core Hunter's Fury with Crit Chance or Crit Damage |
| Kneepads | Red Core Hunter's Fury with Crit Chance or Crit Damage |
| Gear Mods | Crit Chance | Crit Damage |
| Skills | Crusader Ballistic Shield | Decoy | Pulse | Reviver Hive |
| Pro Tip | Aim for at least 55% Crit Chance, then use Crit Damage rolls and mods |
Build showcase:
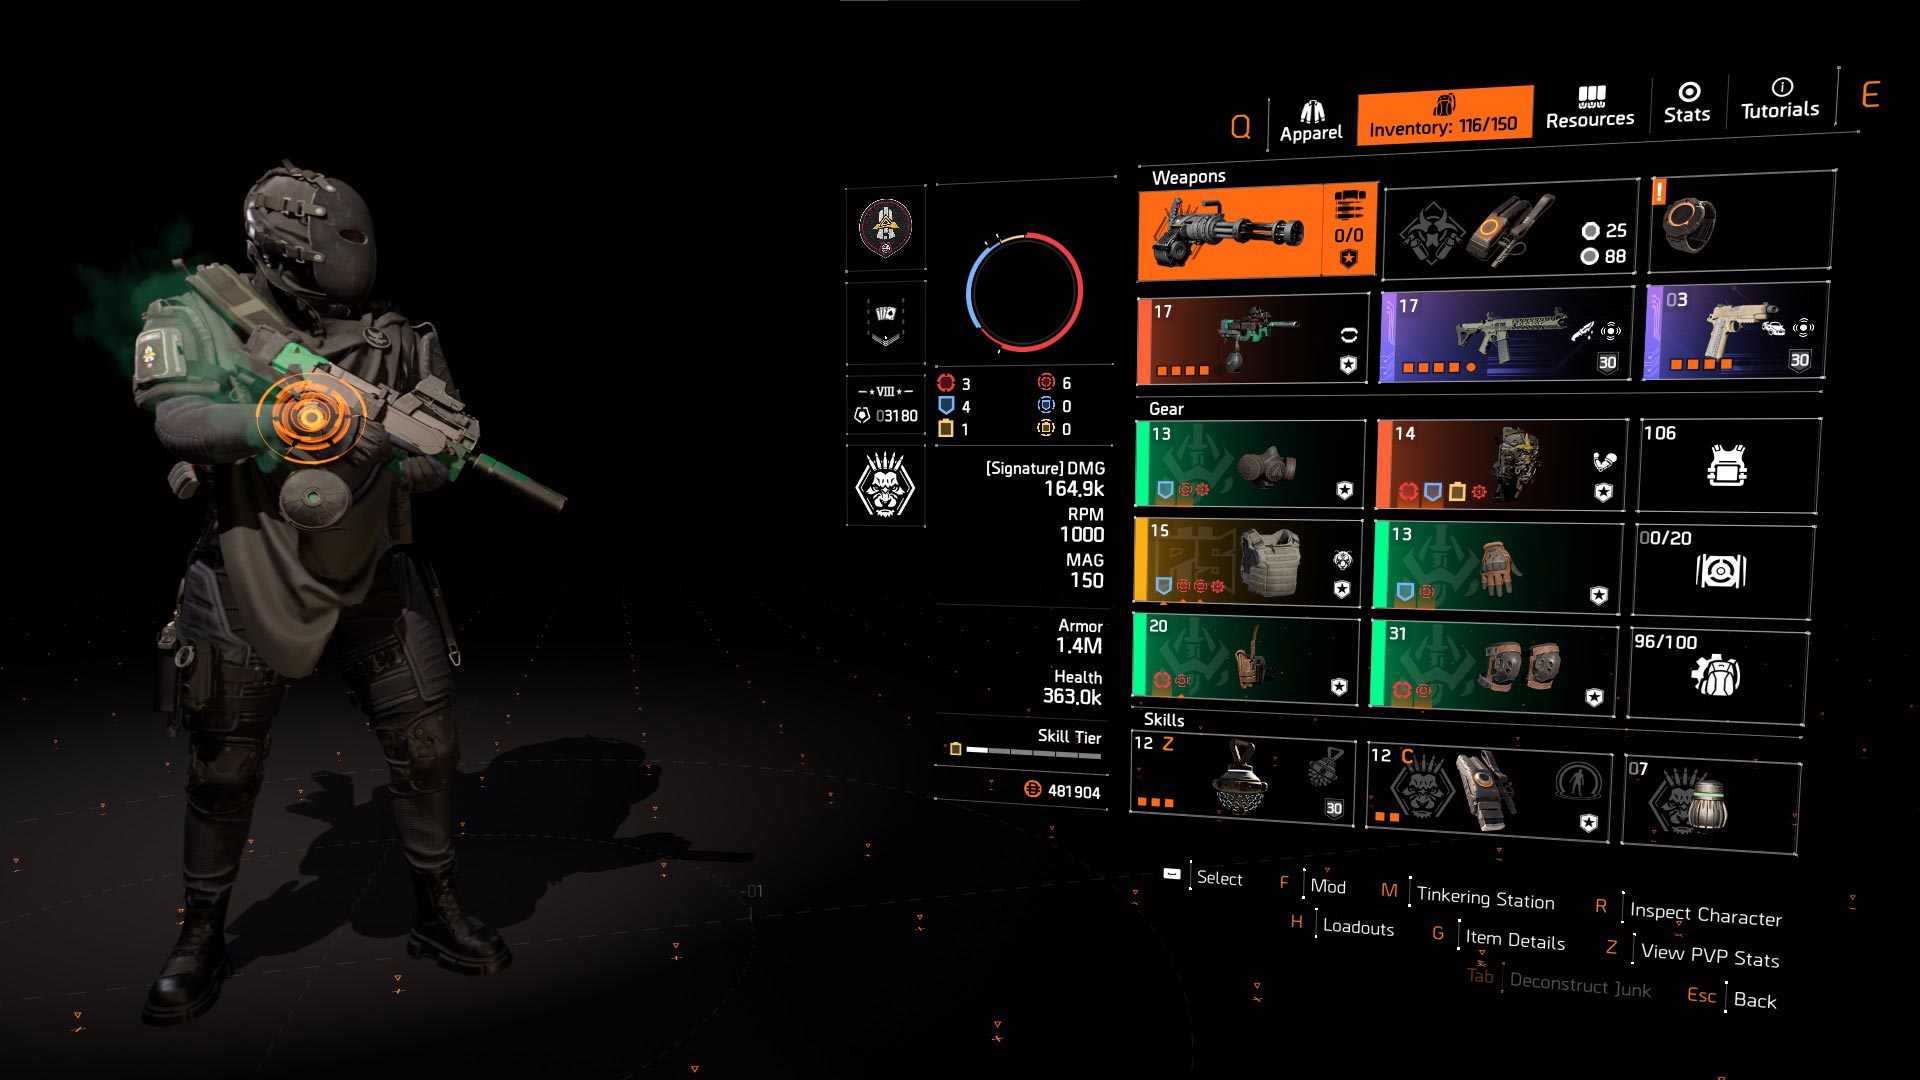
Build store link: Hunter's Fury SMG Build for Sale (variant 10).
10. One-Shot Hotshot Sniper Build
| Build Component | Description |
| Weapon Slot #1 | Prima Donna |
| Weapon Slot #2 | Any preferred weapon |
| Specialization | Sharpshooter |
| Mask | Red Core Hotshot with Headshot Damage |
| Backpack | Red Core Airaldi with Headshot Damage, Weapon Handling & Vigilance |
| Chest | Iron Will |
| Gloves | Red Core Hotshot with Headshot Damage |
| Holster | Red Core Hotshot with Headshot Damage |
| Kneepads | Red Core Hotshot with Headshot Damage |
| Gear Mods | Headshot Damage |
| Skills | Decoy | Defender Drone | Reviver Hive |
Build store link: One-Shot Sniper Build for Sale (variant 11).
11. One-Shot Regulus Build with Memento
| Build Component | Description |
| Weapon Slot #1 | Model 700 or SR1 with DMG to target out of cover & Determined |
| Weapon Slot #2 | 1886 with DMG to target out of cover & Determined |
| Weapon Slot #3 | Regulus |
| Specialization | Technician |
| Mask | Red Core Punch Drunk with Headshot Damage & Weapon Handling |
| Backpack | Memento |
| Chest | Red Core Chainkiller with Headshot Damage & Weapon Handling |
| Gloves | Red Core Contractor's Gloves with Headshot Damage |
| Holster | Red Core Providence with Headshot Damage & Weapon Handling |
| Kneepads | Red Core Turmoil with Headshot Damage |
| Gear Mods | Headshot Damage |
| Skills | Bulwark Ballistic Shield | Decoy | Pulse | Reviver Hive |
Build showcase:
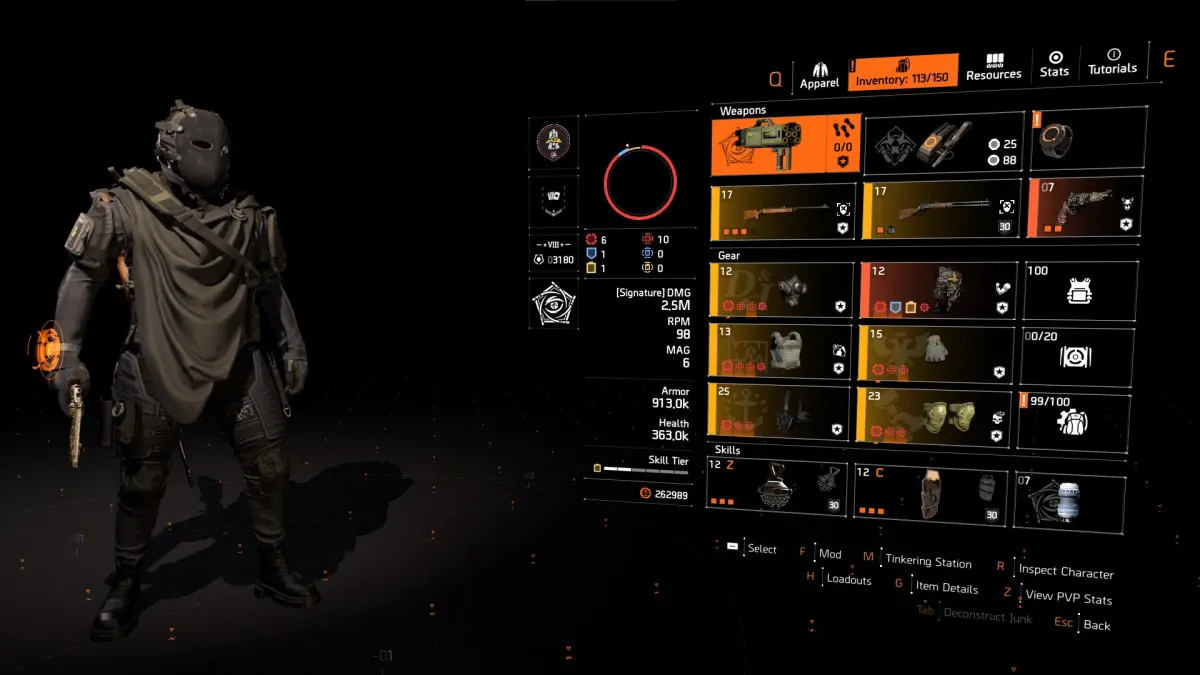
Build store link: One-Shot Regulus Build with Memento for Sale (variant 12).
12. Armor Regen Build
| Build Component | Description |
| Weapon Slot #1 | Lexington, Carbine 7, Police M4, or FAMAS with Streamline, Killer, or Measured |
| Weapon Slot #2 | Scorpio |
| Specialization | Gunner |
| Mask | Blue Core Investor with Hazard Protection, Explosive Resistance & Armor Regen |
| Backpack | Blue Core Gila with Crit Chance, Crit Damage/Armor Regen & Adrenaline Rush |
| Chest | Blue Core Belstone with Crit Chance, Crit Damage/Armor Regen & Intimidate or Obliterate |
| Gloves | Blue Core Gila with Crit Chance & Armor Regen |
| Holster | Blue Core Gila with Crit Chance & Armor Regen |
| Kneepads | Blue Core Emperor's Guard |
| Gear Mods | Crit Damage |
| Skills | Crusader Ballistic Shield | Banshee Pulse | Reviver Hive |
Build store link: Armor Regen Build for Sale (variant 13).
What is the best Division 2 Solo Build for PvE in 2026?
All of the builds mentioned above qualify as the best PvE builds that you can play as a solo player in Division 2. Nobody can say, "This is the best solo PvE build out of all," because we all have our own skills and preferences for weapons, playstyles, etc. At the end of the day, "the best build for you" will be the build that matches perfectly with your playstyle, uses your favorite weapons, and brings you the most of the fun.
Example: I am an absolute fan of Assault Rifles in all the shooters that I play, and I prefer the close to medium-range combat fights, so for me, the best PvE build in Div 2 is the assault rifle build. What about you? What’s your favorite weapon type in this game?
The best Division 2 PvP Builds (for DPS) in 2026
This section presents you with the best PvP builds to use as a DPS in the Dark Zone or Conflict game modes. These are the most popular builds that, paired with the right player skills, really stand out and transform you into a killing machine. Compared to the PvE scenarios, in competitive PvP fights, your player skills really make a difference!
1. Capacitor Build with Ninja Backpack
| Build Component | Description |
| Weapon Slot #1 | Capacitor |
| Weapon Slot #2 | Any preferred weapon |
| Specialization | Technician |
| Mask | Blue Core Walker with Crit Chance & Crit Damage |
| Backpack | Ninja Backpack |
| Chest | Red Core Equalizer with Crit Chance & Crit Damage |
| Gloves | Blue Core Contractor's Gloves with Crit Chance or Crit Damage |
| Holster | Blue Core Picaro's Holster with Crit Chance or Crit Damage |
| Kneepads | Red Core Fox's Prayer with Crit Chance or Crit Damage |
| Gear Mods | Crit Chance | Crit Damage |
| Skills | Jammer Pulse | Decoy | Stinger Hive | Explosive Seeker Mine |
| Pro Tip | Aim for at least 50% Crit Chance, then use Crit Damage rolls and mods. |
Build showcase:
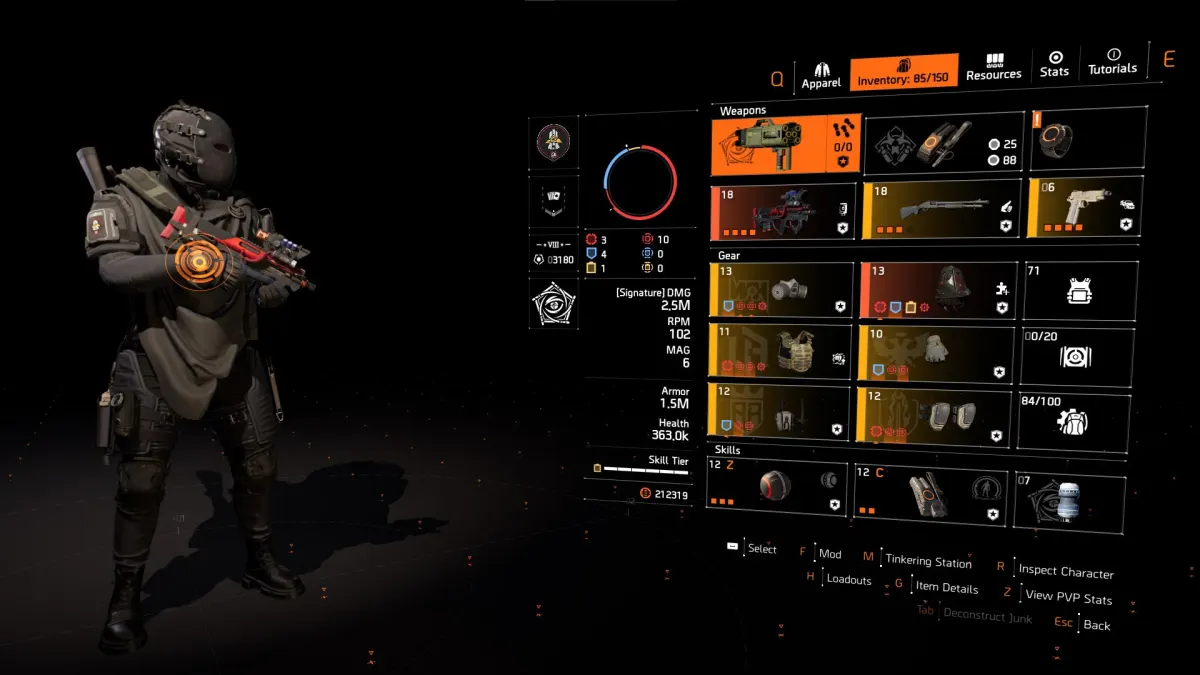
Build store link: Capacitor Build with Ninja Backpack for Sale (variant 1).
2. Bighorn Armor Regen Headshot Build
| Build Component | Description |
| Weapon Slot #1 | The Bighorn |
| Weapon Slot #2 | Any preferred weapon |
| Specialization | Survivalist |
| Mask | Catharsis |
| Backpack | Blue Core Gila with Headshot Damage, Armor Regen & Adrenaline Rush |
| Chest | Blue Core Belstone with Headshot Damage, Armor Regen & Protected Reload or Unbreakable |
| Gloves | Blue Core Gila with Headshot Damage & Armor Regen |
| Holster | Blue Core Gila with Headshot Damage & Armor Regen |
| Kneepads | Blue Core Emperor's Guard |
| Gear Mods | Headshot Damage |
| Skills | Crusader Ballistic Shield | Decoy | Reviver Hive | Pulse |
Build showcase:
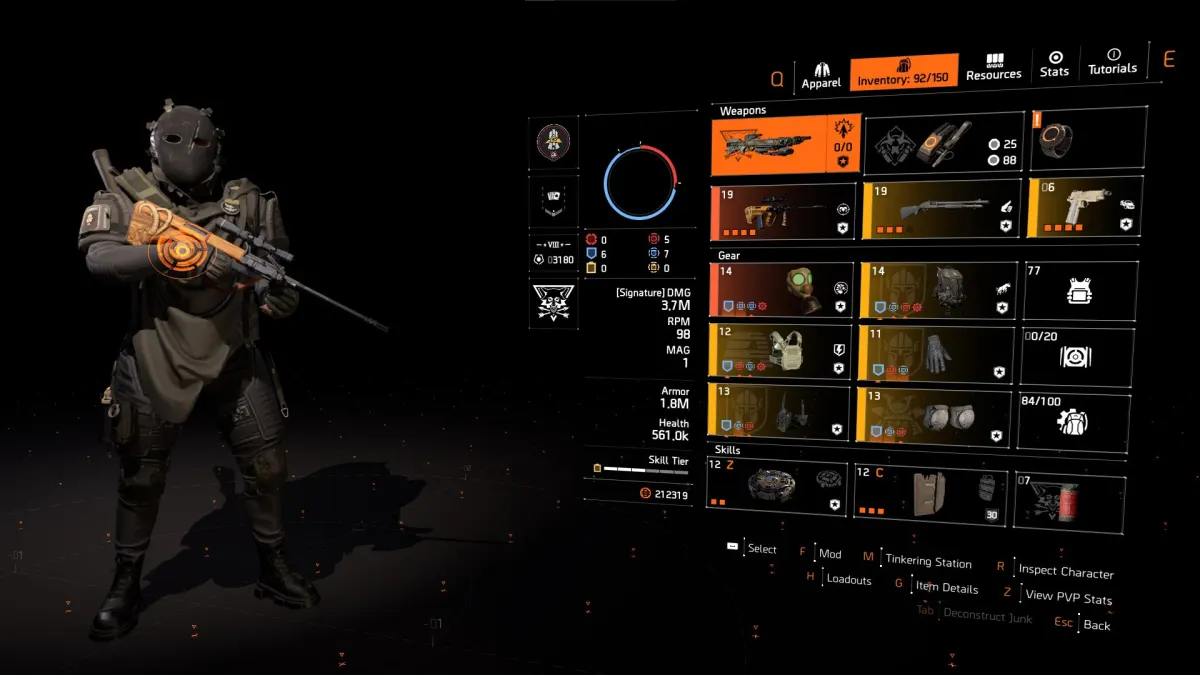
Build store link: Bighorn Armor Regen Headshot Build for Sale (variant 2).
3. Capacitor Build with Unbreakable & Adrenaline Rush
| Build Component | Description |
| Weapon Slot #1 | Capacitor |
| Weapon Slot #2 | Any preferred weapon |
| Specialization | Firewall |
| Mask | Coyote's Mask |
| Backpack | Blue Core Matador with Crit Chance & Crit Damage |
| Chest | Red Core Ceska or Grupo with Crit Chance, Crit Damage & Unbreakable |
| Gloves | Blue Core Walker with Crit Chance & Crit Damage |
| Holster | Blue Core Salvo with Crit Chance or Crit Damage |
| Kneepads | Blue Core Unit Alloys with Crit Chance & Crit Damage |
| Gear Mods | Crit Chance | Crit Damage |
| Skills | Reviver Hive | Drone | Decoy | Seeker Mine |
| Pro Tip | Aim for at least 50% Crit Chance, then use Crit Damage rolls and mods. |
Build showcase:
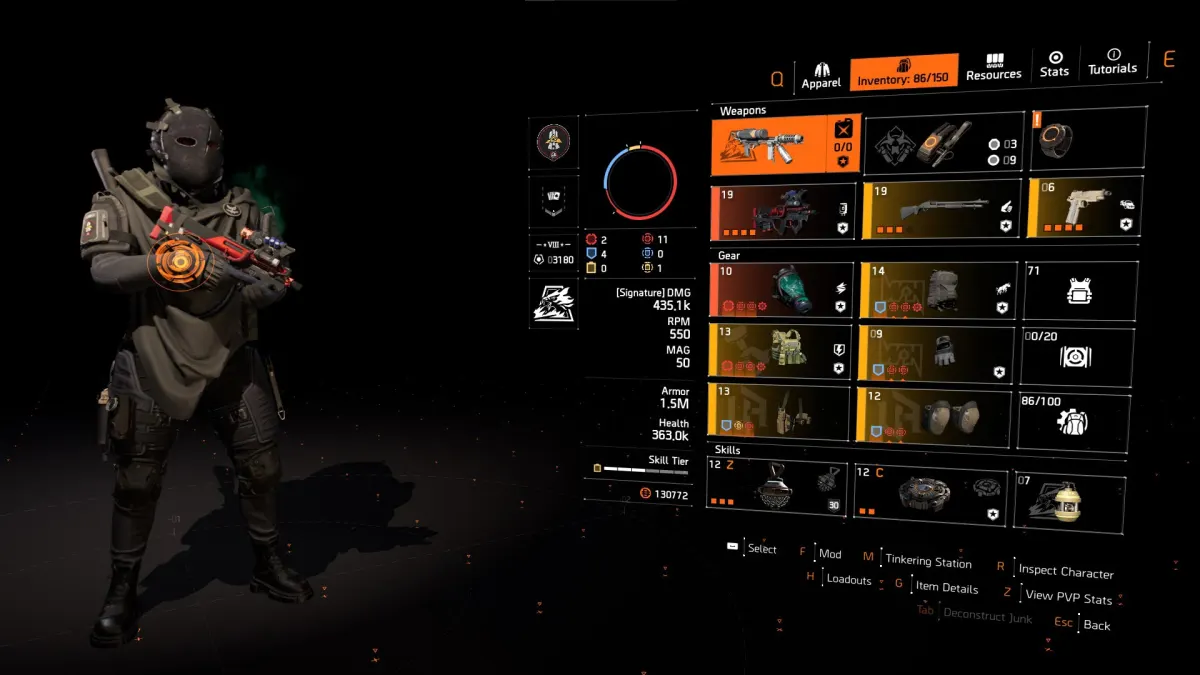
Build store link: Capacitor Build with Unbreakable & Adrenaline Rush for Sale (variant 3).
4. Capacitor Protected Reload Build
| Build Component | Description |
| Weapon Slot #1 | Capacitor |
| Weapon Slot #2 | Any preferred weapon |
| Specialization | Firewall |
| Mask | Catharsis |
| Backpack | Blue Core Matador with Crit Chance & Crit Damage |
| Chest | Red Core Grupo with Crit Chance, Crit Damage & Protected Reload |
| Gloves | Blue Core Ceska with Crit Chance & Crit Damage |
| Holster | Blue Core Salvo with Crit Chance or Crit Damage |
| Kneepads | Blue Core Unit Alloys with Crit Chance & Crit Damage |
| Gear Mods | Crit Chance | Crit Damage |
| Skills | Reviver Hive | Drone | Decoy | Seeker Mine |
| Pro Tip | Aim for at least 50% Crit Chance, then use Crit Damage rolls and mods. |
Build showcase:
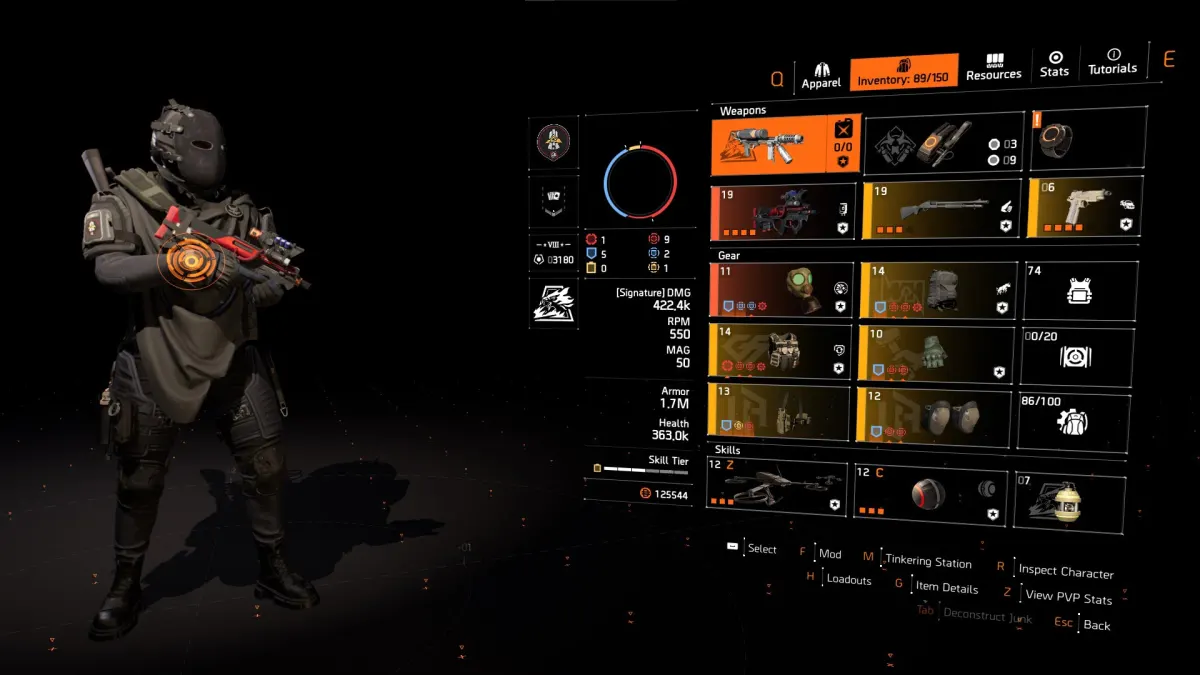
Build store link: Capacitor Protected Reload Build for Sale (variant 4).
5. Double Companion Build
| Build Component | Description |
| Weapon Slot #1 | Lexington with DMG to target out of cover & Measured or Optimist |
| Weapon Slot #2 | Any preferred weapon |
| Specialization | Firewall |
| Mask | Coyote's Mask |
| Backpack | Red Core Walker with Crit Chance, Crit Damage & Companion |
| Chest | Blue Core Henri with Crit Chance & Crit Damage |
| Gloves | Blue Core Walker with Crit Chance & Crit Damage |
| Holster | Blue Core Salvo with Crit Chance or Crit Damage |
| Kneepads | Blue Core Unit Alloys with Crit Chance & Crit Damage |
| Gear Mods | Crit Chance | Crit Damage |
| Skills | Defender Drone | Seeker Mine |
| Pro Tip | Aim for at least 50% Crit Chance, then use Crit Damage rolls and mods. |
Build showcase:
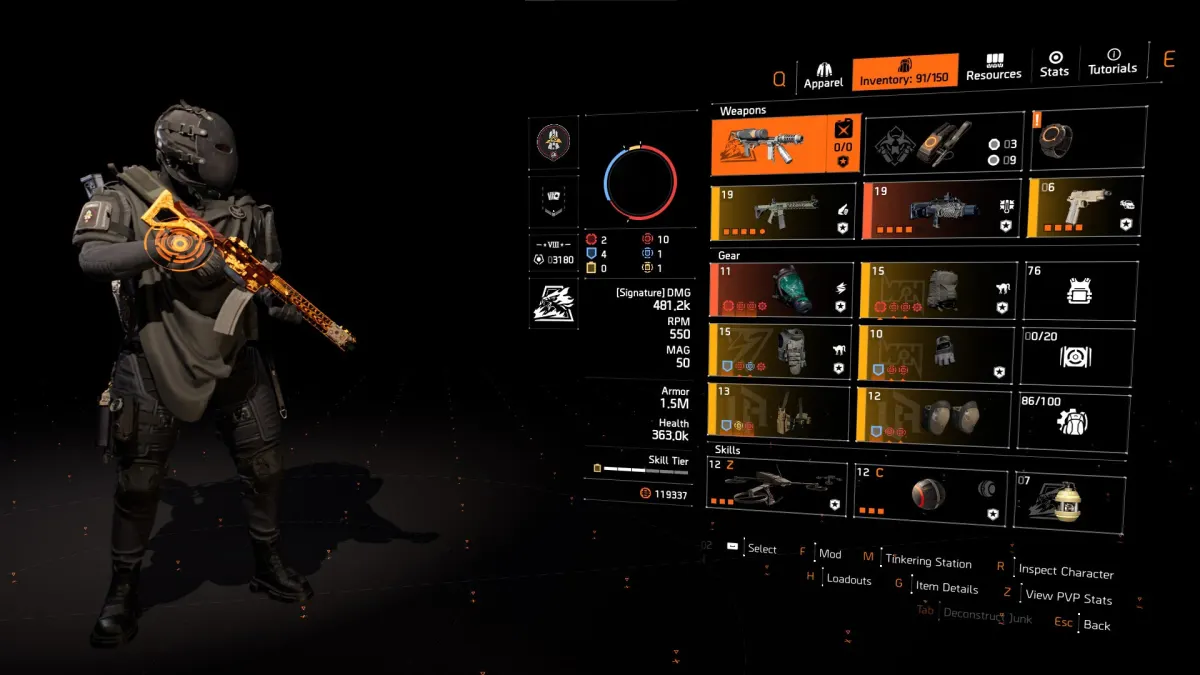
Build store link: Double Companion Build for Sale (variant 5).
6. System Corruption Build
| Build Component | Description |
| Weapon Slot #1 | St. Elmo's Engine |
| Weapon Slot #2 | Any preferred weapon |
| Specialization | Firewall |
| Mask | Catharsis |
| Backpack | Blue Core System Corruption with Crit Chance or Crit Damage |
| Chest | Red Core Ceska or Grupo with Crit Chance, Crit Damage & Unbreakable |
| Gloves | Blue Core System Corruption with Crit Chance or Crit Damage |
| Holster | Blue Core System Corruption with Crit Chance or Crit Damage |
| Kneepads | Blue Core System Corruption with Crit Chance or Crit Damage |
| Gear Mods | Crit Chance | Crit Damage |
| Skills | Decoy | Shock Trap | Reviver Hive | Ballistic Shield |
| Pro Tip | Aim for at least 50% Crit Chance, then use Crit Damage rolls and mods. |
Build showcase:
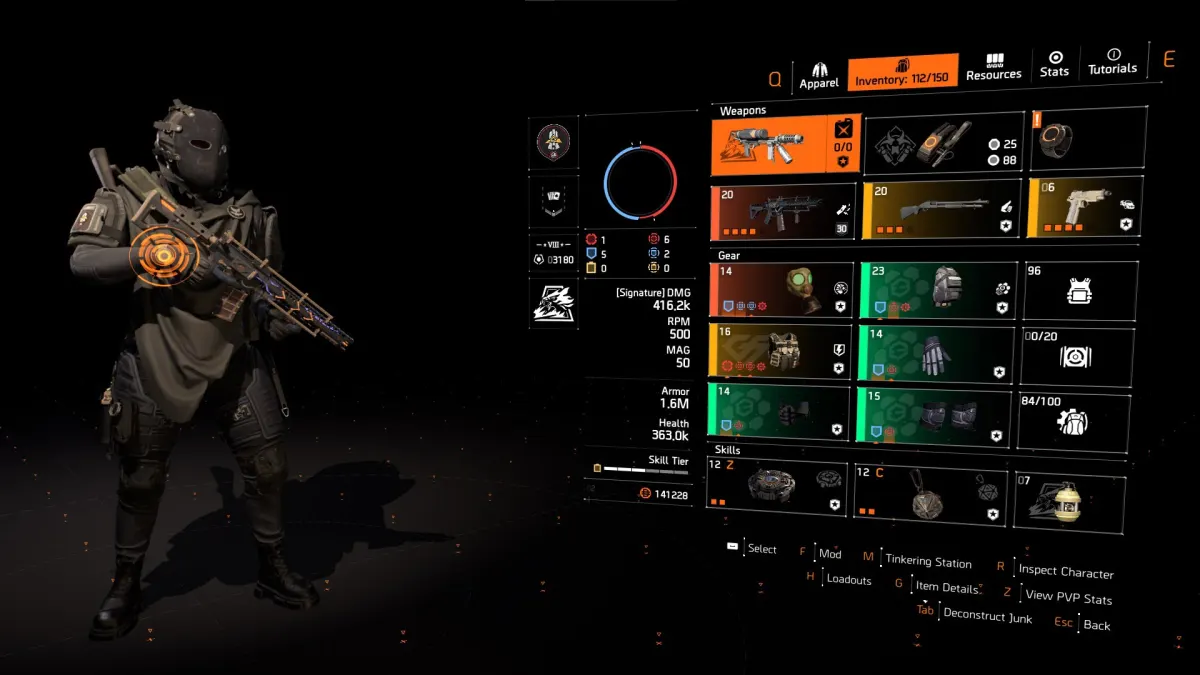
Build store link: System Corruption Build for Sale (variant 6).
7. Striker PvP Build with St. Elmo's
| Build Component | Description |
| Weapon Slot #1 | St. Elmo's Engine |
| Weapon Slot #2 | Any preferred weapon |
| Specialization | Firewall |
| Mask | Red Core Striker with Crit Chance or Crit Damage |
| Backpack | Red Core Ceska or Grupo with Crit Chance, Crit Damage & Adrenaline Rush |
| Chest | Red Core Ceska or Grupo with Crit Chance, Crit Damage & Unbreakable |
| Gloves | Blue Core Striker with Crit Chance or Crit Damage |
| Holster | Blue Core Striker with Crit Chance or Crit Damage |
| Kneepads | Blue Core Striker with Crit Chance or Crit Damage |
| Gear Mods | Crit Chance | Crit Damage |
| Skills | Striker Ballistic Shield | Seeker Mine | Decoy | Pulse |
| Pro Tip | Aim for 55% Crit Chance, then use Crit Damage rolls and mods |
Build showcase:
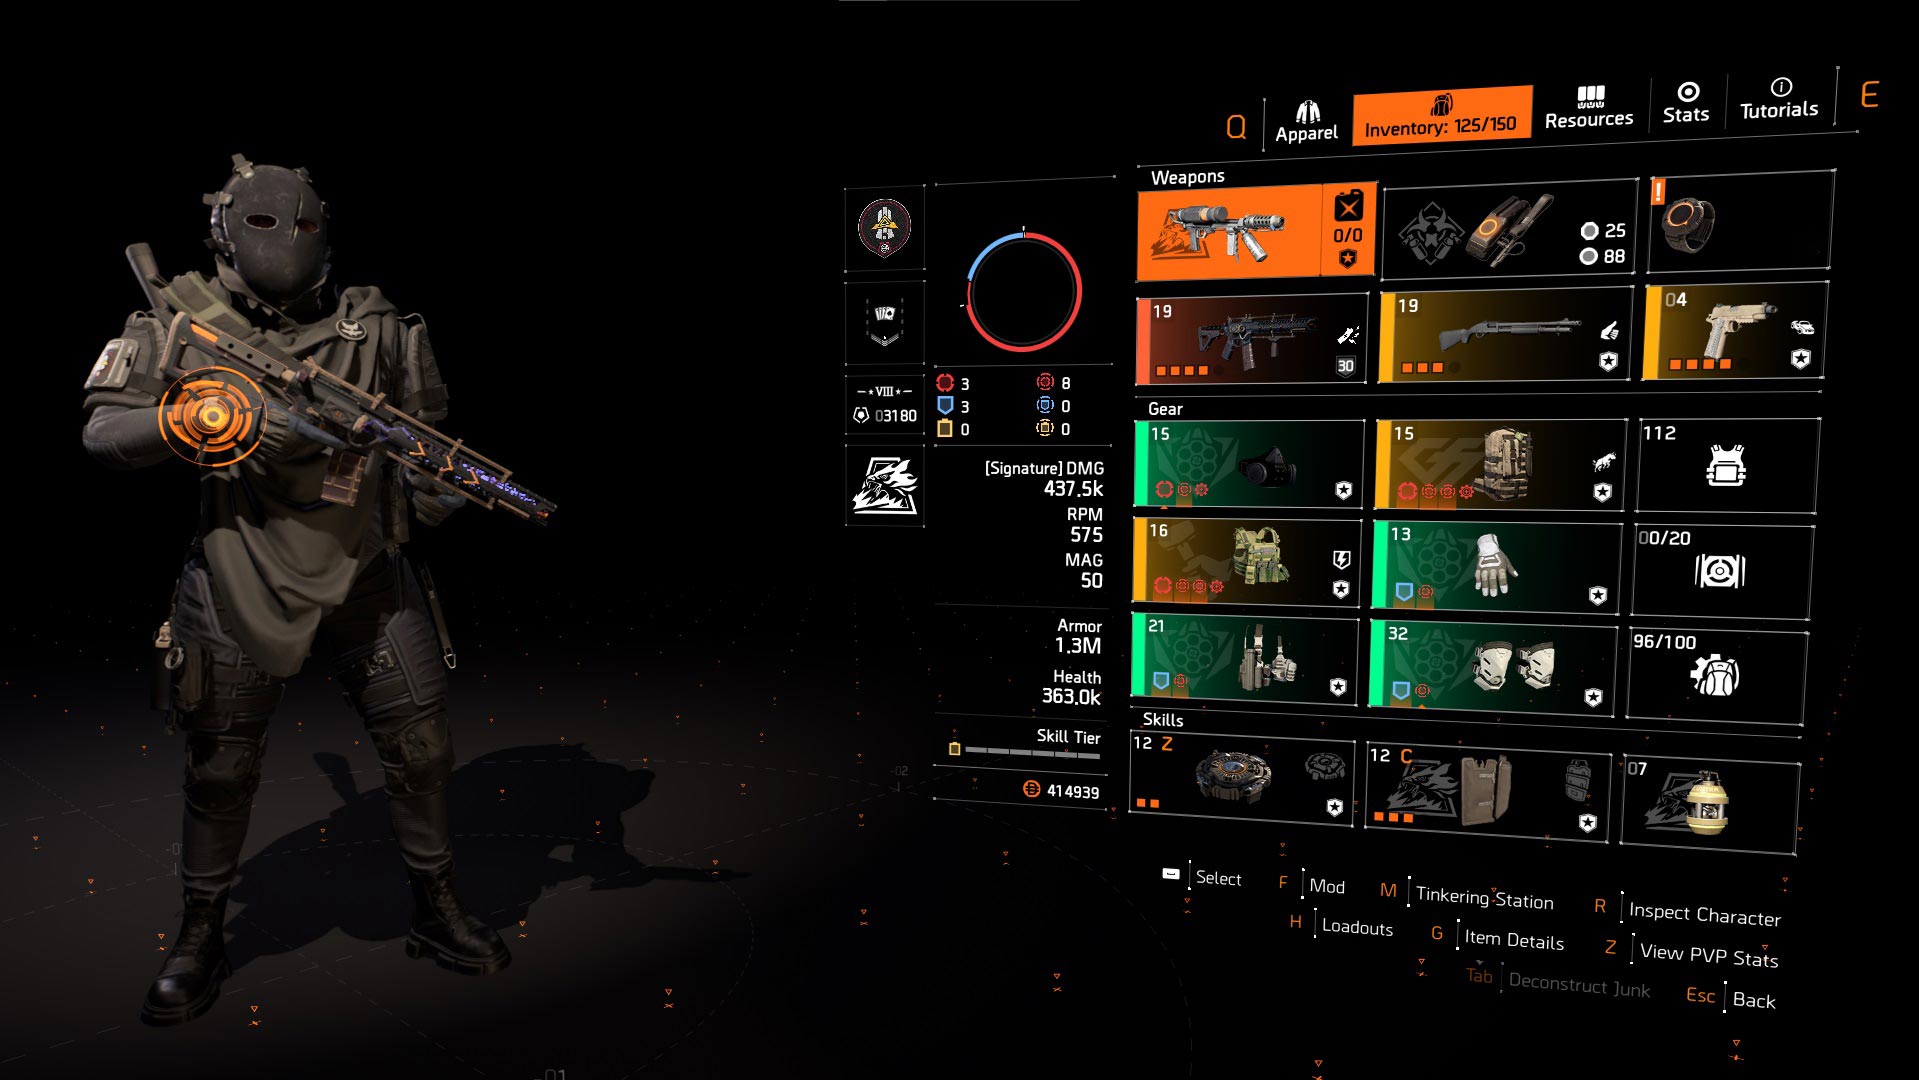
Build store link: Striker PvP Build with St. Elmo's for Sale (variant 7).
8. Striker PvP Build with Ouroboros
| Build Component | Description |
| Weapon Slot #1 | Ouroboros |
| Weapon Slot #2 | Any preferred weapon |
| Specialization | Gunner |
| Mask | Red Core Striker with Crit Chance or Crit Damage |
| Backpack | Red Core Ceska or Grupo with Crit Chance, Crit Damage & Adrenaline Rush |
| Chest | Red Core Ceska or Grupo with Crit Chance, Crit Damage & Unbreakable |
| Gloves | Red Core Striker with Crit Chance or Crit Damage |
| Holster | Blue Core Striker with Crit Chance or Crit Damage |
| Kneepads | Blue Core Striker with Crit Chance or Crit Damage |
| Gear Mods | Crit Chance | Crit Damage |
| Skills | Crusader Ballistic Shield | Seeker Mine | Decoy | Pulse |
| Pro Tip | Aim for 55% Crit Chance, then use Crit Damage rolls and mods |
Build showcase:
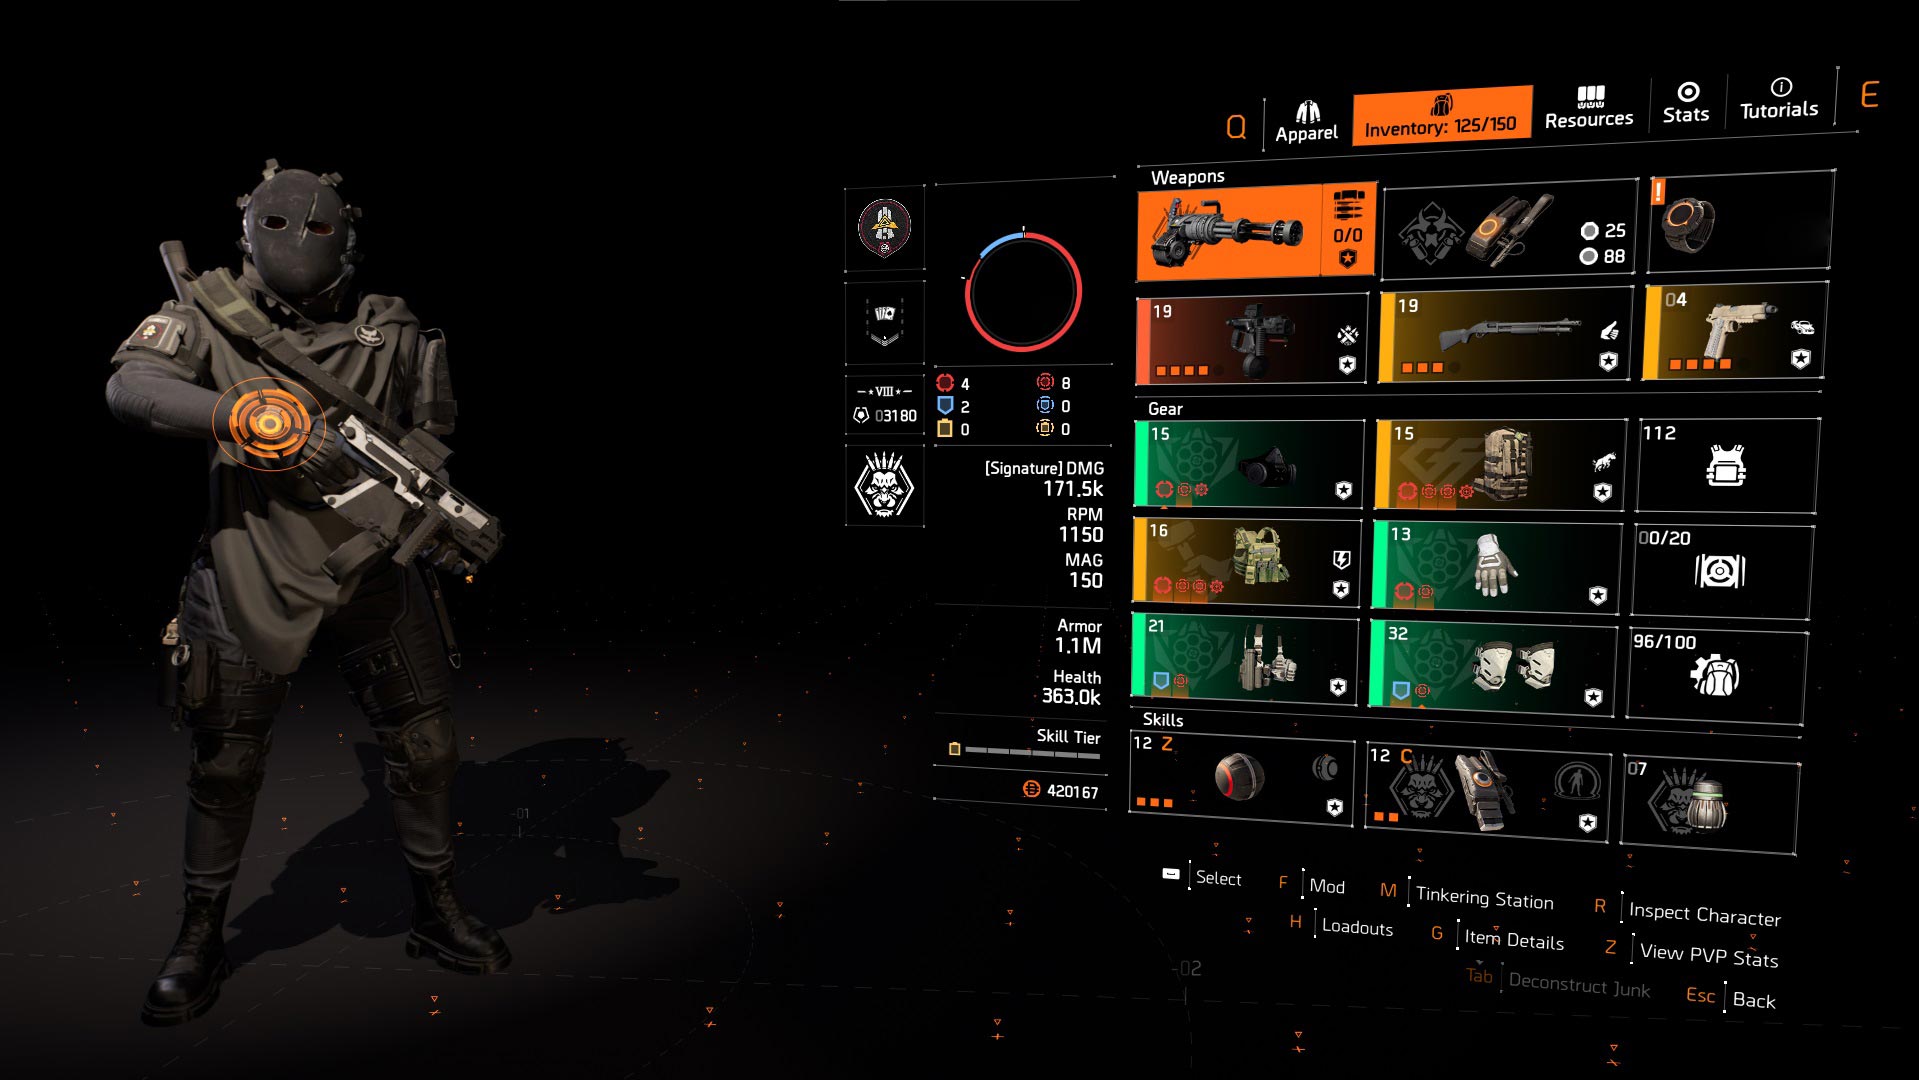
Build store link: Striker PvP Build with Ouroboros for Sale (variant 8).
9. Hunter's Fury PvP Build with Ouroboros
| Build Component | Description |
| Weapon Slot #1 | Ouroboros |
| Weapon Slot #2 | M870 with DMG to target out of cover & Optimist |
| Specialization | Firewall |
| Mask | Red Core Hunter's Fury with Crit Chance or Crit Damage |
| Backpack | Red Core Ceska or Grupo with Crit Chance, Crit Damage & Adrenaline Rush |
| Chest | Red Core Ceska or Grupo with Crit Chance, Crit Damage & Unbreakable |
| Gloves | Red Core Hunter's Fury with Crit Chance or Crit Damage |
| Holster | Blue Core Hunter's Fury with Crit Chance or Crit Damage |
| Kneepads | Blue Core Hunter's Fury with Crit Chance or Crit Damage |
| Gear Mods | Crit Chance | Crit Damage |
| Skills | Crusader Ballistic Shield | Seeker Mine | Decoy | Pulse |
| Pro Tip | Aim for 55% Crit Chance, then use Crit Damage rolls and mods |
Build showcase:
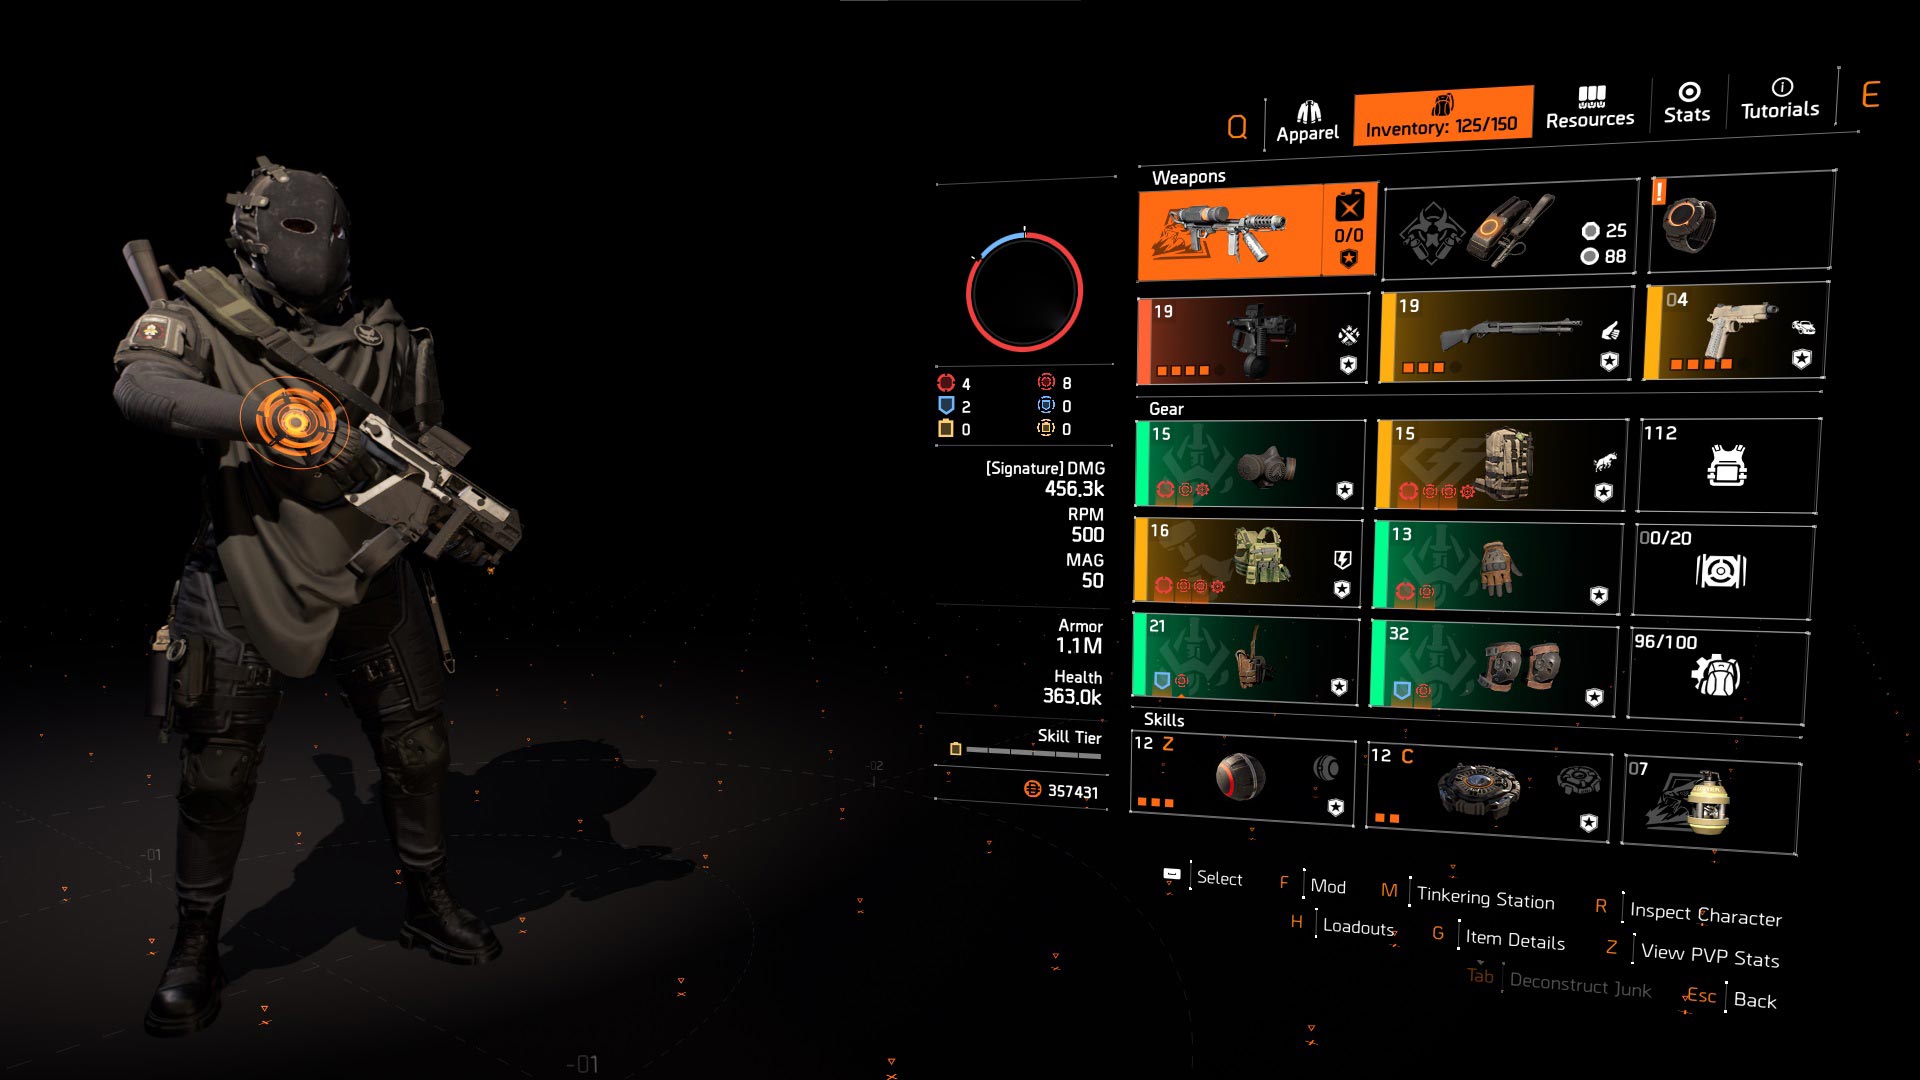
Build store link: Hunter's Fury PvP Build with Ouroboros for Sale (variant 9).
What is the best Division 2 Build for PvP as a solo player in 2026?
This is one of the most popular questions we get regarding Division 2 builds, especially when it comes to PvP. It's understandable because when you focus on the competitive modes in the game, you want THE best build for your character, so the other players don't stand a chance in front of you. However, you will never find that "one" PvP build that outstands all the other builds.
At the end of the day, it's all about the players' skills and what they enjoy the most. Some players enjoy close combat PvP fights, so the best builds, in their case, will revolve around SMGs, Pistols, or Shotguns. On the other hand, some players are experts in the cover-based playstyle, so they prefer sniper rifle or skill builds. As long as you have the right skills, these are all perfect candidates for the "best PvP build in Division 2".
Best Builds in Red Horizon (Year 8 Season 3)
Our most popular seasonal builds for Division 2 Red Horizon are:
1. One-Shot Sniper Build with Iron Will & Prima Donna
| Build Component | Description |
| Weapon Slot #1 | Prima Donna |
| Weapon Slot #2 | Any preferred weapon |
| Specialization | Sharpshooter |
| Mask | Red Core Hotshot with Headshot Damage |
| Backpack | Red Core Airaldi with Headshot Damage, Weapon Handling & Vigilance |
| Chest | Iron Will |
| Gloves | Red Core Hotshot with Headshot Damage |
| Holster | Red Core Hotshot with Headshot Damage |
| Kneepads | Red Core Hotshot with Headshot Damage |
| Gear Mods | Headshot Damage |
| Skills | Decoy | Defender Drone | Reviver Hive |
Build store link: One-Shot Sniper Build with Iron Will & Prima Donna for Sale (variant 1).
2. Pestilence Ember Engine Drone Build
| Build Component | Description |
| Weapon Slot #1 | Pestilence |
| Weapon Slot #2 | Pyromaniac |
| Specialization | Sharpshooter |
| Mask | Yellow Core Ember Engine with Status Effects |
| Backpack | Yellow Core The Courier with Status Effects & Crit Chance or Crit Damage |
| Chest | Yellow Core Electrique with Status Effects & Crit Chance or Crit Damage & Glass Cannon |
| Gloves | Yellow Core Ember Engine with Status Effects |
| Holster | Yellow Core Ember Engine with Status Effects |
| Kneepads | Yellow Core Ember Engine with Status Effects |
| Gear Mods | Crit Chance |
| Skills | Tactician Drone | Reviver Hive |
Build showcase:
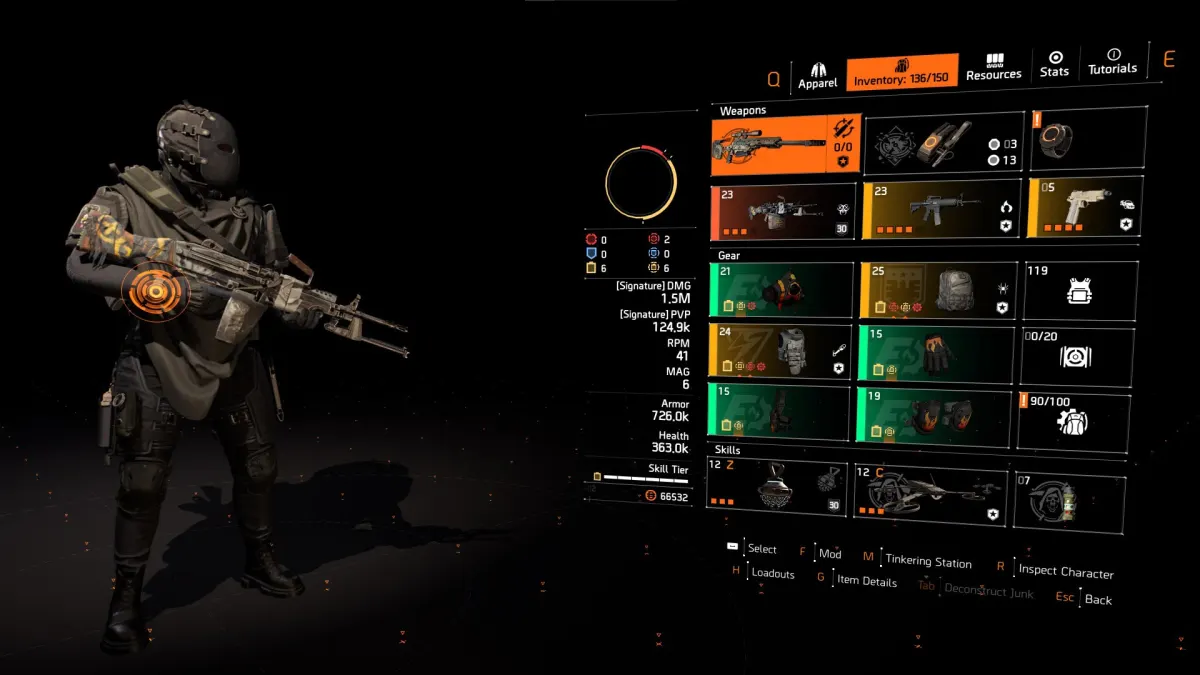
Build store link: Pestilence Ember Engine Drone Build for Sale (variant 2).
3. Iron Lung Ember Engine Drone Build
| Build Component | Description |
| Weapon Slot #1 | Iron Lung |
| Weapon Slot #2 | Pyromaniac |
| Specialization | Sharpshooter |
| Mask | Vile |
| Backpack | Yellow Core The Courier with Status Effects & Crit Chance or Crit Damage |
| Chest | Yellow Core Ember Engine with Status Effects |
| Gloves | Yellow Core Ember Engine with Status Effects |
| Holster | Yellow Core Ember Engine with Status Effects |
| Kneepads | Yellow Core Ember Engine with Status Effects |
| Gear Mods | Crit Chance |
| Skills | Tactician Drone | Reviver Hive |
Build showcase:
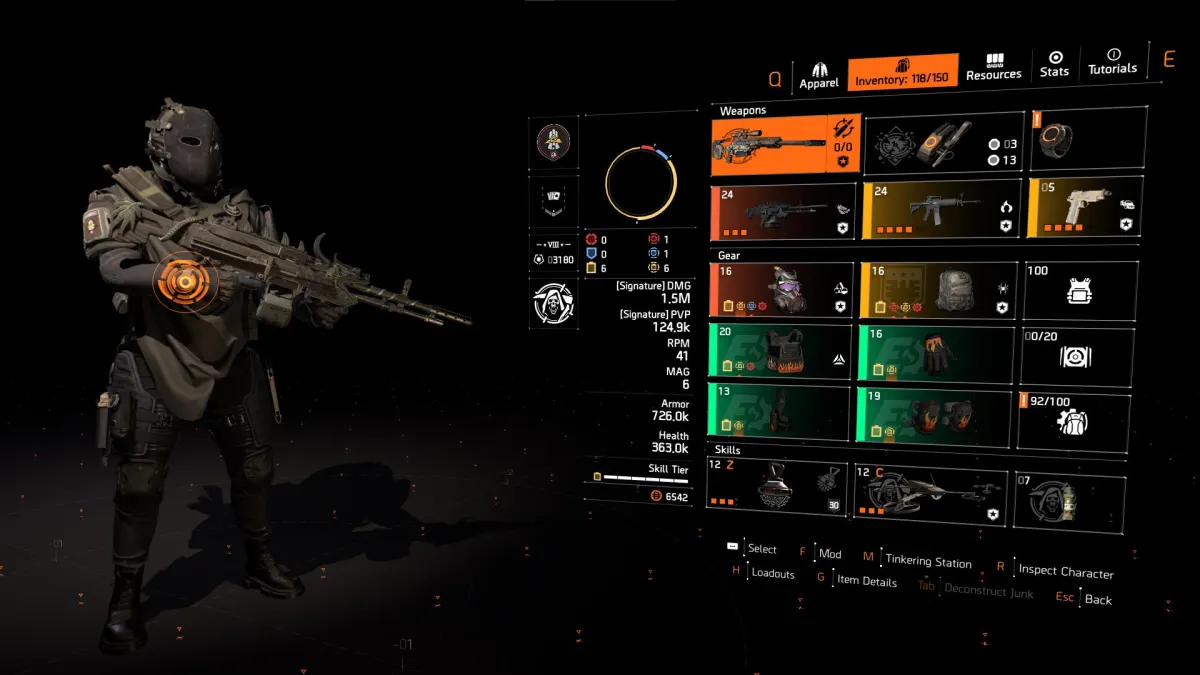
Build store link: Iron Lung Ember Engine Drone Build for Sale (variant 3).
4. Iron Lung Pulsed Ember Engine Build V1
| Build Component | Description |
| Weapon Slot #1 | Iron Lung |
| Weapon Slot #2 | Pyromaniac |
| Specialization | Gunner |
| Mask | Vile |
| Backpack | Yellow Core The Courier with Status Effects & Crit Chance or Crit Damage |
| Chest | Red Core Ember Engine with Status Effects |
| Gloves | Red Core Ember Engine with Status Effects |
| Holster | Red Core Ember Engine with Status Effects |
| Kneepads | Red Core Ember Engine with Status Effects |
| Gear Mods | Skill Haste |
| Skills | Banshee Pulse | Reviver Hive |
Build showcase:
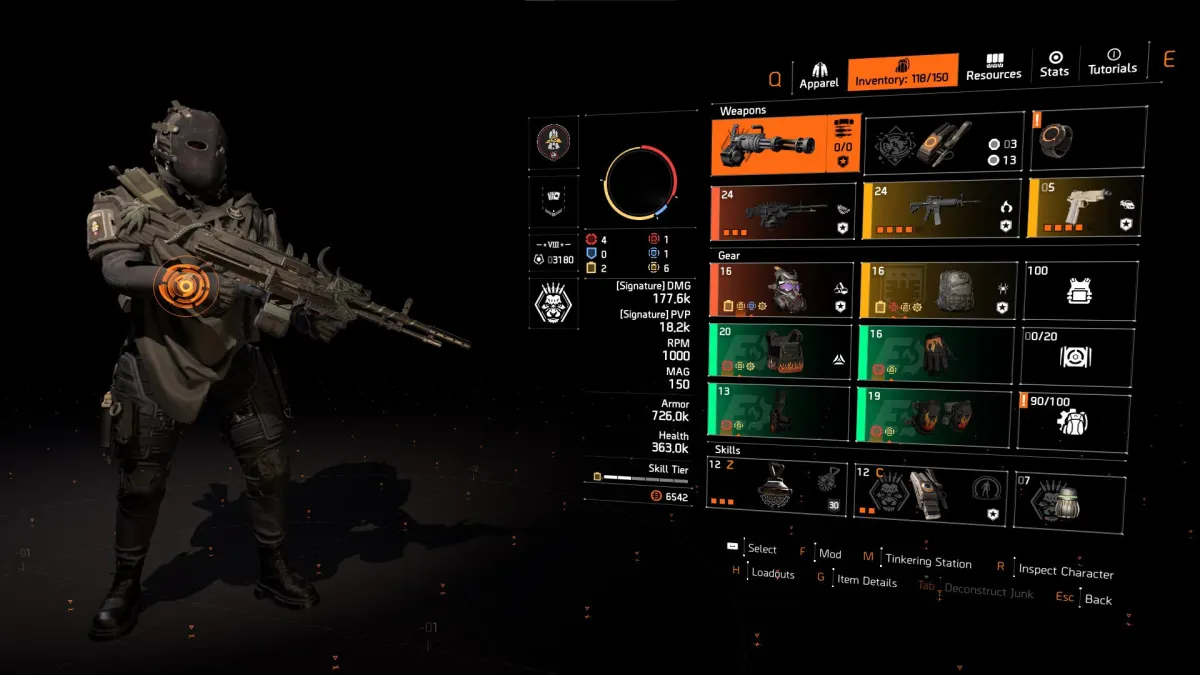
Build store link: Iron Lung Pulsed Ember Engine Build V1 for Sale (variant 4).
5. Iron Lung Pulsed Ember Engine Build V2
| Build Component | Description |
| Weapon Slot #1 | Iron Lung |
| Weapon Slot #2 | Pyromaniac |
| Specialization | Gunner |
| Mask | Vile |
| Backpack | Red Core Ember Engine with Status Effects |
| Chest | Red Core Ember Engine with Status Effects |
| Gloves | Red Core Electrique with Status Effects & Skill Haste |
| Holster | Red Core Ember Engine with Status Effects |
| Kneepads | Red Core Ember Engine with Status Effects |
| Gear Mods | Skill Haste |
| Skills | Banshee Pulse | Reviver Hive |
Build showcase:
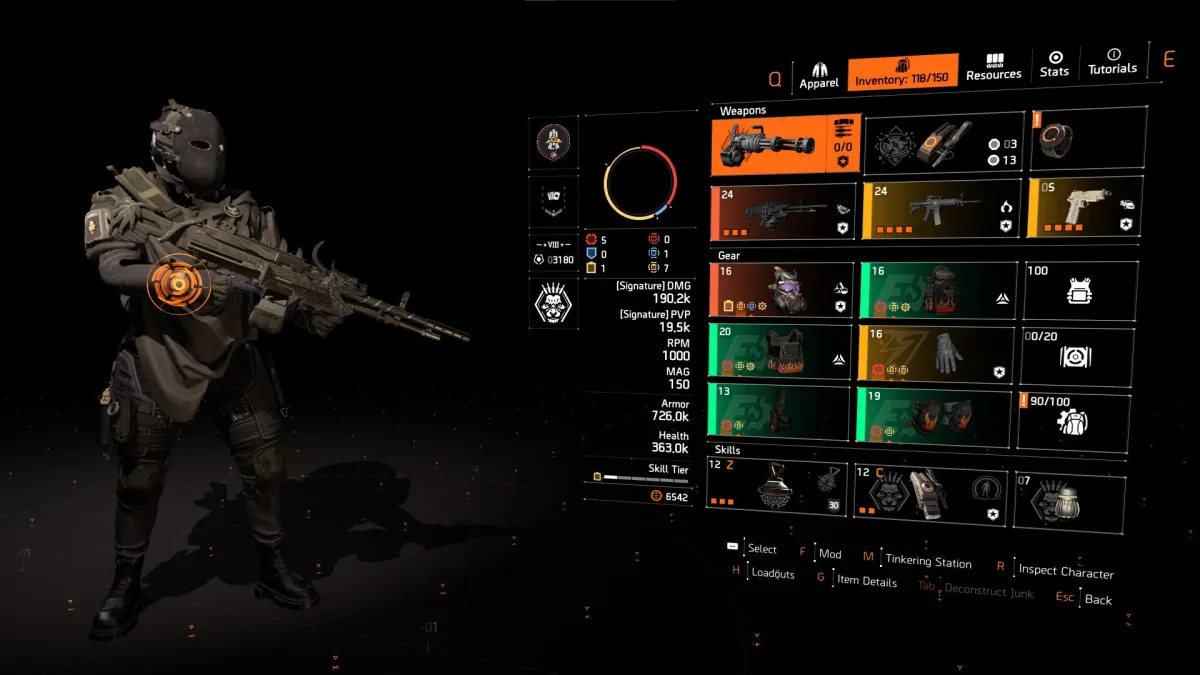
Build store link: Iron Lung Pulsed Ember Engine Build V2 for Sale (variant 5).
6. Fafnir Core Strength Build with Memento
| Build Component | Description |
| Weapon Slot #1 | Fafnir |
| Weapon Slot #2 | Any preferred weapon |
| Specialization | Gunner |
| Mask | Blue Core Core Strength with Status Effects |
| Backpack | Memento |
| Chest | Blue Core Core Strength with Status Effects |
| Gloves | Blue Core Electrique with Status Effects |
| Holster | Blue Core Core Strength with Status Effects |
| Kneepads | Blue Core Core Strength with Status Effects |
| Gear Mods | Protection from Elites |
| Skills | Crusader Ballistic Shield | Reviver Hive |
Build showcase:
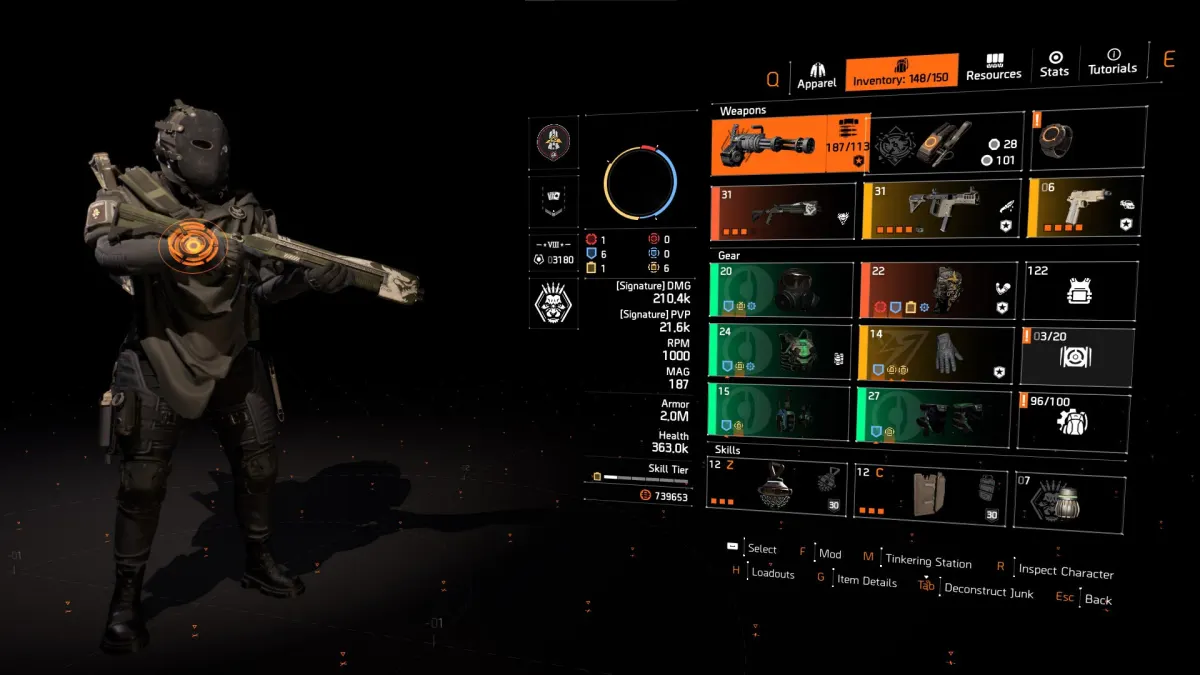
Build store link: Fafnir Core Strength Build with Memento for Sale (variant 6).
7. Fafnir Hunter's Fury Status Build with The Catalyst
| Build Component | Description |
| Weapon Slot #1 | Fafnir |
| Weapon Slot #2 | Any preferred weapon |
| Specialization | Gunner |
| Mask | The Catalyst |
| Backpack | Red Core The Setup with Status Effects and Crit Chance or Crit Damage |
| Chest | Red Core Hunter's Fury with Status Effects |
| Gloves | Red Core Hunter's Fury with Status Effects |
| Holster | Red Core Hunter's Fury with Status Effects |
| Kneepads | Red Core Hunter's Fury with Status Effects |
| Gear Mods | Crit Chance | Crit Damage |
| Skills | Crusader Ballistic Shield | Reviver Hive |
| Pro Tip | Aim for 55%+ Crit Chance, then go for Crit Damage rolls. The build works best when upgraded to Prototype with Paradox Augments! |
Build showcase:
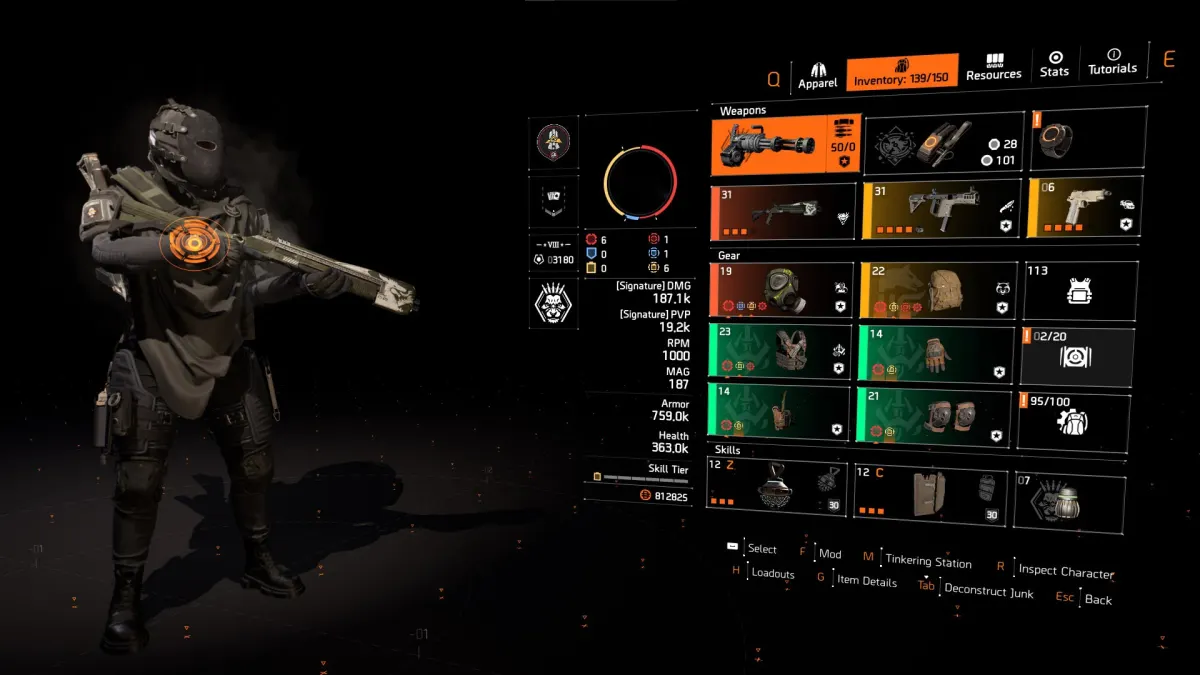
Build store link: Fafnir Hunter's Fury Status Build with The Catalyst for Sale (variant 7).
8. Fafnir Hunter's Fury Crit Build with Coyote's
| Build Component | Description |
| Weapon Slot #1 | Fafnir |
| Weapon Slot #2 | Any preferred weapon |
| Specialization | Gunner |
| Mask | Coyote's Mask |
| Backpack | Red Core The Setup with Crit Chance & Crit Damage |
| Chest | Red Core Hunter's Fury with Crit Chance or Crit Damage |
| Gloves | Red Core Hunter's Fury with Crit Chance or Crit Damage |
| Holster | Red Core Hunter's Fury with Crit Chance or Crit Damage |
| Kneepads | Red Core Hunter's Fury with Crit Chance or Crit Damage |
| Gear Mods | Crit Chance | Crit Damage |
| Skills | Crusader Ballistic Shield | Reviver Hive |
| Pro Tip | Aim for 55%+ Crit Chance, then go for Crit Damage rolls. The build works best when upgraded to Prototype with Paradox Augments! |
Build showcase:
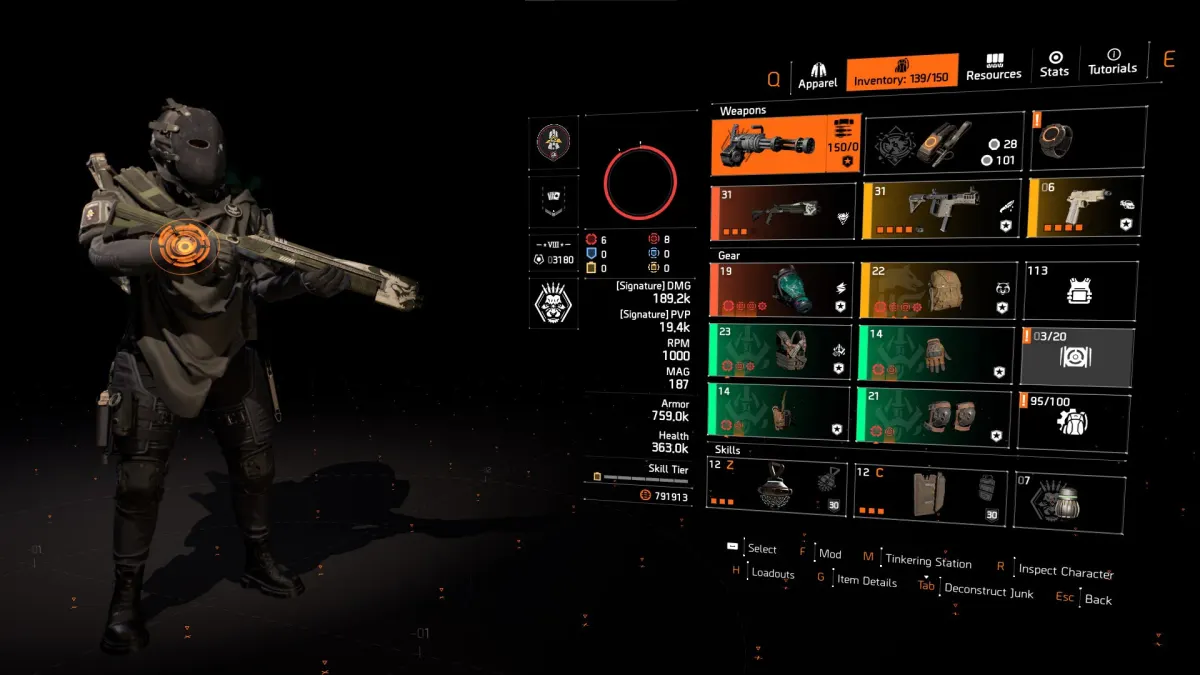
Build store link: Fafnir Hunter's Fury Crit Build with Coyote's for Sale (variant 8).
9. Fafnir Hunter's Fury Build with Memento
| Build Component | Description |
| Weapon Slot #1 | Fafnir |
| Weapon Slot #2 | Any preferred weapon |
| Specialization | Gunner |
| Mask | Blue Core Hunter's Fury with Crit Chance or Crit Damage |
| Backpack | Memento |
| Chest | Blue Core Palisade with Crit Chance, Crit Damage & Intimidate |
| Gloves | Red Core Hunter's Fury with Crit Chance or Crit Damage |
| Holster | Red Core Hunter's Fury with Crit Chance or Crit Damage |
| Kneepads | Red Core Hunter's Fury with Crit Chance or Crit Damage |
| Gear Mods | Crit Chance | Crit Damage |
| Skills | Crusader Ballistic Shield | Reviver Hive |
| Pro Tip | Aim for 55%+ Crit Chance, then go for Crit Damage rolls. The build works best when upgraded to Prototype with Paradox Augments! |
Build showcase:
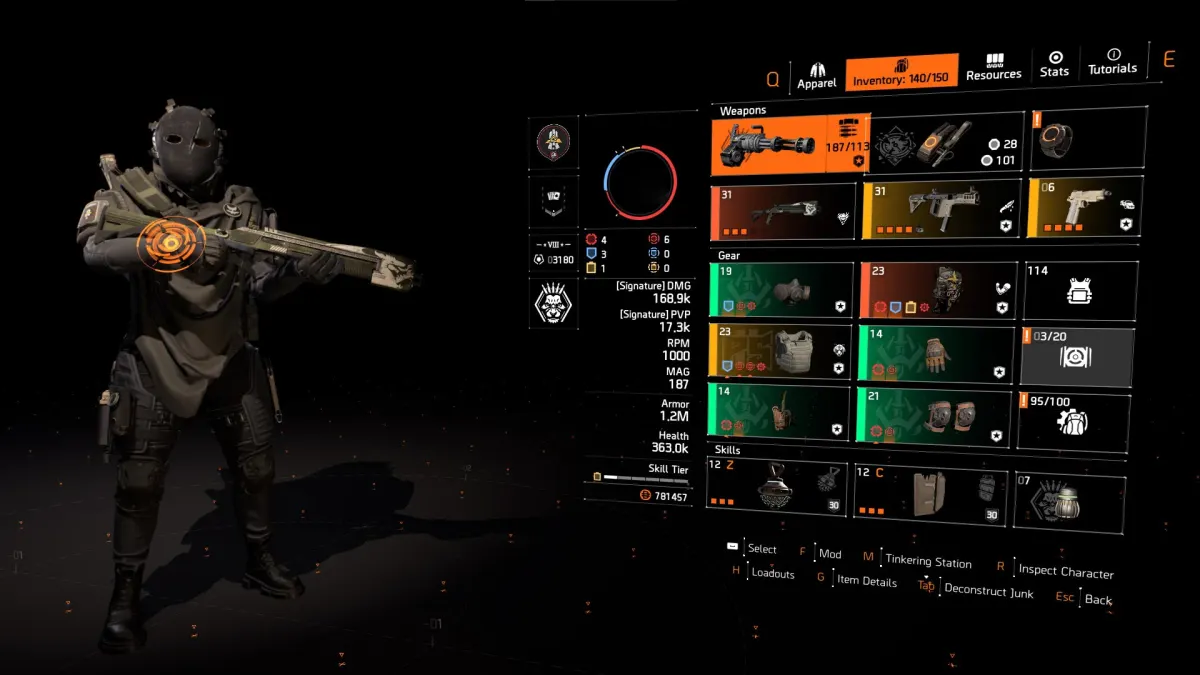
Build store link: Fafnir Hunter's Fury Build with Memento for Sale (variant 9).
10. Fafnir Hunter's Fury Build with Bloodsucker
| Build Component | Description |
| Weapon Slot #1 | Fafnir |
| Weapon Slot #2 | Any preferred weapon |
| Specialization | Gunner |
| Mask | Blue Core Hunter's Fury with Crit Chance or Crit Damage |
| Backpack | Blue Core Liquid Engineer with Crit Chance & Crit Damage |
| Chest | Blue Core Palisade with Crit Chance, Crit Damage & Intimidate |
| Gloves | Red Core Hunter's Fury with Crit Chance or Crit Damage |
| Holster | Red Core Hunter's Fury with Crit Chance or Crit Damage |
| Kneepads | Red Core Hunter's Fury with Crit Chance or Crit Damage |
| Gear Mods | Crit Chance | Crit Damage |
| Skills | Crusader Ballistic Shield | Reviver Hive |
| Pro Tip | Aim for 55%+ Crit Chance, then go for Crit Damage rolls. The build works best when upgraded to Prototype with Paradox Augments! |
Build showcase:
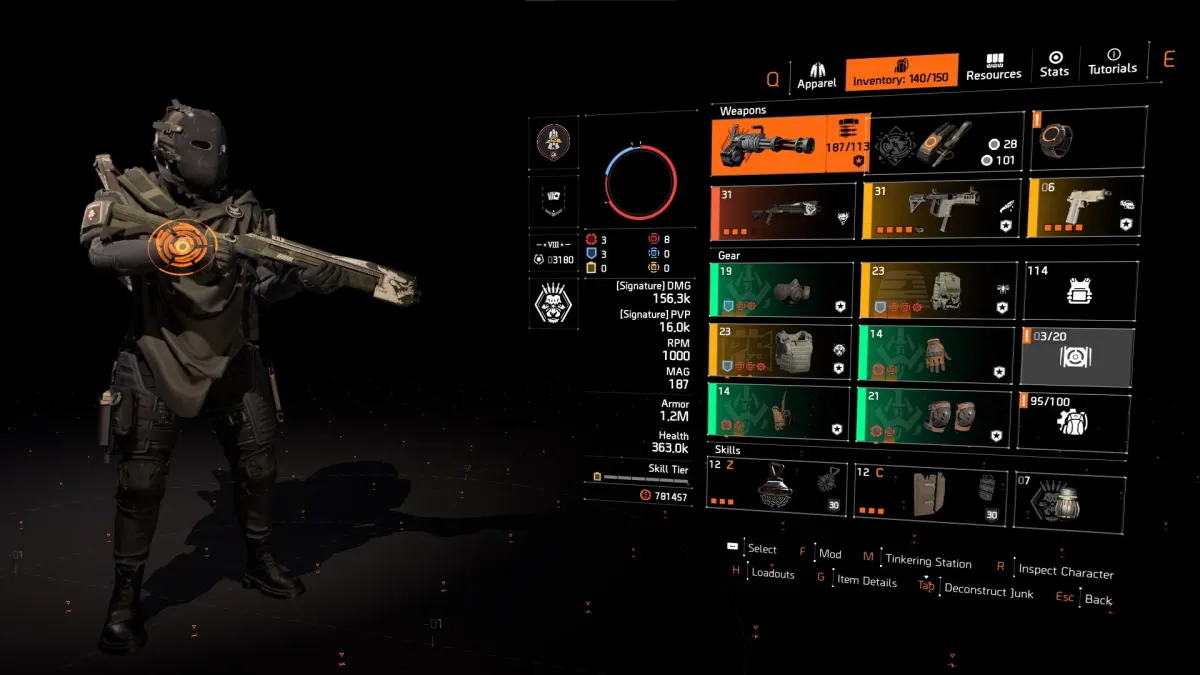
Build store link: Fafnir Hunter's Fury Build with Bloodsucker for Sale (variant 10).
Best Builds for Division 2 Escalation Missions
Our most popular builds for Division 2 Escalations are:
1. Red Striker DPS Build with Overdogs
| Build Component | Description |
| Weapon Slot #1 | St. Elmo's Engine |
| Weapon Slot #2 | GR9 or MK46 with Damage to Armor and Frenzy |
| Specialization | Gunner |
| Mask | Red Core Striker with Crit Chance or Crit Damage |
| Backpack | Red Core Striker with Crit Chance or Crit Damage |
| Chest | Red Core Equalizer with Crit Chance & Crit Damage |
| Gloves | Overdogs |
| Holster | Red Core Striker with Crit Chance or Crit Damage |
| Kneepads | Red Core Striker with Crit Chance or Crit Damage |
| Gear Mods | Crit Chance | Crit Damage |
| Skills | Crusader Ballistic Shield | Decoy | Pulse | Reviver Hive |
| Pro Tip | Aim for 55%+ Crit Chance, then use Crit Damage rolls and mods |
Build showcase:
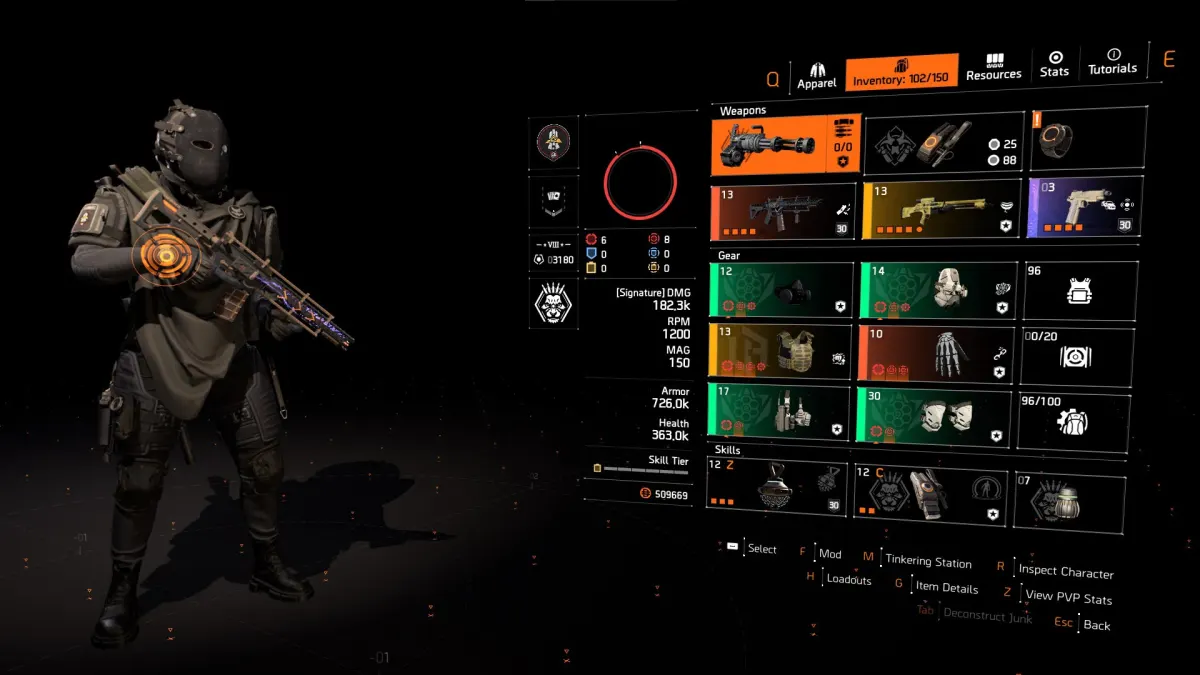
Build store link: Red Striker DPS Build with Overdogs for Sale (variant 1).
2. Tipping Scales LMG Build with Tinkerer
| Build Component | Description |
| Weapon Slot #1 | GR9 or MK46 with Damage to Armor and Frenzy |
| Weapon Slot #2 | GR9 or MK46 with Damage to Armor and Fast Hands |
| Specialization | Gunner |
| Mask | Tinkerer |
| Backpack | Red Core Tipping Scales with Crit Chance or Crit Damage |
| Chest | Red Core Tipping Scales with Crit Chance or Crit Damage |
| Gloves | Red Core Contractor's Gloves with Crit Chance or Crit Damage |
| Holster | Red Core Tipping Scales with Crit Chance or Crit Damage |
| Kneepads | Red Core Tipping Scales with Crit Chance or Crit Damage |
| Gear Mods | Crit Chance | Crit Damage |
| Skills | Defender Drone | Decoy | Reviver Hive | Banshee Pulse |
| Pro Tip | Aim for 60% Crit Chance, then use Crit Damage rolls and mods |
Build showcase:
Build store link: Tipping Scales LMG Build with Tinkerer for Sale (variant 2).
3. Glass Cannon Negotiator DPS Build
| Build Component | Description |
| Weapon Slot #1 | Bluescreen |
| Weapon Slot #2 | Any preferred weapon |
| Specialization | Gunner |
| Mask | Red Core Negotiator with Crit Chance or Crit Damage |
| Backpack | Red Core Negotiator with Crit Chance or Crit Damage |
| Chest | Red Core Ceska with Crit Chance, Crit Damage & Glass Cannon |
| Gloves | Overdogs |
| Holster | Red Core Negotiator with Crit Chance or Crit Damage |
| Kneepads | Red Core Negotiator with Crit Chance or Crit Damage |
| Gear Mods | Crit Chance | Crit Damage |
| Skills | Crusader Ballistic Shield | Decoy | Pulse | Reviver Hive |
| Pro Tip | Aim for 55%+ Crit Chance, then use Crit Damage rolls and mods |
Build showcase:
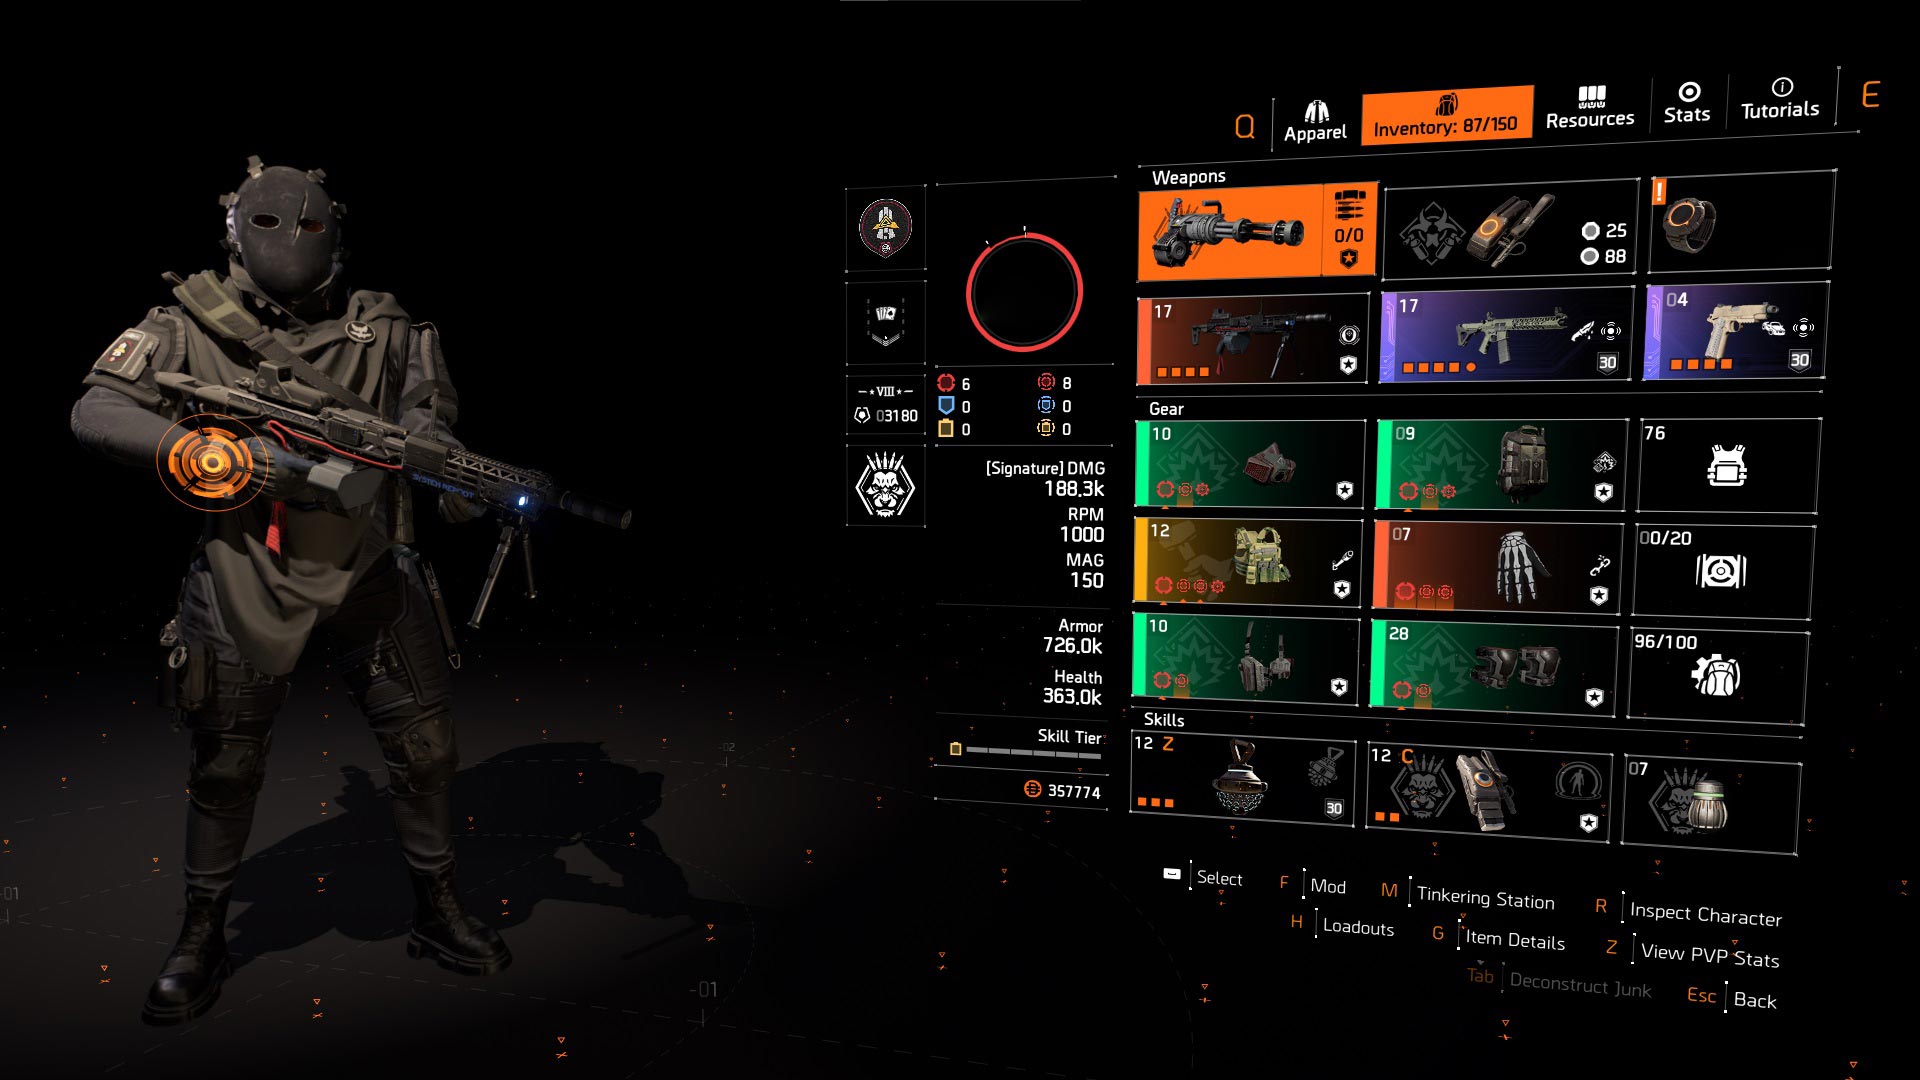
Build store link: Glass Cannon Negotiator DPS Build for Sale (variant 3).
4. Sheriff's Striker Build for Solo
| Build Component | Description |
| Weapon Slot #1 | Sheriff |
| Weapon Slot #2 | ACS-12 with DMG to target out of cover & Brazen |
| Specialization | Gunner |
| Mask | Red Core Striker with Crit Chance or Crit Damage |
| Backpack | Red Core Striker with Crit Chance or Crit Damage |
| Chest | Red Core Striker with Crit Chance or Crit Damage |
| Gloves | Overdogs |
| Holster | Red Core Striker with Crit Chance or Crit Damage |
| Kneepads | Red Core Fox's Prayer with Crit Chance or Crit Damage |
| Gear Mods | Crit Chance | Crit Damage |
| Skills | Crusader Ballistic Shield | Decoy | Pulse | Reviver Hive |
| Pro Tip | Aim for 50%+ Crit Chance, then go for Crit Damage rolls. The build works best when upgraded to Prototype with Paradox Augments! |
Build showcase:
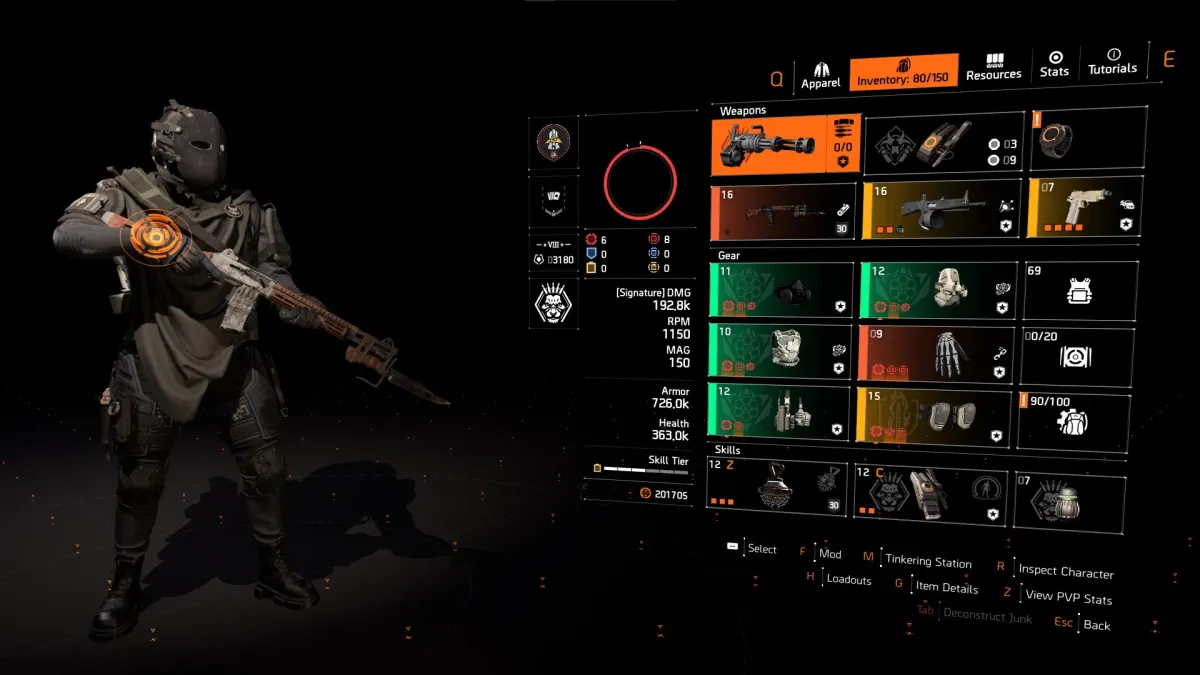
Build store link: Sheriff's Striker Build for Solo for Sale (variant 4).
5. Sheriff's Striker Build for Group
| Build Component | Description |
| Weapon Slot #1 | Sheriff |
| Weapon Slot #2 | ACS-12 with DMG to target out of cover & Brazen |
| Specialization | Firewall |
| Mask | Coyote's Mask |
| Backpack | Red Core The Setup with Crit Chance & Crit Damage |
| Chest | Red Core Striker with Crit Chance or Crit Damage |
| Gloves | Red Core Striker with Crit Chance or Crit Damage |
| Holster | Red Core Striker with Crit Chance or Crit Damage |
| Kneepads | Red Core Striker with Crit Chance or Crit Damage |
| Gear Mods | Crit Chance | Crit Damage |
| Skills | Striker Ballistic Shield | Decoy | Pulse | Reviver Hive |
| Pro Tip | Aim for 50%+ Crit Chance, then go for Crit Damage rolls. The build works best when upgraded to Prototype with Paradox Augments! |
Build showcase:
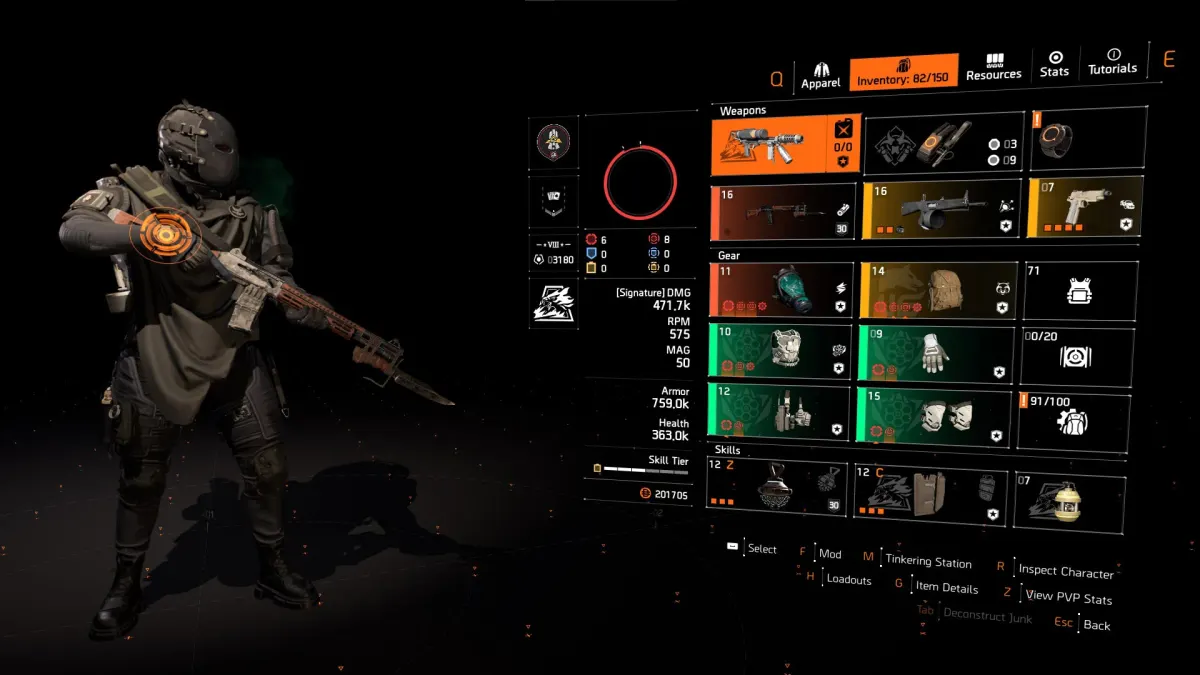
Build store link: Sheriff's Striker Build for Group for Sale (variant 5).
6. Refactor DPS/Support Skill Build
| Build Component | Description |
| Weapon Slot #1 | Scorpio or Capacitor |
| Weapon Slot #2 | Harmony or Mechanical Animal |
| Specialization | Survivalist |
| Mask | Yellow Core Refactor with Skill Damage |
| Backpack | Birdie's Quick Fix Pack |
| Chest | Yellow Core Refactor with Skill Damage |
| Gloves | Yellow Core Refactor with Skill Damage |
| Holster | Yellow Core Wyvern with Skill Damage & Skill Haste |
| Kneepads | Yellow Core Refactor with Skill Damage |
| Gear Mods | Skill Haste |
| Skills | Assault Turret | Striker Drone |
Build showcase:
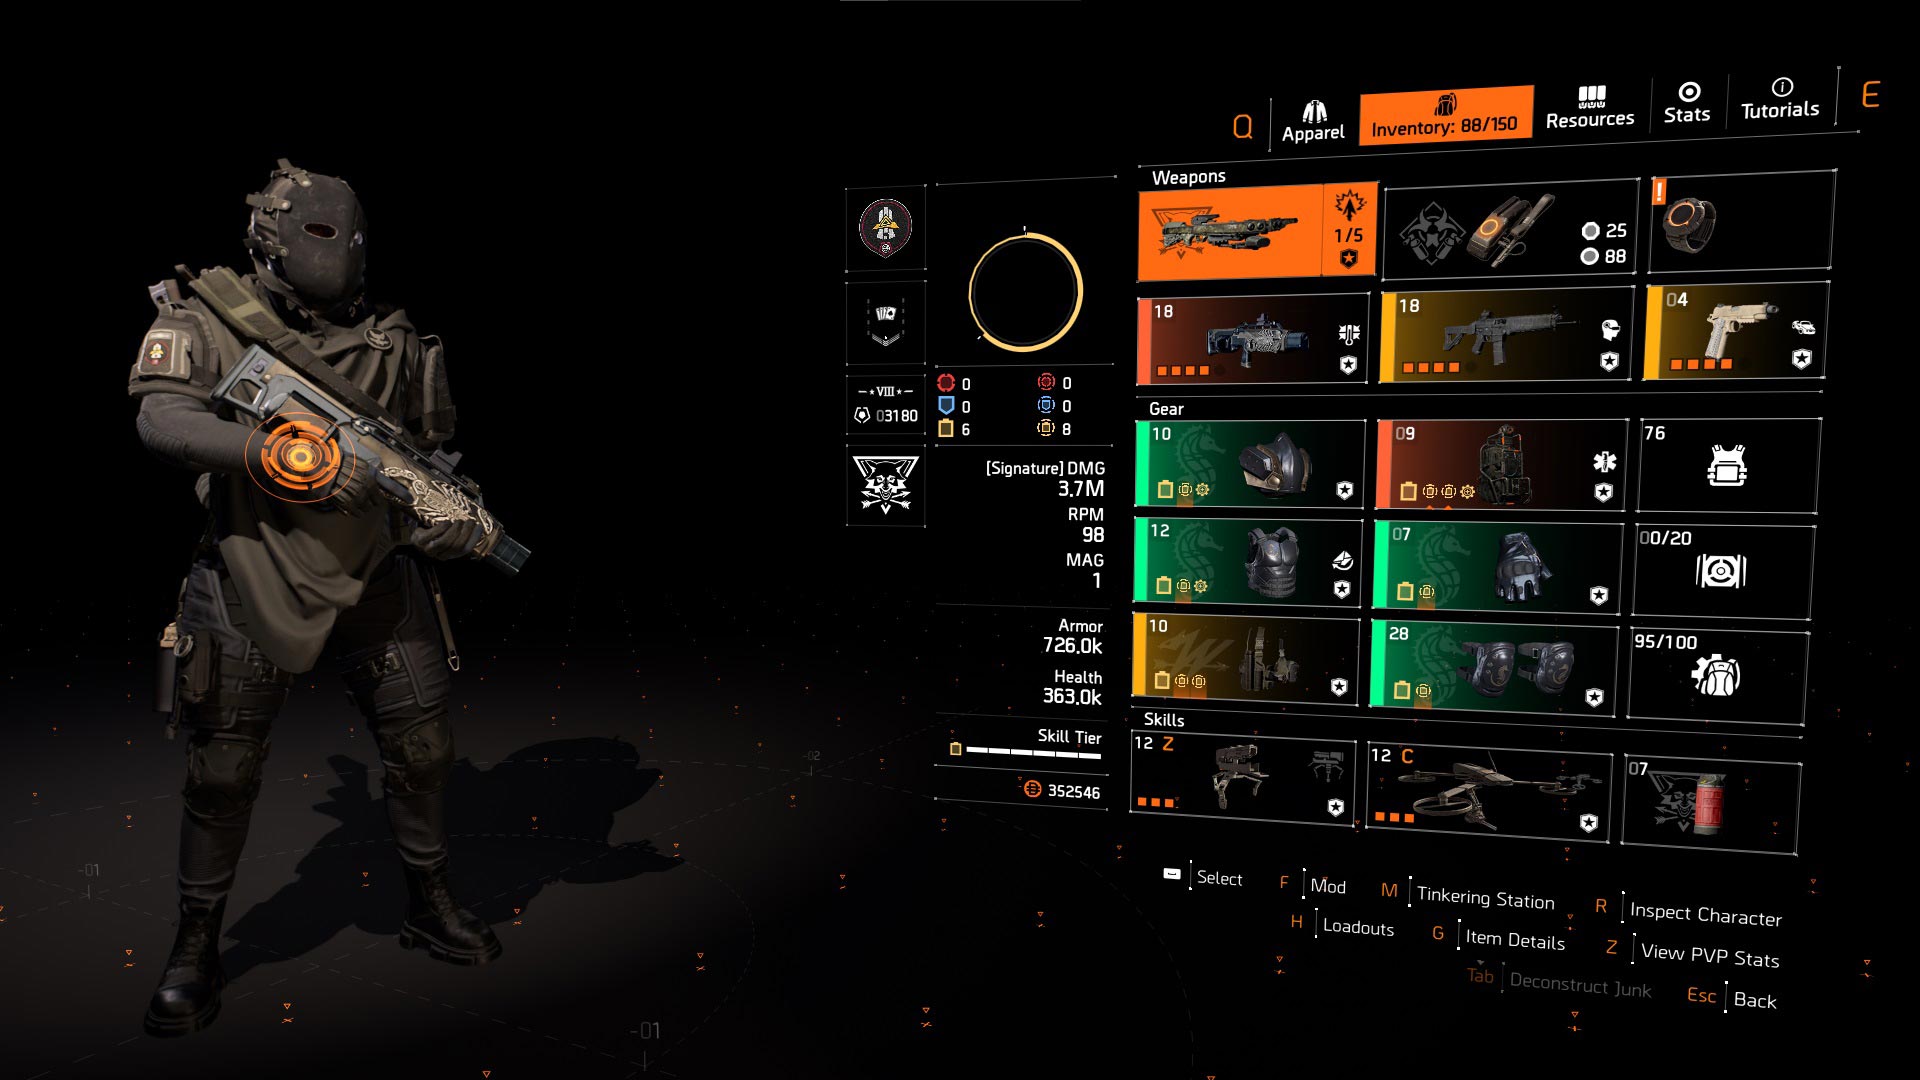
Build store link: Refactor DPS/Support Skill Build for Sale (variant 6).
7. Future Initiative Healer Build
| Build Component | Description |
| Weapon Slot #1 | Scorpio |
| Weapon Slot #2 | Lefty |
| Specialization | Survivalist |
| Mask | Yellow Core Future Initiative with Repair Skills |
| Backpack | Yellow Core Alps with Repair Skills, Skill Haste & Opportunistic |
| Chest | Yellow Core Future Initiative with Repair Skills |
| Gloves | BTSU Datagloves |
| Holster | Yellow Core Future Initiative with Repair Skills |
| Kneepads | Yellow Core Future Initiative with Repair Skills |
| Gear Mods | Repair Skills |
| Skills | Reinforcer Chem Launcher | Restorer Hive |
Build showcase:
Build store link: Future Initiative Healer Build for Sale (variant 7).
8. Eclipse Status Effect Foam Build
| Build Component | Description |
| Weapon Slot #1 | Scorpio |
| Weapon Slot #2 | Lefty |
| Specialization | Survivalist |
| Mask | Yellow Core Eclipse Protocol with Status Effects |
| Backpack | Yellow Core Electrique with Status Effects, Skill Haste & Creeping Death |
| Chest | Yellow Core Eclipse Protocol with Status Effects |
| Gloves | Yellow Core Eclipse Protocol with Status Effects |
| Holster | Yellow Core Golan with Status Effects & Skill Haste |
| Kneepads | Yellow Core Eclipse Protocol with Status Effects |
| Gear Mods | Skill Haste |
| Skills | Riot Foam Chem Launcher | Jammer Pulse |
Build showcase:
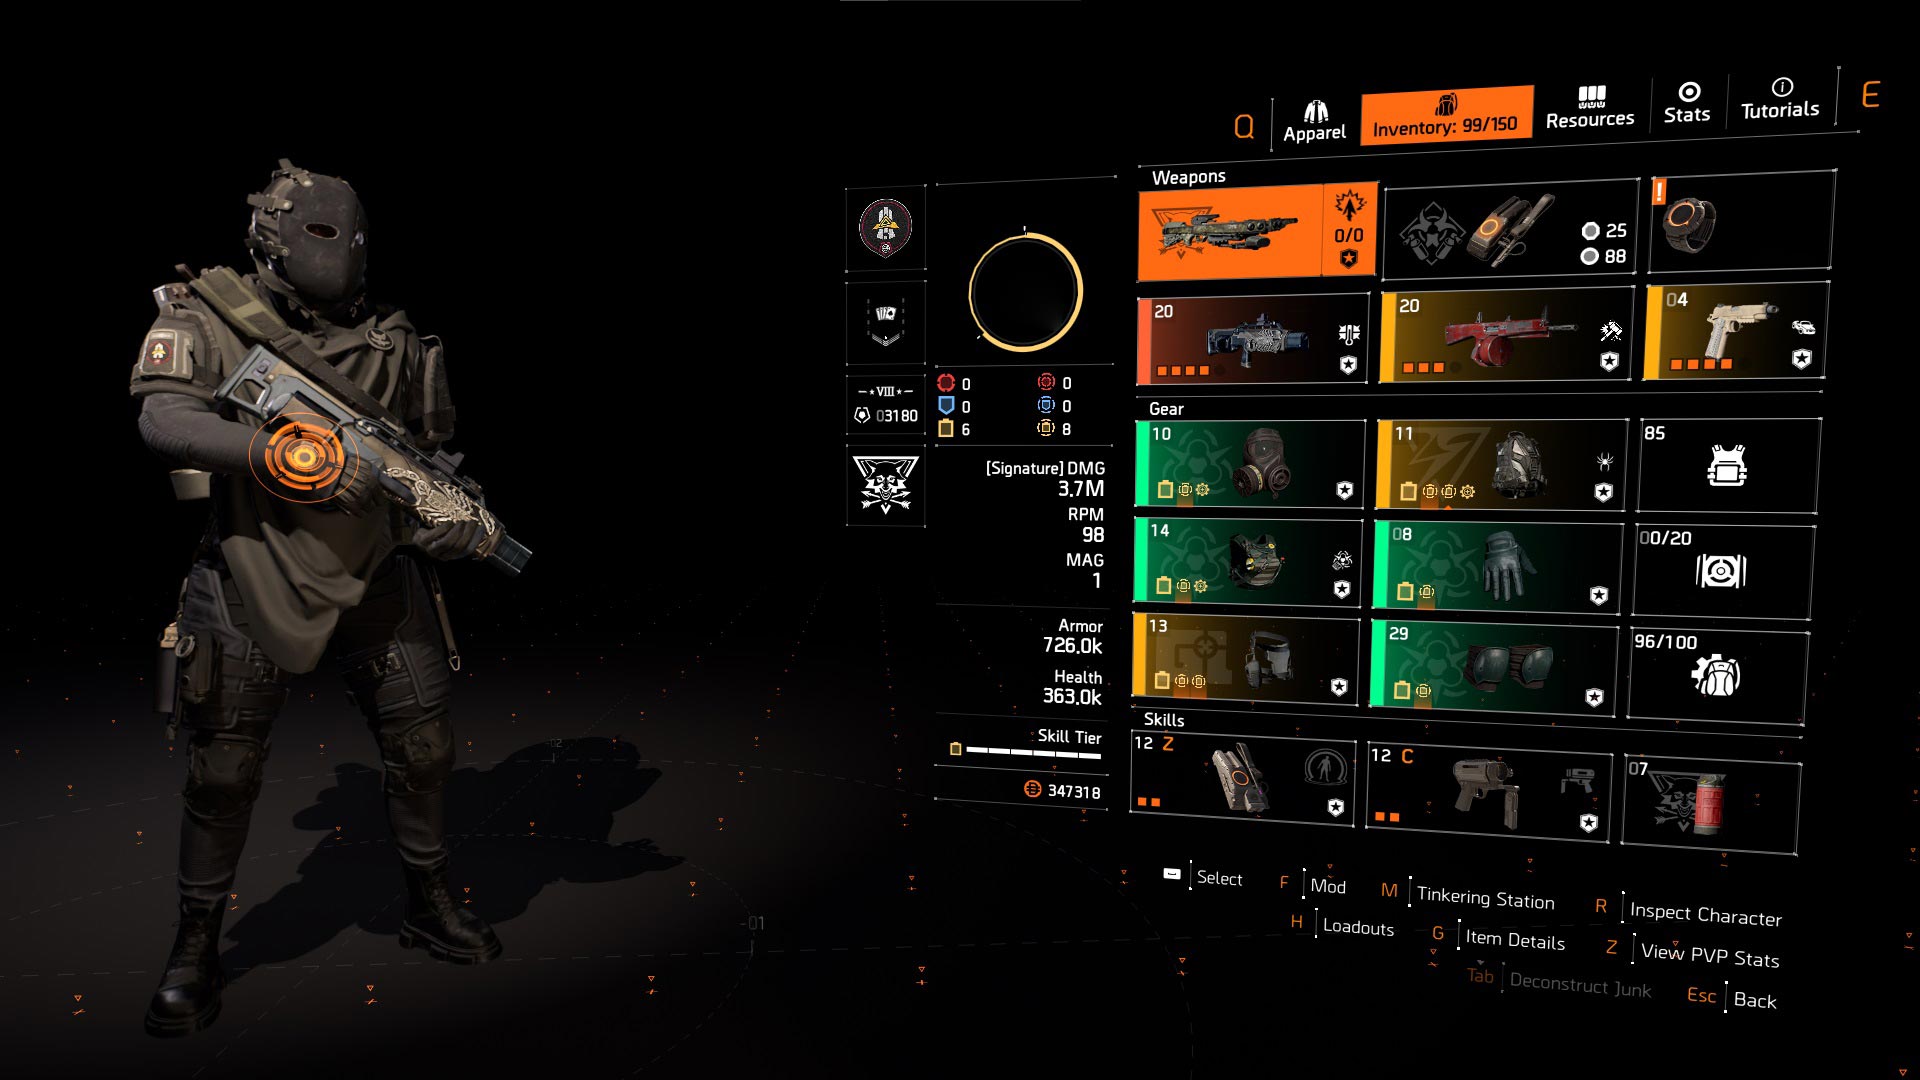
Build store link: Eclipse Status Effect Foam Build for Sale (variant 8).
Best Builds for Division 2 Incursions
Now let's check out what type of builds you need for Paradise Lost and Broken Rain Incursions. In both cases, players use 3 types of builds, as follows:
- DPS Builds
- Healer Builds
- Tank Builds
Division 2 Incursions are 4-player activities that can be easily completed using proper team coordination, communication, and build configuration. In most scenarios, you will always need 2x DPS builds and 1x healer build, leaving the 4th spot for either a final DPS or, sometimes, a tank build.
Below, we present our build recommendations for the Paradise Lost and Broken Rain Incursions:
1. St. Elmo's Striker Build with Overdogs & Equalizer
| Build Component | Description |
| Weapon Slot #1 | St. Elmo's Engine |
| Weapon Slot #2 | GR9 or MK46 with Damage to Armor and Frenzy |
| Specialization | Gunner |
| Mask | Red Core Striker with Crit Chance or Crit Damage |
| Backpack | Red Core Striker with Crit Chance or Crit Damage |
| Chest | Red Core Equalizer with Crit Chance & Crit Damage |
| Gloves | Overdogs |
| Holster | Red Core Striker with Crit Chance or Crit Damage |
| Kneepads | Red Core Striker with Crit Chance or Crit Damage |
| Gear Mods | Crit Chance | Crit Damage |
| Skills | Crusader Ballistic Shield | Decoy | Pulse | Reviver Hive |
| Pro Tip | Aim for 50%+ Crit Chance, then use Crit Damage rolls and mods |
Build showcase:
Build store link: St. Elmo's Striker Build with Overdogs & Equalizer for Sale (variant 1).
2. Striker Build with Coyote's Mask & Equalizer
| Build Component | Description |
| Weapon Slot #1 | St. Elmo's Engine |
| Weapon Slot #2 | Any preferred weapon |
| Specialization | Firewall |
| Mask | Coyote's Mask |
| Backpack | Red Core Striker with Crit Chance or Crit Damage |
| Chest | Red Core Equalizer with Crit Chance & Crit Damage |
| Gloves | Red Core Striker with Crit Chance or Crit Damage |
| Holster | Red Core Striker with Crit Chance or Crit Damage |
| Kneepads | Red Core Striker with Crit Chance or Crit Damage |
| Gear Mods | Crit Chance | Crit Damage |
| Skills | Striker Shield | Decoy | Pulse | Reviver Hive |
| Pro Tip | Aim for 50%+ Crit Chance, then use Crit Damage rolls and mods |
Build showcase:
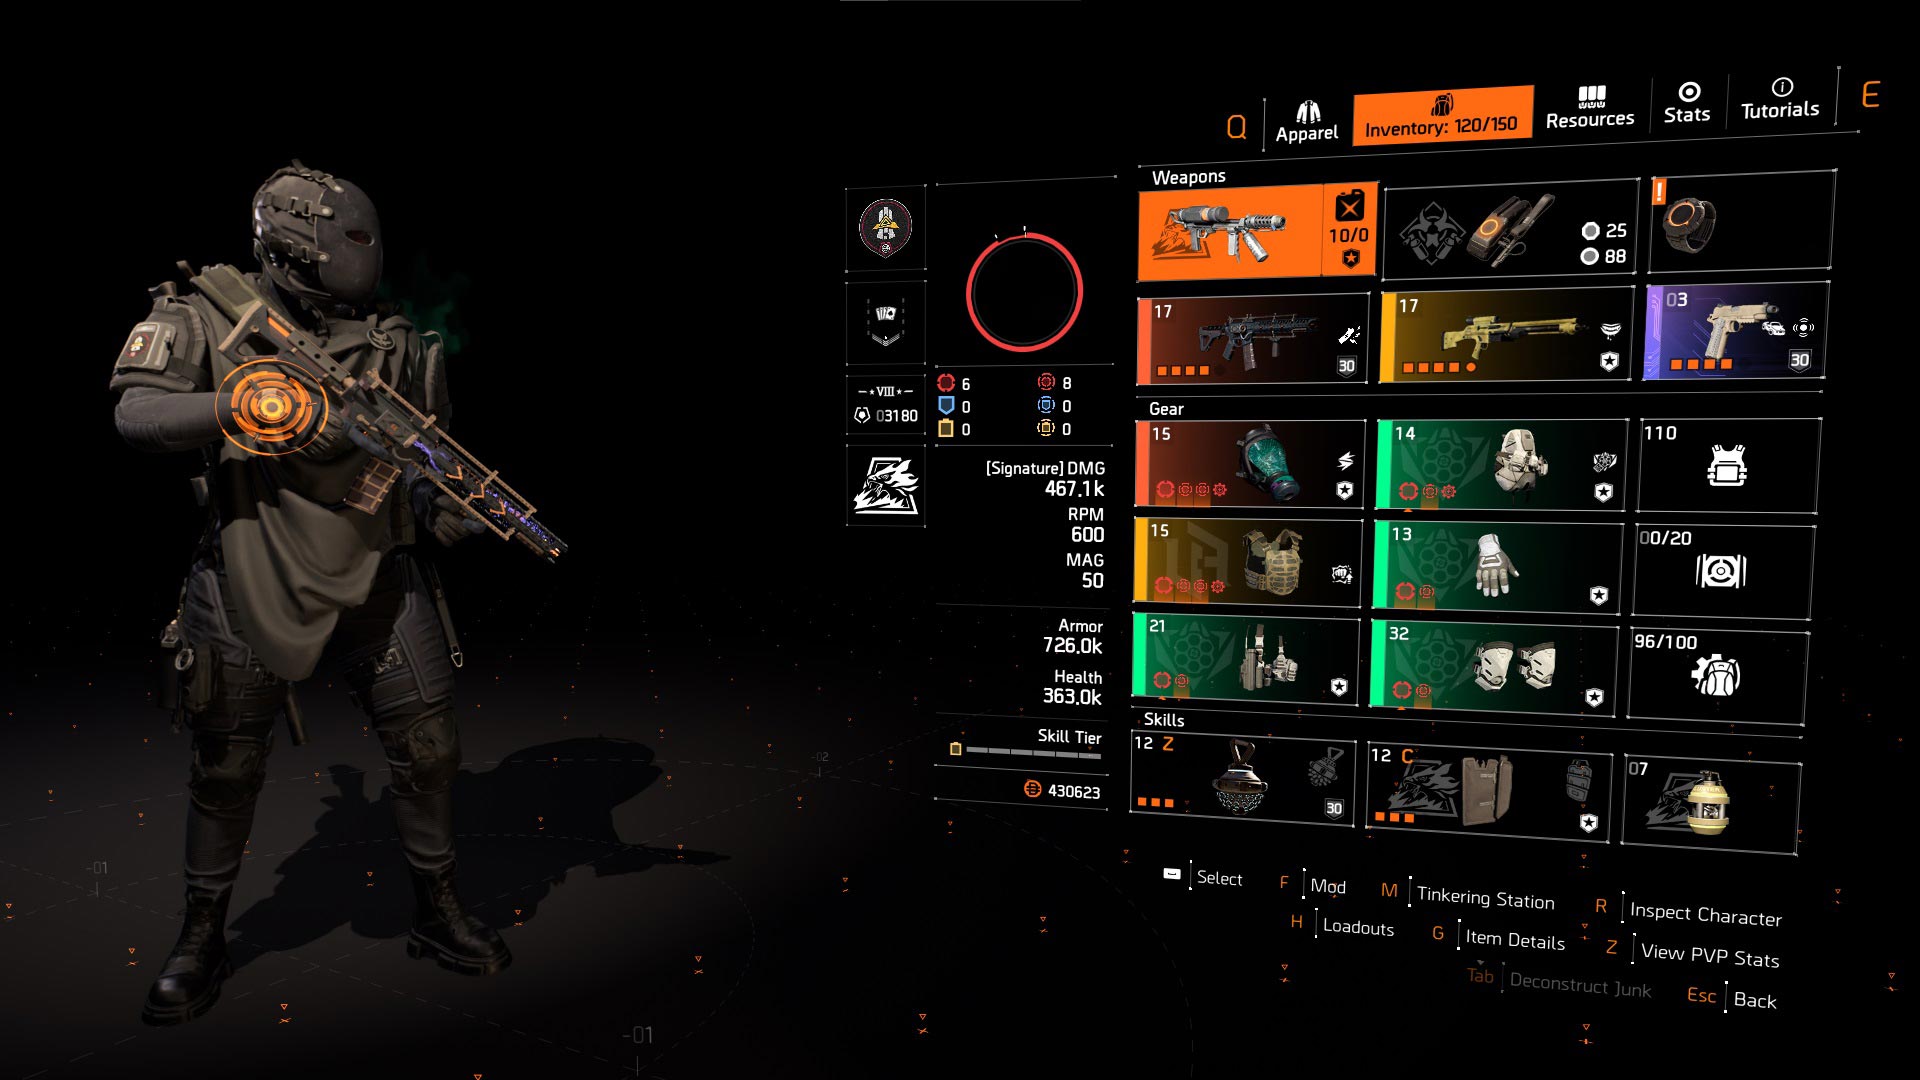
Build store link: Striker Build with Coyote's Mask & Equalizer for Sale (variant 2).
3. Striker Build with Overdogs & Fox's Prayer
| Build Component | Description |
| Weapon Slot #1 | St. Elmo's Engine |
| Weapon Slot #2 | GR9 or MK46 with Damage to Armor and Frenzy |
| Specialization | Gunner |
| Mask | Red Core Striker with Crit Chance or Crit Damage |
| Backpack | Red Core Striker with Crit Chance or Crit Damage |
| Chest | Red Core Striker with Crit Chance or Crit Damage |
| Gloves | Overdogs |
| Holster | Red Core Striker with Crit Chance or Crit Damage |
| Kneepads | Red Core Fox's Prayer with Crit Chance or Crit Damage |
| Gear Mods | Crit Chance | Crit Damage |
| Skills | Crusader Ballistic Shield | Decoy | Pulse | Reviver Hive |
| Pro Tip | Aim for 50%+ Crit Chance, then use Crit Damage rolls and mods |
Build showcase:
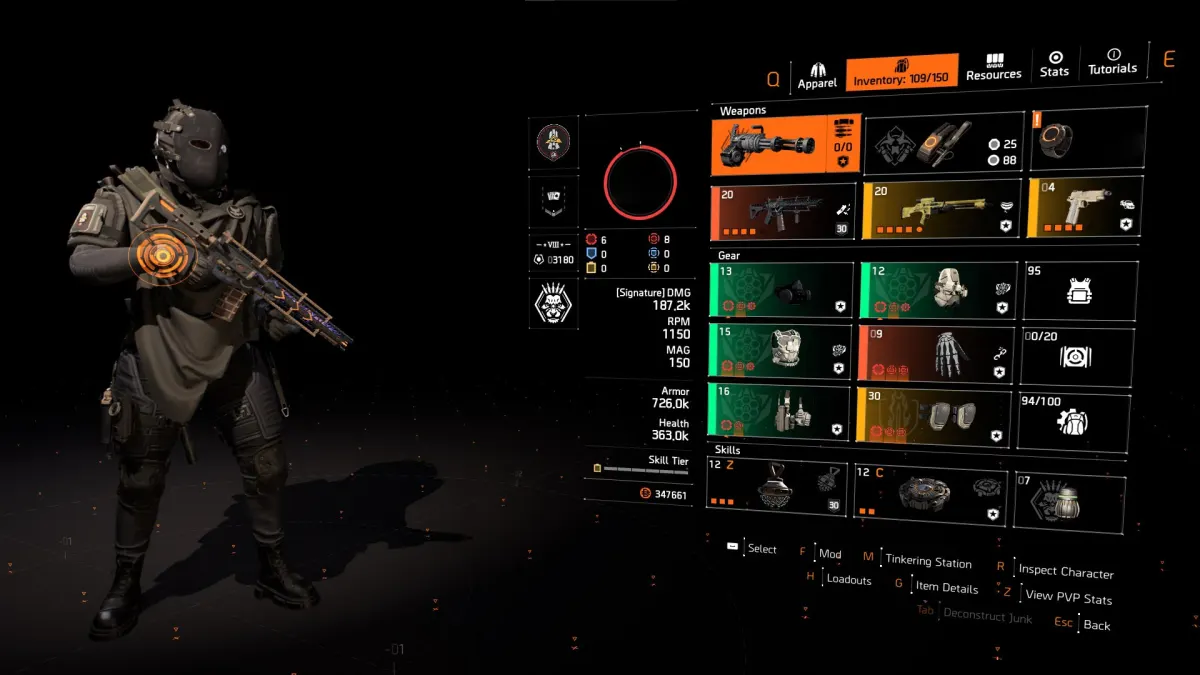
Build store link: Striker Build with Overdogs & Fox's Prayer for Sale (variant 3).
4. Future Initiative Birdie Healer Build
| Build Component | Description |
| Weapon Slot #1 | Scorpio |
| Weapon Slot #2 | Lefty |
| Specialization | Survivalist |
| Mask | Yellow Core Future Initiative with Repair Skills |
| Backpack | Birdie's Quick Fix Pack |
| Chest | Yellow Core Benefactor with Repair Skills & Skill Haste |
| Gloves | Yellow Core Future Initiative with Repair Skills |
| Holster | Yellow Core Future Initiative with Repair Skills |
| Kneepads | Yellow Core Future Initiative with Repair Skills |
| Gear Mods | Repair Skills |
| Skills | Reinforcer Chem Launcher | Restorer Hive |
Build showcase:
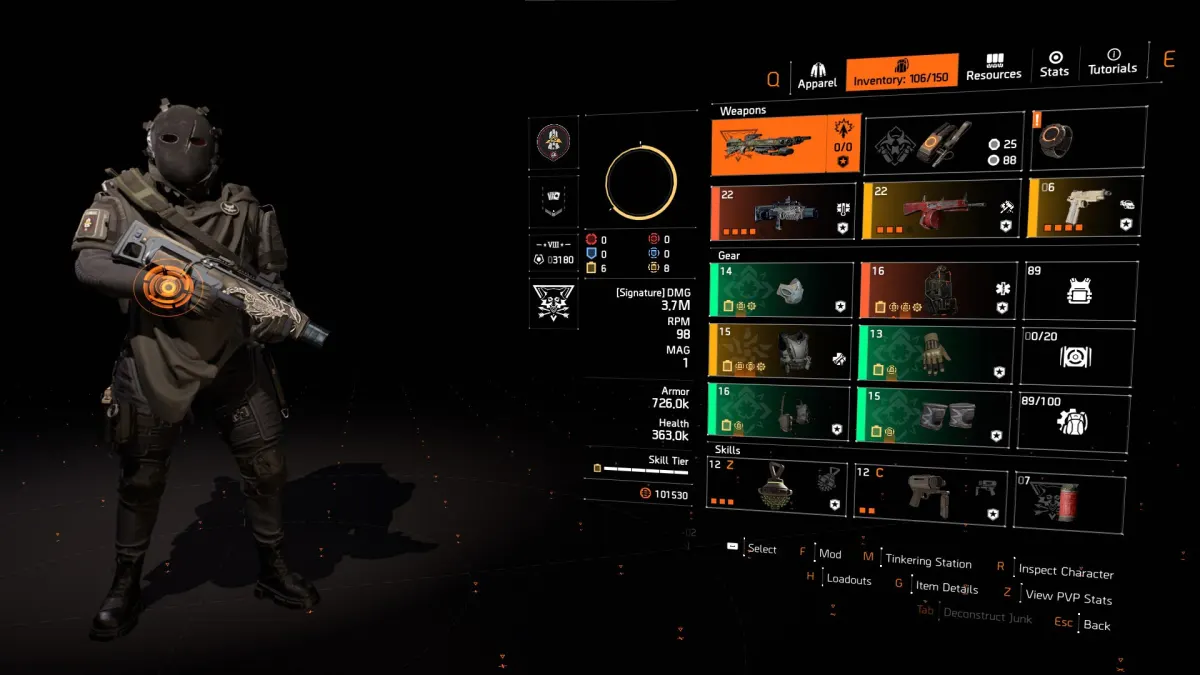
Build store link: Future Initiative Birdie Healer Build for Sale (variant 4).
5. Future Initiative BTSU Healer Build
| Build Component | Description |
| Weapon Slot #1 | Scorpio |
| Weapon Slot #2 | Lefty |
| Specialization | Survivalist |
| Mask | Yellow Core Future Initiative with Repair Skills |
| Backpack | Yellow Core Alps with Repair Skills, Skill Haste & Opportunistic |
| Chest | Yellow Core Future Initiative with Repair Skills |
| Gloves | BTSU Datagloves |
| Holster | Yellow Core Future Initiative with Repair Skills |
| Kneepads | Yellow Core Future Initiative with Repair Skills |
| Gear Mods | Repair Skills |
| Skills | Reinforcer Chem Launcher | Restorer Hive |
Build showcase:
Build store link: Future Initiative BTSU Healer Build for Sale (variant 5).
6. Protection From Elites Tank Build
| Build Component | Description |
| Weapon Slot #1 | Any preferred weapon |
| Weapon Slot #2 | Any preferred weapon |
| Weapon Slot #3 | Quickstep |
| Specialization | Survivalist |
| Mask | Blue Core Gila with Armor Regen & Hazard Protection |
| Backpack | Blue Core Belstone with Armor Regen, Hazard Protection & Adrenaline Rush |
| Chest | Provocator |
| Gloves | Blue Core Improvised Gloves with Armor Regen & Hazard Protection |
| Holster | Blue Core Improvised Holster with Armor Regen & Hazard Protection |
| Kneepads | Blue Core Emperor's Guard |
| Gear Mods | Protection from Elites |
| Skills | Reviver Hive | Decoy |
Build showcase:
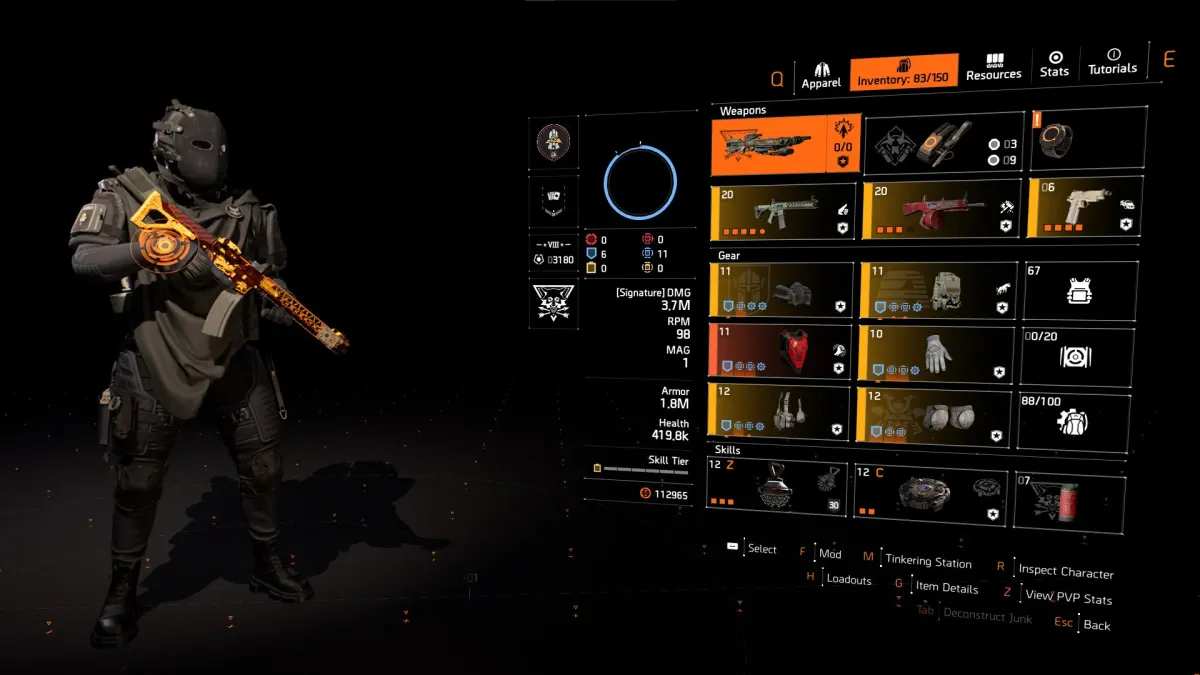
Build store link: Protection From Elites Tank Build for Sale (variant 6).
7. Eclipse BTSU Foam Build
| Build Component | Description |
| Weapon Slot #1 | Scorpio |
| Weapon Slot #2 | Lefty |
| Specialization | Survivalist |
| Mask | Yellow Core Eclipse Protocol with Status Effects |
| Backpack | Yellow Core Electrique with Status Effects, Skill Haste & Creeping Death |
| Chest | Yellow Core Eclipse Protocol with Status Effects |
| Gloves | BTSU Datagloves |
| Holster | Yellow Core Eclipse Protocol with Status Effects |
| Kneepads | Yellow Core Eclipse Protocol with Status Effects |
| Gear Mods | Skill Haste |
| Skills | Restorer Hive | Riot Foam Chem Launcher |
Build showcase:
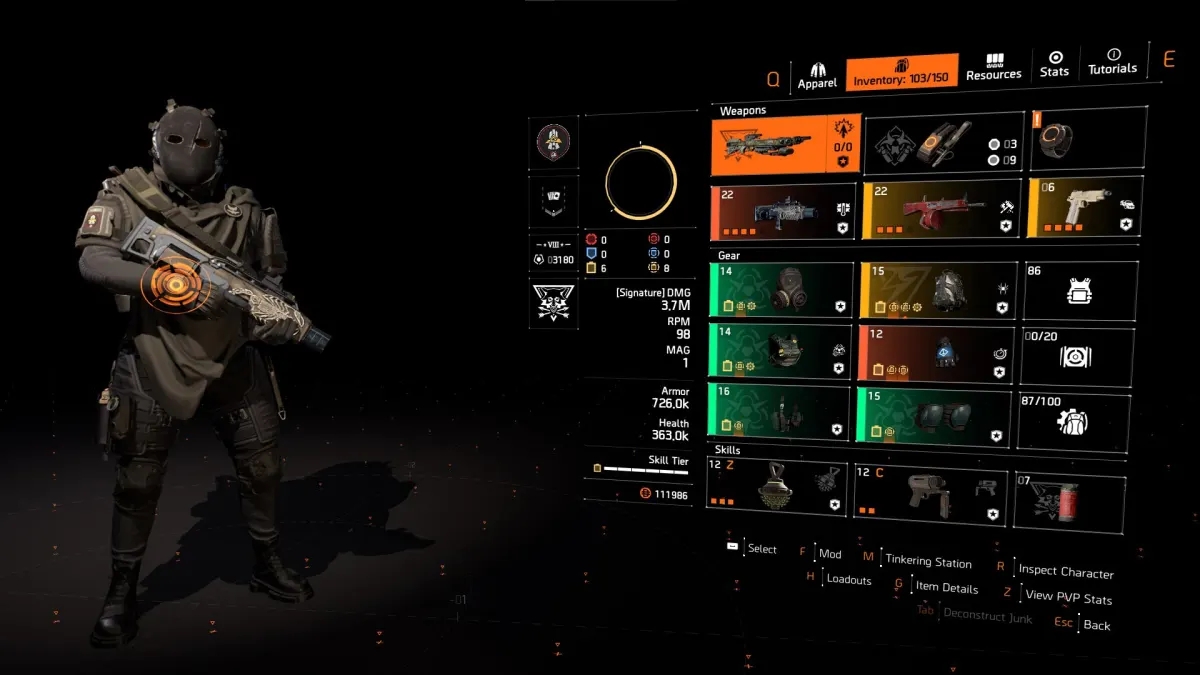
Build store link: Eclipse BTSU Foam Build for Sale (variant 7).
8. Foundry Tank Build
| Build Component | Description |
| Weapon Slot #1 | Any preferred weapon |
| Weapon Slot #2 | Any preferred weapon |
| Weapon Slot #3 | Liberty |
| Specialization | Technician |
| Mask | Blue Core Foundry with Armor Regen or Hazard Protection |
| Backpack | Blue Core Gila with Armor Regen, Hazard Protection & Adrenaline Rush |
| Chest | Blue Core Belstone with Armor Regen, Hazard Protection & Vanguard |
| Gloves | Blue Core Foundry with Armor Regen or Hazard Protection |
| Holster | Blue Core Foundry with Armor Regen or Hazard Protection |
| Kneepads | Blue Core Foundry with Armor Regen or Hazard Protection |
| Gear Mods | Protection from Elites |
| Skills | Artificer Hive | Deflector Shield |
Build showcase:
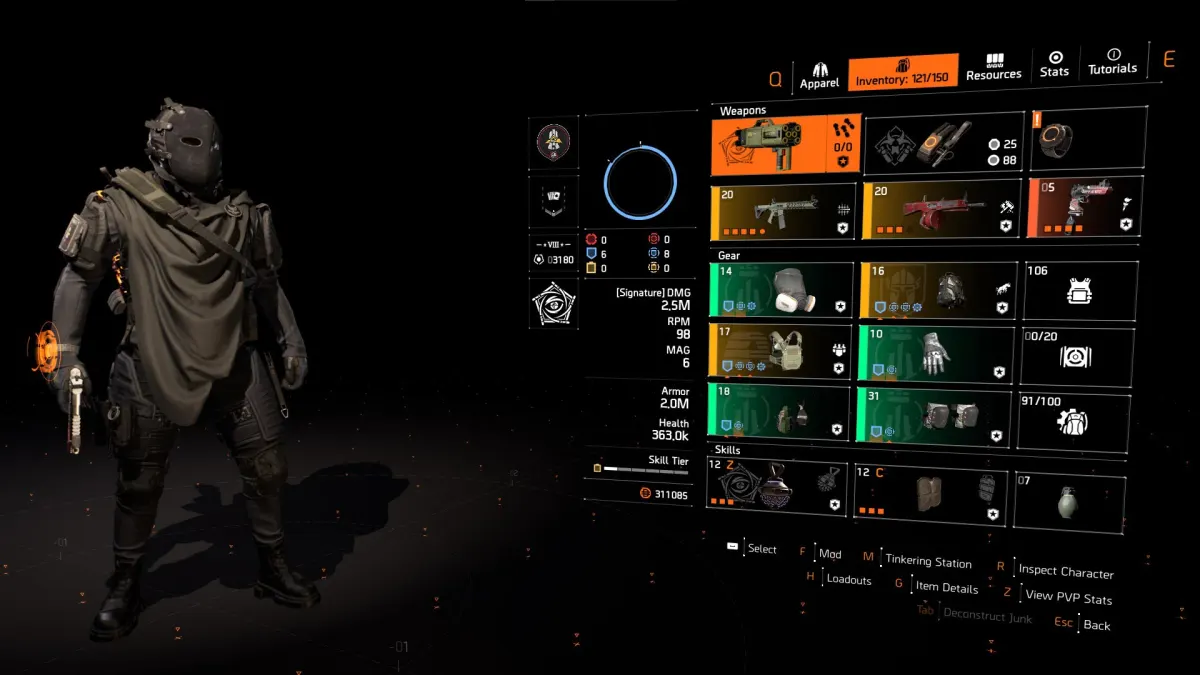
Build store link: Foundry Tank Build for Sale.
Remember, these are just our personal build recommendations for the Paradise Lost and Broken Rain Incursions. Feel free to customize your own build and always use whatever seems best for you!
Best Raid Builds for The Division 2 in the current meta (2026)
This section covers the must-have builds that shouldn't be missing from any raid setup. Apart from great team skills and communication, Division 2 raids also require some particular loadouts to run through.
These builds are specially designed to cover the key roles in The Dark Hours and The Iron Horse raids. So whether you want to be the tank, the healer, or one of the damage dealers in the raid, we've got the perfect build.
The best raid builds for Division 2 in 2026 are:
- Striker DPS Builds
- Tipping Scales DPS Build
- Glass Cannon Negotiator Build
- Future Initiative Healer Build
- Foundry Tank Build
- Eclipse Status Effects Foam Build
1. St. Elmo's Striker Build with Overdogs & Equalizer
| Build Component | Description |
| Weapon Slot #1 | St. Elmo's Engine |
| Weapon Slot #2 | GR9 or MK46 with Damage to Armor and Frenzy |
| Specialization | Gunner |
| Mask | Red Core Striker with Crit Chance or Crit Damage |
| Backpack | Red Core Striker with Crit Chance or Crit Damage |
| Chest | Red Core Equalizer with Crit Chance & Crit Damage |
| Gloves | Overdogs |
| Holster | Red Core Striker with Crit Chance or Crit Damage |
| Kneepads | Red Core Striker with Crit Chance or Crit Damage |
| Gear Mods | Crit Chance | Crit Damage |
| Skills | Crusader Ballistic Shield | Decoy | Pulse | Reviver Hive |
| Pro Tip | Aim for 50%+ Crit Chance, then use Crit Damage rolls and mods |
Build showcase:
Build store link: St. Elmo's Striker Build with Overdogs & Equalizer for Sale (variant 1).
2. Striker Build with Coyote's Mask & Equalizer
| Build Component | Description |
| Weapon Slot #1 | St. Elmo's Engine |
| Weapon Slot #2 | Any preferred weapon |
| Specialization | Firewall |
| Mask | Coyote's Mask |
| Backpack | Red Core Striker with Crit Chance or Crit Damage |
| Chest | Red Core Equalizer with Crit Chance & Crit Damage |
| Gloves | Red Core Striker with Crit Chance or Crit Damage |
| Holster | Red Core Striker with Crit Chance or Crit Damage |
| Kneepads | Red Core Striker with Crit Chance or Crit Damage |
| Gear Mods | Crit Chance | Crit Damage |
| Skills | Striker Shield | Decoy | Pulse | Reviver Hive |
| Pro Tip | Aim for 50%+ Crit Chance, then use Crit Damage rolls and mods |
Build showcase:
Build store link: Striker Build with Coyote's Mask & Equalizer for Sale (variant 2).
3. Striker Build with Overdogs & Fox's Prayer
| Build Component | Description |
| Weapon Slot #1 | St. Elmo's Engine |
| Weapon Slot #2 | GR9 or MK46 with Damage to Armor and Frenzy |
| Specialization | Gunner |
| Mask | Red Core Striker with Crit Chance or Crit Damage |
| Backpack | Red Core Striker with Crit Chance or Crit Damage |
| Chest | Red Core Striker with Crit Chance or Crit Damage |
| Gloves | Overdogs |
| Holster | Red Core Striker with Crit Chance or Crit Damage |
| Kneepads | Red Core Fox's Prayer with Crit Chance or Crit Damage |
| Gear Mods | Crit Chance | Crit Damage |
| Skills | Crusader Ballistic Shield | Decoy | Pulse | Reviver Hive |
| Pro Tip | Aim for 50%+ Crit Chance, then use Crit Damage rolls and mods |
Build showcase:
Build store link: Striker Build with Overdogs & Fox's Prayer for Sale (variant 3).
4. Tipping Scales LMG Build with Tinkerer
| Build Component | Description |
| Weapon Slot #1 | GR9 or MK46 with Damage to Armor and Frenzy |
| Weapon Slot #2 | GR9 or MK46 with Damage to Armor and Fast Hands |
| Specialization | Gunner |
| Mask | Tinkerer |
| Backpack | Red Core Tipping Scales with Crit Chance or Crit Damage |
| Chest | Red Core Tipping Scales with Crit Chance or Crit Damage |
| Gloves | Red Core Contractor's Gloves with Crit Chance or Crit Damage |
| Holster | Red Core Tipping Scales with Crit Chance or Crit Damage |
| Kneepads | Red Core Tipping Scales with Crit Chance or Crit Damage |
| Gear Mods | Crit Chance | Crit Damage |
| Skills | Defender Drone | Decoy | Reviver Hive | Banshee Pulse |
| Pro Tip | Aim for 60% Crit Chance, then use Crit Damage rolls and mods |
Build showcase:
Build store link: Tipping Scales LMG Build with Tinkerer for Sale (variant 4).
5. Glass Cannon Negotiator DPS Build
| Build Component | Description |
| Weapon Slot #1 | Bluescreen |
| Weapon Slot #2 | Any preferred weapon |
| Specialization | Gunner |
| Mask | Red Core Negotiator with Crit Chance or Crit Damage |
| Backpack | Red Core Negotiator with Crit Chance or Crit Damage |
| Chest | Red Core Ceska with Crit Chance, Crit Damage & Glass Cannon |
| Gloves | Overdogs |
| Holster | Red Core Negotiator with Crit Chance or Crit Damage |
| Kneepads | Red Core Negotiator with Crit Chance or Crit Damage |
| Gear Mods | Crit Chance | Crit Damage |
| Skills | Crusader Ballistic Shield | Decoy | Pulse | Reviver Hive |
| Pro Tip | Aim for 55%+ Crit Chance, then use Crit Damage rolls and mods |
Build showcase:
Build store link: Glass Cannon Negotiator DPS Build for Sale (variant 5).
6. Future Initiative Healer Build
| Build Component | Description |
| Weapon Slot #1 | Scorpio |
| Weapon Slot #2 | Lefty |
| Specialization | Survivalist |
| Mask | Yellow Core Future Initiative with Repair Skills |
| Backpack | Yellow Core Alps with Repair Skills, Skill Haste & Opportunistic |
| Chest | Yellow Core Future Initiative with Repair Skills |
| Gloves | BTSU Datagloves |
| Holster | Yellow Core Future Initiative with Repair Skills |
| Kneepads | Yellow Core Future Initiative with Repair Skills |
| Gear Mods | Repair Skills |
| Skills | Reinforcer Chem Launcher | Restorer Hive |
Build showcase:
Build store link: Future Initiative Healer Build for Sale (variant 6).
7. Foundry Tank Build
| Build Component | Description |
| Weapon Slot #1 | Any preferred weapon |
| Weapon Slot #2 | Any preferred weapon |
| Weapon Slot #3 | Liberty |
| Specialization | Technician |
| Mask | Blue Core Foundry with Armor Regen or Hazard Protection |
| Backpack | Blue Core Gila with Armor Regen, Hazard Protection & Adrenaline Rush |
| Chest | Blue Core Belstone with Armor Regen, Hazard Protection & Vanguard |
| Gloves | Blue Core Foundry with Armor Regen or Hazard Protection |
| Holster | Blue Core Foundry with Armor Regen or Hazard Protection |
| Kneepads | Blue Core Foundry with Armor Regen or Hazard Protection |
| Gear Mods | Protection from Elites |
| Skills | Artificer Hive | Deflector Shield |
Build showcase:
Build store link: Foundry Tank Build for Sale (variant 7).
8. Eclipse Status Effect Foam Build
| Build Component | Description |
| Weapon Slot #1 | Scorpio |
| Weapon Slot #2 | Lefty |
| Specialization | Survivalist |
| Mask | Yellow Core Eclipse Protocol with Status Effects |
| Backpack | Yellow Core Electrique with Status Effects, Skill Haste & Creeping Death |
| Chest | Yellow Core Eclipse Protocol with Status Effects |
| Gloves | Yellow Core Eclipse Protocol with Status Effects |
| Holster | Yellow Core Golan with Status Effects & Skill Haste |
| Kneepads | Yellow Core Eclipse Protocol with Status Effects |
| Gear Mods | Skill Haste |
| Skills | Riot Foam Chem Launcher | Jammer Pulse |
Build showcase:
Build store link: Eclipse Status Effect Foam Build for Sale (variant 8).
9. Eclipse BTSU Foam Build
| Build Component | Description |
| Weapon Slot #1 | Scorpio |
| Weapon Slot #2 | Lefty |
| Specialization | Survivalist |
| Mask | Yellow Core Eclipse Protocol with Status Effects |
| Backpack | Yellow Core Electrique with Status Effects, Skill Haste & Creeping Death |
| Chest | Yellow Core Eclipse Protocol with Status Effects |
| Gloves | BTSU Datagloves |
| Holster | Yellow Core Eclipse Protocol with Status Effects |
| Kneepads | Yellow Core Eclipse Protocol with Status Effects |
| Gear Mods | Skill Haste |
| Skills | Restorer Hive | Riot Foam Chem Launcher |
Build showcase:
Build store link: Eclipse BTSU Foam Build for Sale (variant 9).
These are the best raid builds you should use if you want a smooth raiding experience in Division 2. In terms of difficulty, the raid builds are some of the most accessible builds to get as they don't rely on that many rare items or perfect rolls on the gear.
Best XP & SHD Farming Builds in The Division 2
In this section we will go through the best builds for fast SHD Watch & Seasonal Leveling. These builds can easily clear Heroic activities with 5 directives for maximum XP gains.
1. One-Shot Hotshot Sniper Build
| Build Component | Description |
| Weapon Slot #1 | Prima Donna |
| Weapon Slot #2 | Any preferred weapon |
| Specialization | Sharpshooter |
| Mask | Red Core Hotshot with Headshot Damage |
| Backpack | Red Core Airaldi with Headshot Damage, Weapon Handling & Vigilance |
| Chest | Iron Will |
| Gloves | Red Core Hotshot with Headshot Damage |
| Holster | Red Core Hotshot with Headshot Damage |
| Kneepads | Red Core Hotshot with Headshot Damage |
| Gear Mods | Headshot Damage |
| Skills | Decoy | Defender Drone | Reviver Hive |
Build store link: One-Shot Hotshot Sniper Build for Sale (variant 1).
2. One-Shot Regulus Build with Memento
| Build Component | Description |
| Weapon Slot #1 | Model 700 or SR1 with DMG to target out of cover & Determined |
| Weapon Slot #2 | 1886 with DMG to target out of cover & Determined |
| Weapon Slot #3 | Regulus |
| Specialization | Technician |
| Mask | Red Core Punch Drunk with Headshot Damage & Weapon Handling |
| Backpack | Memento |
| Chest | Red Core Chainkiller with Headshot Damage & Weapon Handling |
| Gloves | Red Core Contractor's Gloves with Headshot Damage |
| Holster | Red Core Providence with Headshot Damage & Weapon Handling |
| Kneepads | Red Core Turmoil with Headshot Damage |
| Gear Mods | Headshot Damage |
| Skills | Bulwark Ballistic Shield | Decoy | Pulse | Reviver Hive |
Build showcase:
Build store link: One-Shot Regulus Build with Memento for Sale (variant 2).
3. One-Shot Pistol Build with The Harvest
| Build Component | Description |
| Weapon Slot #1 | Model 700 or SR1 with DMG to target out of cover & Determined |
| Weapon Slot #2 | 1886 with DMG to target out of cover & Determined |
| Weapon Slot #3 | The Harvest with DMG to target out of cover & Determined |
| Specialization | Gunner |
| Mask | Red Core Punch Drunk with Headshot Damage & Weapon Handling |
| Backpack | Red Core Imminence Armaments with Headshot Damage, Weapon Handling & Vigilance |
| Chest | Red Core Imminence Armaments with Headshot Damage, Weapon Handling & Headhunter |
| Gloves | Overdogs |
| Holster | Red Core Imminence Armaments with Headshot Damage |
| Kneepads | Red Core Turmoil with Headshot Damage |
| Gear Mods | Headshot Damage |
| Skills | Bulwark Ballistic Shield | Decoy | Pulse | Reviver Hive |
Build showcase:
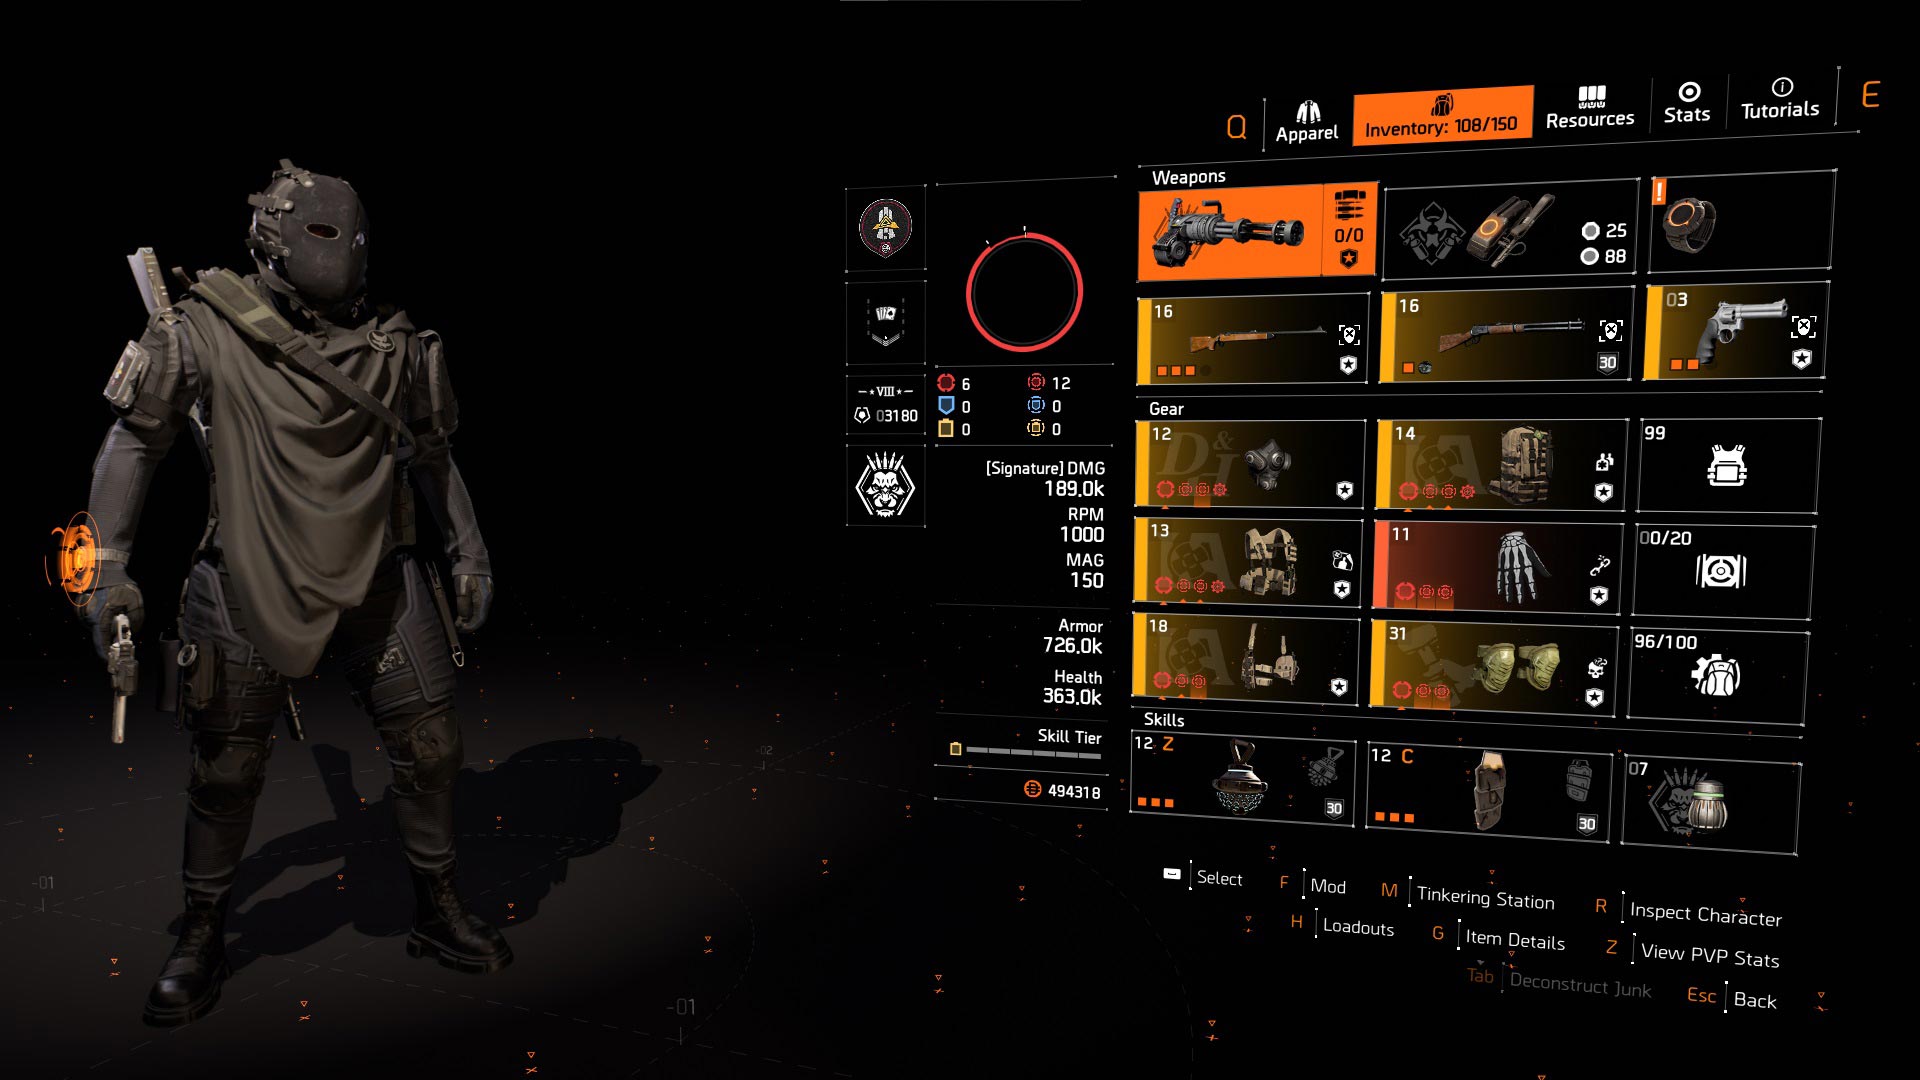
Build store link: One-Shot Pistol Build with The Harvest for Sale (variant 3).
4. Headhunter's Fury Determined Build
| Build Component | Description |
| Weapon Slot #1 | 1886 Rifle with DMG to target out of cover & Determined |
| Weapon Slot #2 | Nemesis |
| Specialization | Sharpshooter |
| Mask | Red Core Hunter's Fury with Headshot Damage |
| Backpack | Memento |
| Chest | Red Core Chainkiller with Headshot Damage & Weapon Handling |
| Gloves | Blue Core Hunter's Fury with Headshot Damage |
| Holster | Blue Core Hunter's Fury with Headshot Damage |
| Kneepads | Blue Core Hunter's Fury with Headshot Damage |
| Gear Mods | Headshot Damage |
| Skills | Crusader Ballistic Shield | Drone | Decoy | Reviver Hive |
Build showcase:
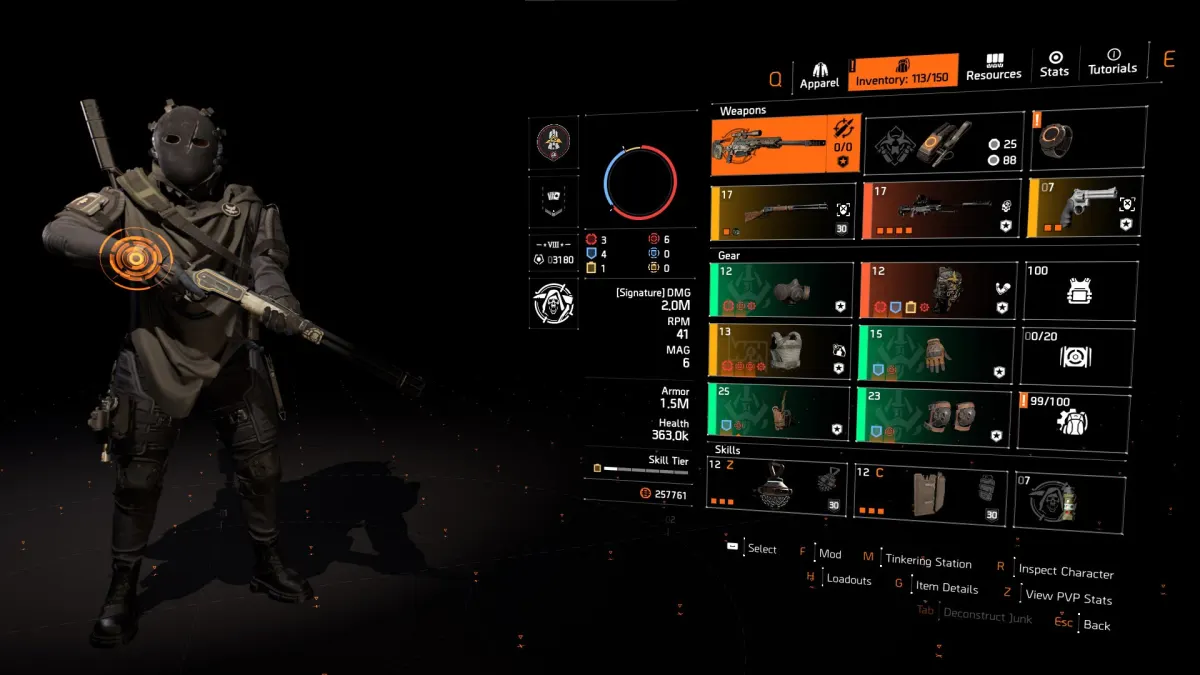
Build store link: Headhunter's Fury Determined Build for Sale (variant 4).
Best Builds for Master Climax Missions in Division 2
These builds, often called "PFE Builds", strongly rely on Protection from Elites mods for survivability while also providing amazing damage through the crit rolls and weapon talents, which makes them the go-to loadouts for Master Climax Missions.
We consider them the best loadouts for SOLO Master Climax Mission completions, but they also work perfectly for groups. So, whether you tackle the Master Missions as a solo player or with your teammates, you are all set!
Our most popular builds for Climax Missions on Master difficulty are:
1. PFE Build with Improvised Gear, Memento & Chill Out
| Build Component | Description |
| Weapon Slot #1 | St. Elmo's Engine |
| Weapon Slot #2 | Dark Winter |
| Specialization | Survivalist (for 10% Protection from Elites) |
| Mask | Blue Core Chill Out with Crit Chance |
| Backpack | Memento |
| Chest | Blue Core Palisade with Crit Chance, Crit Damage & Obliterate |
| Gloves | Blue Core Improvised Gloves with Crit Chance & Crit Damage |
| Holster | Blue Core Improvised Holster with Crit Chance & Crit Damage |
| Kneepads | Blue Core Improvised Kneepads with Crit Chance & Crit Damage |
| Gear Mods | Protection from Elites |
| Skills | Crusader Ballistic Shield | Decoy | Pulse | Reviver Hive |
| Pro Tip | Use Protection from Elites 11%+ mods in all gear slots. Aim for 45%+ Crit Chance! |
Build showcase:
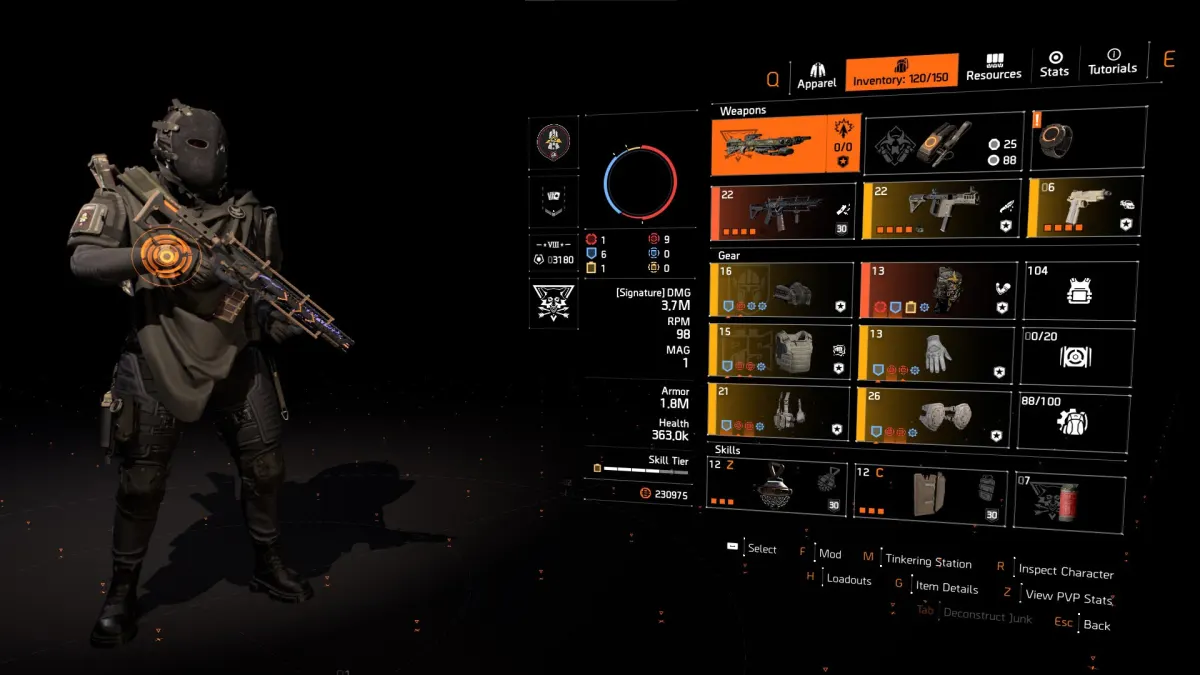
Build store link: PFE Build with Improvised Gear, Memento & Chill Out for Sale (variant 1).
2. PFE Build with Striker, Memento & Chill Out
| Build Component | Description |
| Weapon Slot #1 | St. Elmo's Engine |
| Weapon Slot #2 | ACS-12 with Preservation |
| Specialization | Survivalist (for 10% Protection from Elites) |
| Mask | Blue Core Chill Out with Crit Chance |
| Backpack | Memento |
| Chest | Red Core Striker with Crit Chance or Crit Damage |
| Gloves | Blue Core Striker with Crit Chance or Crit Damage |
| Holster | Blue Core Striker with Crit Chance or Crit Damage |
| Kneepads | Blue Core Striker with Crit Chance or Crit Damage |
| Gear Mods | Protection from Elites |
| Skills | Crusader Ballistic Shield | Decoy | Pulse | Reviver Hive |
| Pro Tip | Use Protection from Elites 11%+ mods in all gear slots. Aim for 45%+ Crit Chance! |
Build showcase:
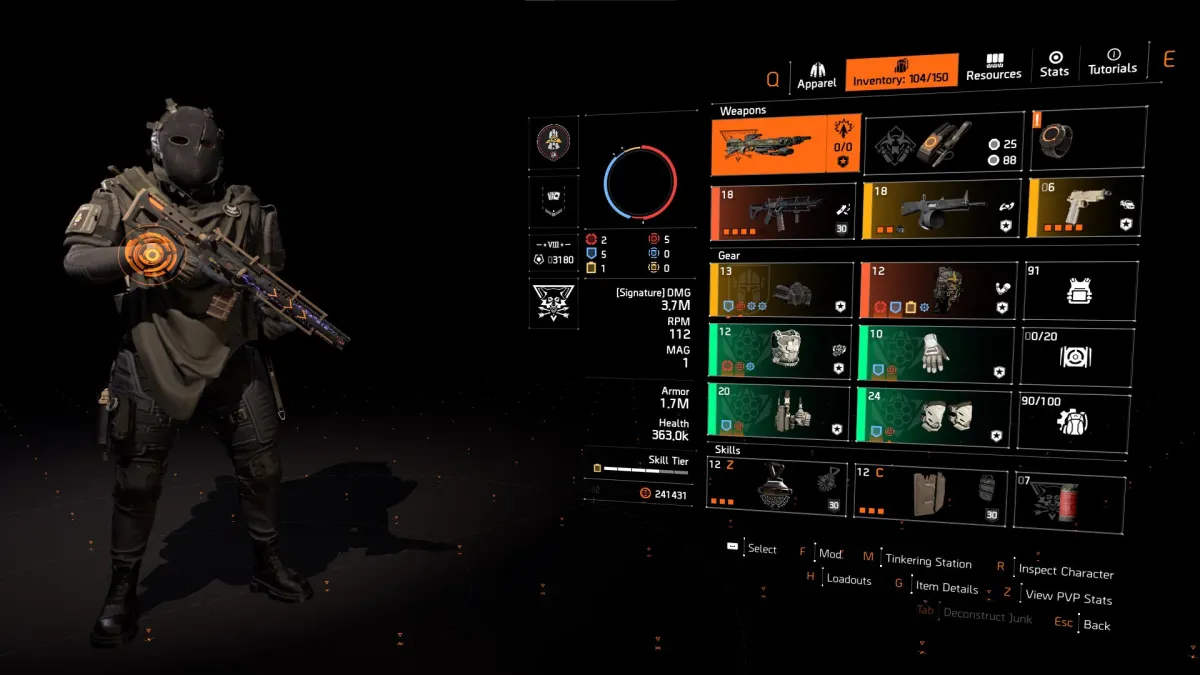
Build store link: PFE Build with Striker, Memento & Chill Out for Sale (variant 2).
3. PFE Build with Heartbreaker, Memento & Chameleon
| Build Component | Description |
| Weapon Slot #1 | Chameleon |
| Weapon Slot #2 | ACS-12 with Preservation |
| Specialization | Survivalist (for 10% Protection from Elites) |
| Mask | Blue Core Heartbreaker with Crit Chance or Crit Damage |
| Backpack | Memento |
| Chest | Blue Core Heartbreaker with Crit Chance or Crit Damage |
| Gloves | Blue Core Heartbreaker with Crit Chance or Crit Damage |
| Holster | Red Core Salvo with Crit Chance or Crit Damage |
| Kneepads | Blue Core Heartbreaker with Crit Chance or Crit Damage |
| Gear Mods | Protection from Elites |
| Skills | Crusader Ballistic Shield | Decoy | Pulse | Reviver Hive |
| Pro Tip | Use Protection from Elites 11%+ mods in all gear slots. Aim for 45%+ Crit Chance! |
Build showcase:
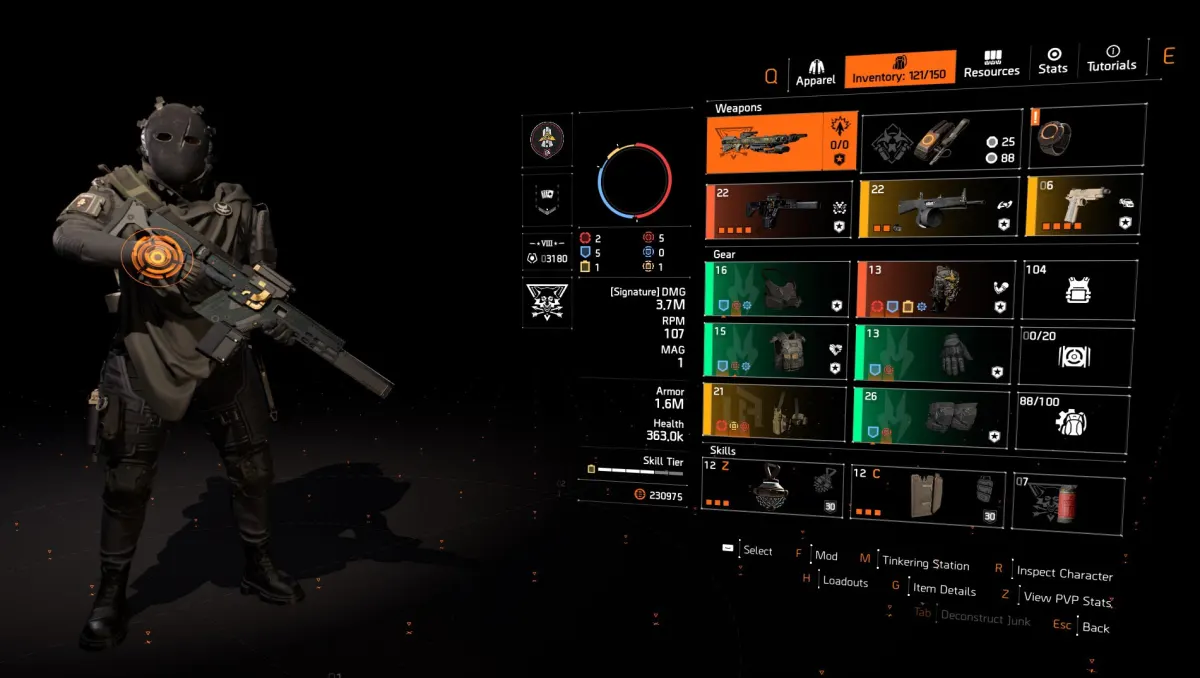
Build store link: PFE Build with Heartbreaker, Memento & Chameleon for Sale (variant 3).
4. PFE Build with Improvised Gear, Coyote's & Backfire
| Build Component | Description |
| Weapon Slot #1 | Backfire |
| Weapon Slot #2 | Lexington with DMG to target out of cover & Killer |
| Specialization | Survivalist (for 10% Protection from Elites) |
| Mask | Coyote's Mask |
| Backpack | Red Core Grupo or Ceska with Crit Chance, Crit Damage & Adrenaline Rush |
| Chest | Blue Core Belstone with Crit Chance, Crit Damage & Intimidate |
| Gloves | Blue Core Improvised Gloves with Crit Chance & Crit Damage |
| Holster | Blue Core Improvised Holster with Crit Chance & Crit Damage |
| Kneepads | Blue Core Improvised Kneepads with Crit Chance & Crit Damage |
| Gear Mods | Protection from Elites |
| Skills | Crusader Ballistic Shield | Decoy | Pulse | Reviver Hive |
| Pro Tip | Use Protection from Elites 11%+ mods in all gear slots. Aim for 45%+ Crit Chance! |
Build showcase:
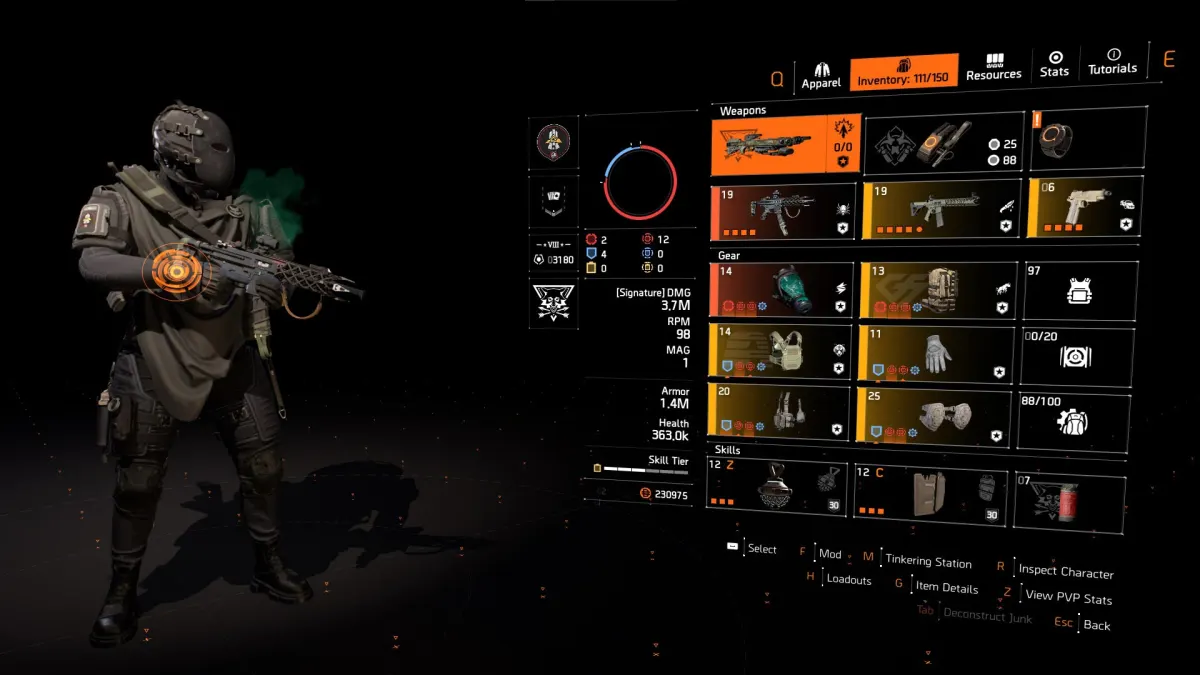
Build store link: PFE Build with Improvised Gear, Coyote's & Backfire for Sale (variant 4).
5. PFE Build with Improvised Gear, Coyote's & St. Elmo's
| Build Component | Description |
| Weapon Slot #1 | St. Elmo's Engine |
| Weapon Slot #2 | Dark Winter |
| Specialization | Survivalist (for 10% Protection from Elites) |
| Mask | Coyote's Mask |
| Backpack | Red Core Grupo or Ceska with Crit Chance, Crit Damage & Adrenaline Rush |
| Chest | Blue Core Belstone with Crit Chance, Crit Damage & Intimidate |
| Gloves | Blue Core Improvised Gloves with Crit Chance & Crit Damage |
| Holster | Blue Core Improvised Holster with Crit Chance & Crit Damage |
| Kneepads | Blue Core Improvised Kneepads with Crit Chance & Crit Damage |
| Gear Mods | Protection from Elites |
| Skills | Crusader Ballistic Shield | Decoy | Pulse | Reviver Hive |
| Pro Tip | Use Protection from Elites 11%+ mods in all gear slots. Aim for 45%+ Crit Chance! |
Build showcase:
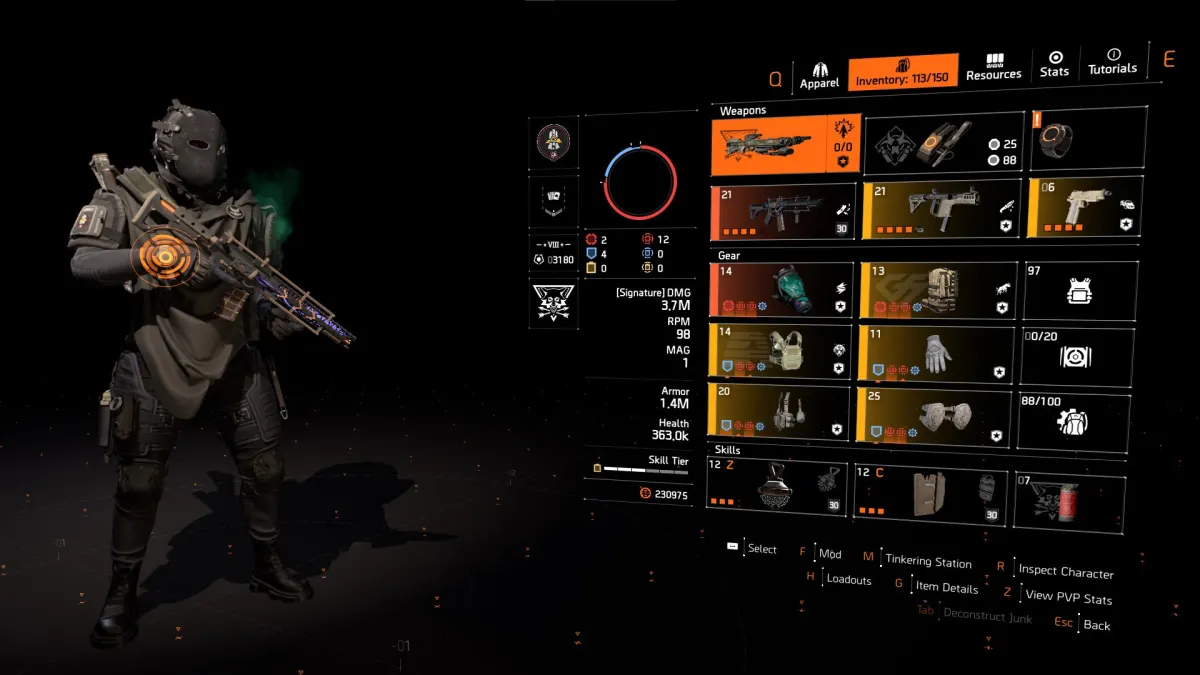
Build store link: PFE Build with Improvised Gear, Coyote's & St. Elmo's for Sale (variant 5).
6. PFE Build with Improvised Gear, Coyote's & Scorpio
| Build Component | Description |
| Weapon Slot #1 | Scorpio |
| Weapon Slot #2 | Lexington with DMG to target out of cover & Killer |
| Specialization | Survivalist (for 10% Protection from Elites) |
| Mask | Coyote's Mask |
| Backpack | Red Core Grupo or Ceska with Crit Chance, Crit Damage & Adrenaline Rush |
| Chest | Blue Core Belstone with Crit Chance, Crit Damage & Intimidate |
| Gloves | Blue Core Improvised Gloves with Crit Chance & Crit Damage |
| Holster | Blue Core Improvised Holster with Crit Chance & Crit Damage |
| Kneepads | Blue Core Improvised Kneepads with Crit Chance & Crit Damage |
| Gear Mods | Protection from Elites |
| Skills | Crusader Ballistic Shield | Decoy | Pulse | Reviver Hive |
| Pro Tip | Use Protection from Elites 11%+ mods in all gear slots. Aim for 45%+ Crit Chance! |
Build showcase:
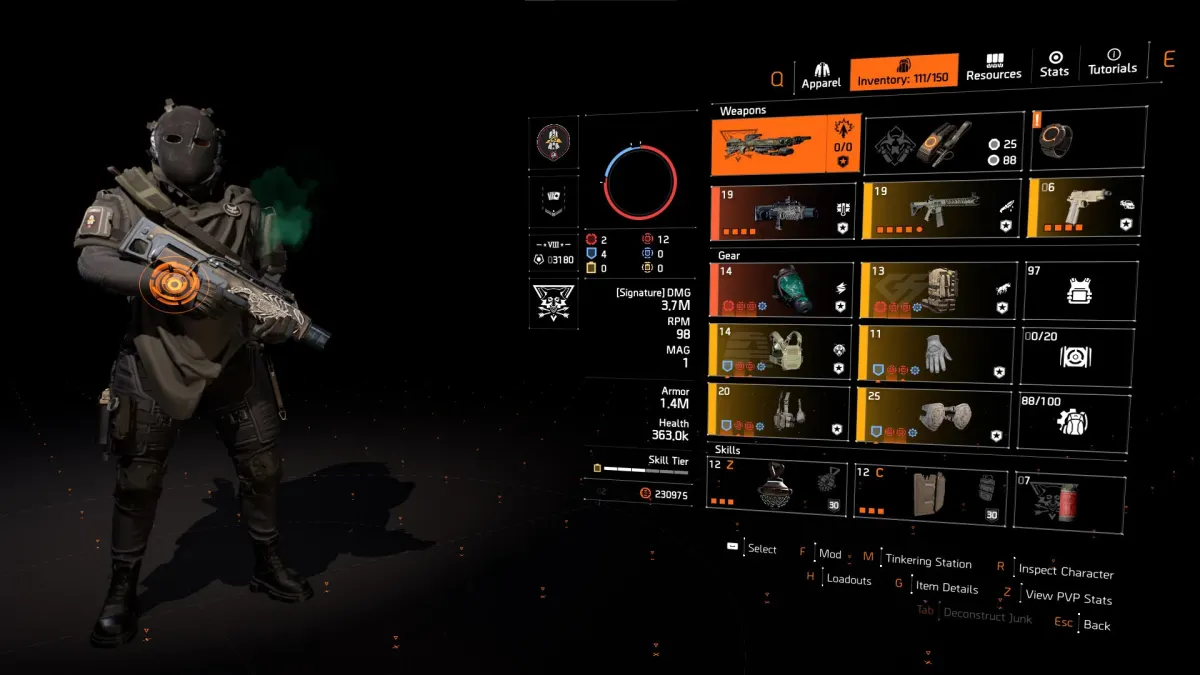
Build store link: PFE Build with Improvised Gear, Coyote's & Scorpio for Sale (variant 6).
7. PFE Build with Improvised Gear, Investor & Backfire
| Build Component | Description |
| Weapon Slot #1 | Backfire |
| Weapon Slot #2 | Lexington with DMG to target out of cover & Killer |
| Specialization | Survivalist (for 10% Protection from Elites) |
| Mask | Blue Core Investor with 2x blue attributes |
| Backpack | Red Core Grupo or Ceska with Crit Chance, Crit Damage & Adrenaline Rush |
| Chest | Blue Core Belstone with Crit Chance, Crit Damage & Intimidate |
| Gloves | Blue Core Improvised Gloves with Crit Chance & Crit Damage |
| Holster | Blue Core Improvised Holster with Crit Chance & Crit Damage |
| Kneepads | Blue Core Improvised Kneepads with Crit Chance & Crit Damage |
| Gear Mods | Protection from Elites |
| Skills | Crusader Ballistic Shield | Decoy | Pulse | Reviver Hive |
| Pro Tip | Use Protection from Elites 11%+ mods in all gear slots. Aim for 45%+ Crit Chance! |
Build showcase:
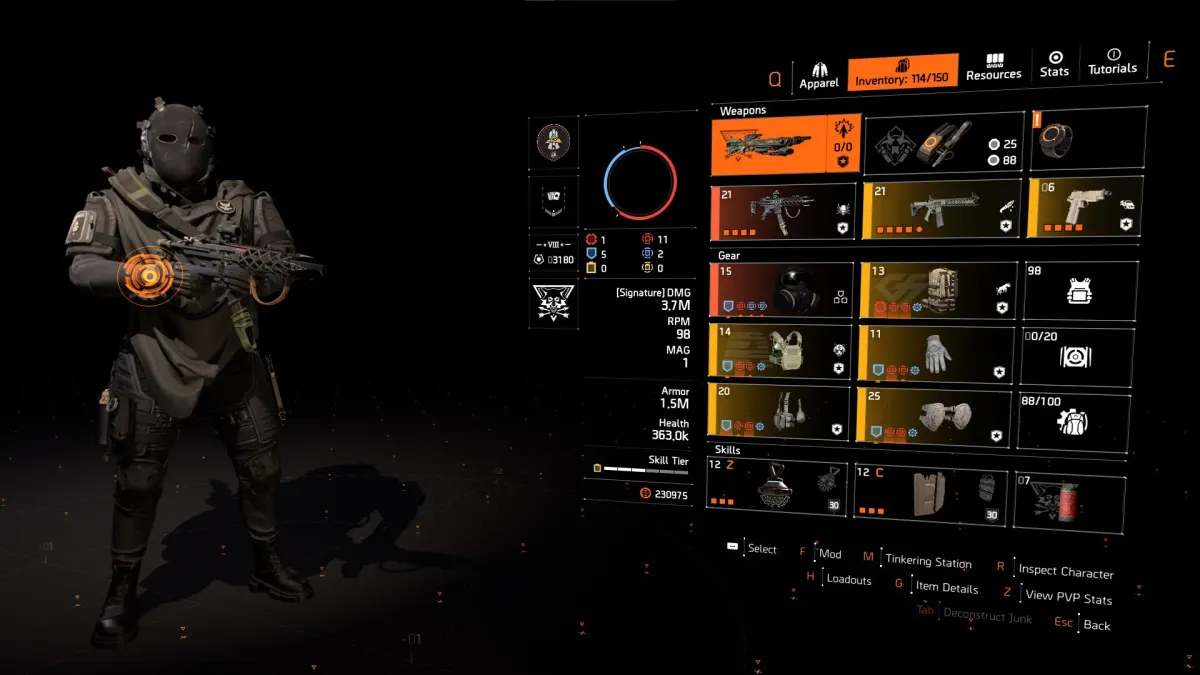
Build store link: PFE Build with Improvised Gear, Investor & Backfire for Sale (variant 7).
Best Prototype Builds in Division 2 for PvE
Our most popular Prototype builds for Division 2 PvE are:
1. Prototype Striker Build with Overdogs for Solo/Group Legendary & Escalation
| Build Component | Description |
| Weapon Slot #1 | St. Elmo's Engine |
| Weapon Slot #2 | Prototype Rock n' Roll or GR9 (for Augment stacking) |
| Weapon Slot #3 | Prototype Quickstep (for Augment stacking) |
| Specialization | Gunner |
| Mask | Prototype Striker with Weapon Damage and Crit Chance or Crit Damage |
| Backpack | Prototype Striker with Weapon Damage and Crit Chance or Crit Damage |
| Chest | Prototype Equalizer with Weapon Damage, Crit Chance & Crit Damage |
| Gloves | Overdogs |
| Holster | Prototype Striker with Weapon Damage and Crit Chance or Crit Damage |
| Kneepads | Prototype Striker with Weapon Damage and Crit Chance or Crit Damage |
| Gear Mods | Crit Chance | Crit Damage |
| Skills | Crusader Ballistic Shield | Reviver Hive |
| Pro Tip | Aim for 55%+ Crit Chance, then use Crit Damage rolls and mods |
Screenshot:
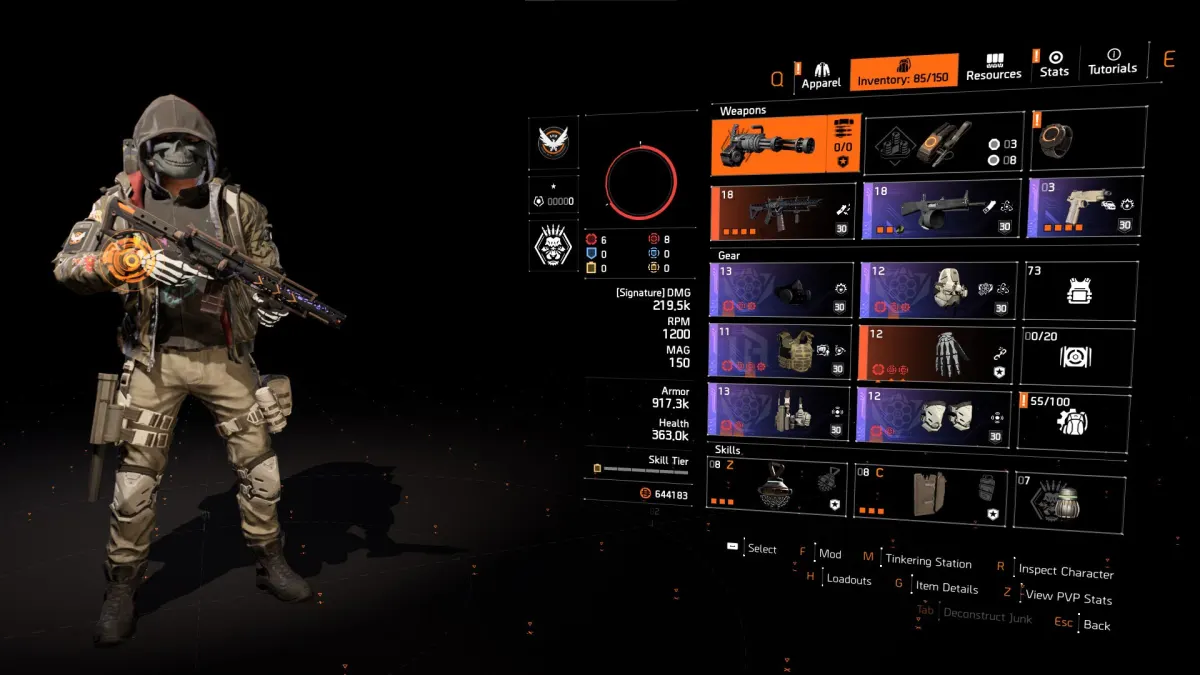
Build store link: Solo/Group Legendary & Escalation Build with Overdogs (Variant #1).
2. Prototype Striker Red Build with Memento for Solo Legendary & Escalation
| Build Component | Description |
| Weapon Slot #1 | St. Elmo's Engine |
| Weapon Slot #2 | Prototype Rock n' Roll or GR9 (for Augment stacking) |
| Weapon Slot #3 | Prototype Quickstep (for Augment stacking) |
| Specialization | Gunner |
| Mask | Prototype Striker with Weapon Damage and Crit Chance or Crit Damage |
| Backpack | Memento |
| Chest | Prototype Equalizer with Weapon Damage, Crit Chance & Crit Damage |
| Gloves | Prototype Striker with Weapon Damage and Crit Chance or Crit Damage |
| Holster | Prototype Striker with Weapon Damage and Crit Chance or Crit Damage |
| Kneepads | Prototype Striker with Weapon Damage and Crit Chance or Crit Damage |
| Gear Mods | Crit Chance | Crit Damage |
| Skills | Crusader Ballistic Shield | Reviver Hive |
| Pro Tip | Aim for 55%+ Crit Chance, then use Crit Damage rolls and mods |
Build store link: Solo Legendary & Escalation Red Build with Memento (Variant #2).
3. Prototype Striker Blue Build with Memento for Solo Legendary & Escalation
| Build Component | Description |
| Weapon Slot #1 | St. Elmo's Engine |
| Weapon Slot #2 | Prototype Rock n' Roll or GR9 (for Augment stacking) |
| Weapon Slot #3 | Prototype Quickstep (for Augment stacking) |
| Specialization | Gunner |
| Mask | Prototype Striker with Armor and Crit Chance or Crit Damage |
| Backpack | Memento |
| Chest | Prototype Palisade with Armor, Crit Chance, Crit Damage & "Obliterate" |
| Gloves | Prototype Striker with Armor and Crit Chance or Crit Damage |
| Holster | Prototype Striker with Armor and Crit Chance or Crit Damage |
| Kneepads | Prototype Striker with Armor and Crit Chance or Crit Damage |
| Gear Mods | Crit Chance | Crit Damage |
| Skills | Crusader Ballistic Shield | Reviver Hive |
| Pro Tip | Aim for 55%+ Crit Chance, then use Crit Damage rolls and mods |
Screenshot:
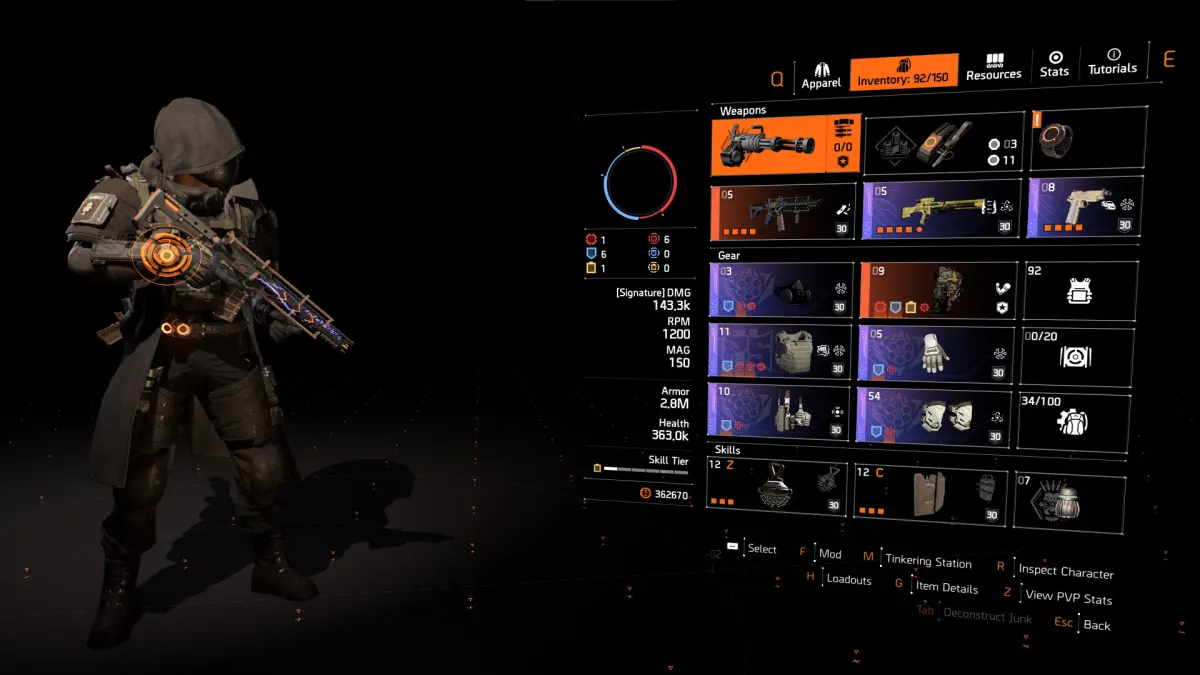
Build store link: Solo Legendary & Escalation Blue Build with Memento (Variant #3).
4. Prototype Striker Build with Coyote's Mask for Group Legendary & Escalation
| Build Component | Description |
| Weapon Slot #1 | St. Elmo's Engine |
| Weapon Slot #2 | Prototype Rock n' Roll or GR9 (for Augment stacking) |
| Weapon Slot #3 | Prototype Quickstep (for Augment stacking) |
| Specialization | Gunner |
| Mask | Coyote's Mask |
| Backpack | Prototype Striker with Weapon Damage and Crit Chance or Crit Damage |
| Chest | Prototype Equalizer with Weapon Damage, Crit Chance & Crit Damage |
| Gloves | Prototype Striker with Weapon Damage and Crit Chance or Crit Damage |
| Holster | Prototype Striker with Weapon Damage and Crit Chance or Crit Damage |
| Kneepads | Prototype Striker with Weapon Damage and Crit Chance or Crit Damage |
| Gear Mods | Crit Chance | Crit Damage |
| Skills | Crusader Ballistic Shield | Reviver Hive |
| Pro Tip | Aim for 50% Crit Chance, then use Crit Damage rolls and mods |
Build store link: Group Legendary & Escalation Build with Coyote's Mask (Variant #4).
5. Prototype Refactor Build
| Build Component | Description |
| Weapon Slot #1 | Scorpio or Capacitor |
| Weapon Slot #2 | Prototype Harmony or Mechanical Animal (for Augment stacking) |
| Weapon Slot #3 | Prototype Quickstep (for Augment stacking) |
| Specialization | Survivalist |
| Mask | Prototype Refactor with Skill Tier and Skill Damage |
| Backpack | Birdie's Quick Fix Pack |
| Chest | Prototype Refactor with Skill Tier and Skill Damage |
| Gloves | Prototype Refactor with Skill Tier and Skill Damage |
| Holster | Prototype Wyvern with Skill Tier, Skill Damage & Skill Haste |
| Kneepads | Prototype Refactor with Skill Tier and Skill Damage |
| Gear Mods | Skill Haste |
| Skills | Assault Turret | Striker Drone |
Build store link: Prototype Refactor Build for Sale.
BUY PROTOTYPE BUILDS AT CHEAP PRICES
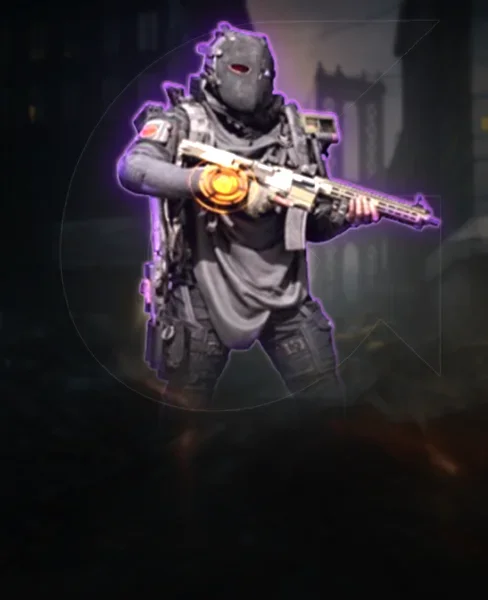
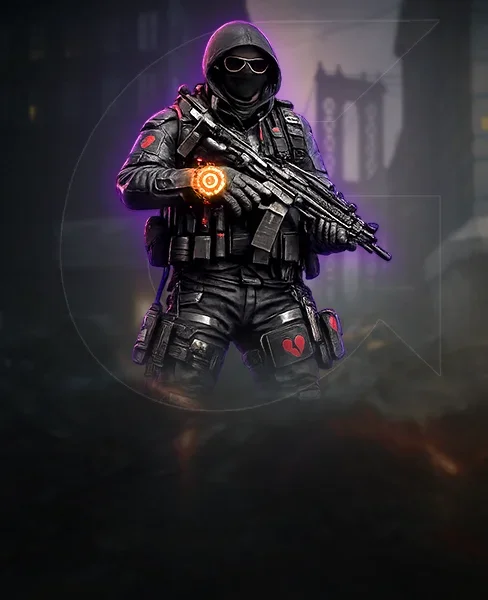
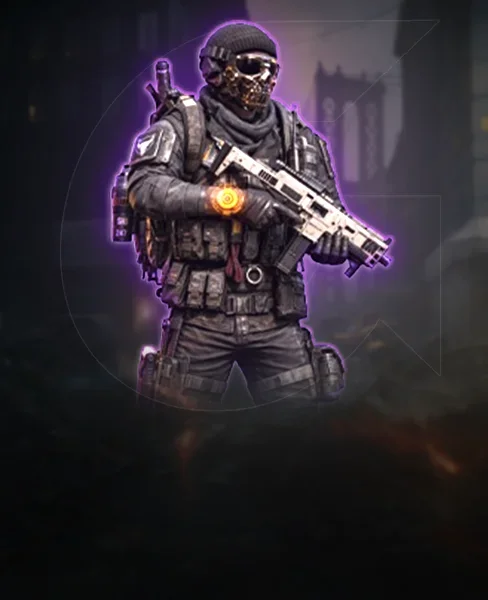
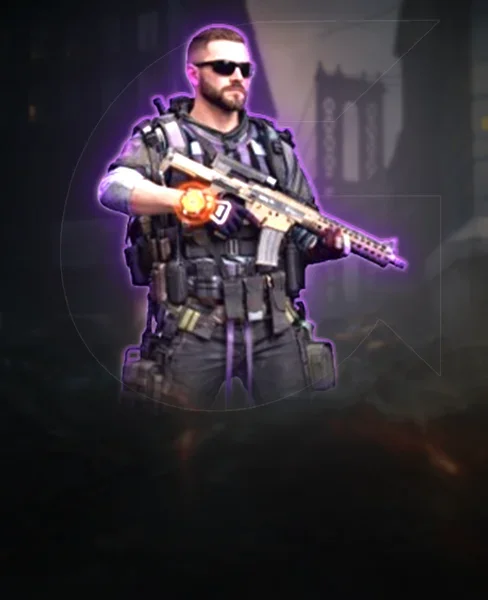
6. Prototype Negotiator's Dilemma Build
| Build Component | Description |
| Weapon Slot #1 | Bluescreen or Pestilence |
| Weapon Slot #2 | Prototype Lexington, Carbine 7, Police M4, or FAMAS (for Augment stacking) |
| Weapon Slot #3 | Prototype Quickstep (for Augment stacking) |
| Specialization | Gunner |
| Mask | Prototype Negotiator with Weapon Damage and Crit Chance or Crit Damage |
| Backpack | Prototype Negotiator with Weapon Damage and Crit Chance or Crit Damage |
| Chest | Prototype Ceska with Weapon Damage, Crit Chance, Crit Damage & "Glass Cannon" |
| Gloves | Overdogs |
| Holster | Prototype Negotiator with Weapon Damage and Crit Chance or Crit Damage |
| Kneepads | Prototype Negotiator with Weapon Damage and Crit Chance or Crit Damage |
| Gear Mods | Crit Chance | Crit Damage |
| Skills | Banshee Pulse | Reviver Hive |
| Pro Tip | Aim for 60% Crit Chance, then use Crit Damage rolls and mods |
Build store link: Prototype Negotiator's Dilemma Build for Sale.
7. Prototype Heartbreaker Build
| Build Component | Description |
| Weapon Slot #1 | Prototype Lexington, Carbine 7, or Police M4 with Flatline |
| Weapon Slot #2 | Prototype Rock n' Roll or ACS-12 with Flatline (for Augment stacking) |
| Weapon Slot #3 | Prototype Quickstep (for Augment stacking) |
| Specialization | Technician (for the Linked Laser Pointer) |
| Mask | Prototype Heartbreaker with Armor and Crit Chance or Crit Damage |
| Backpack | Prototype Heartbreaker with Armor and Crit Chance or Crit Damage |
| Chest | Prototype Heartbreaker with Armor and Crit Chance or Crit Damage |
| Gloves | Overdogs |
| Holster | Prototype Heartbreaker with Armor and Crit Chance or Crit Damage |
| Kneepads | Prototype Fox's Prayer with Armor and Crit Chance or Crit Damage |
| Gear Mods | Crit Chance | Crit Damage |
| Skills | Jammer Pulse | Reviver Hive |
| Pro Tip | Aim for 55%+ Crit Chance, then use Crit Damage rolls and mods |
Screenshot:
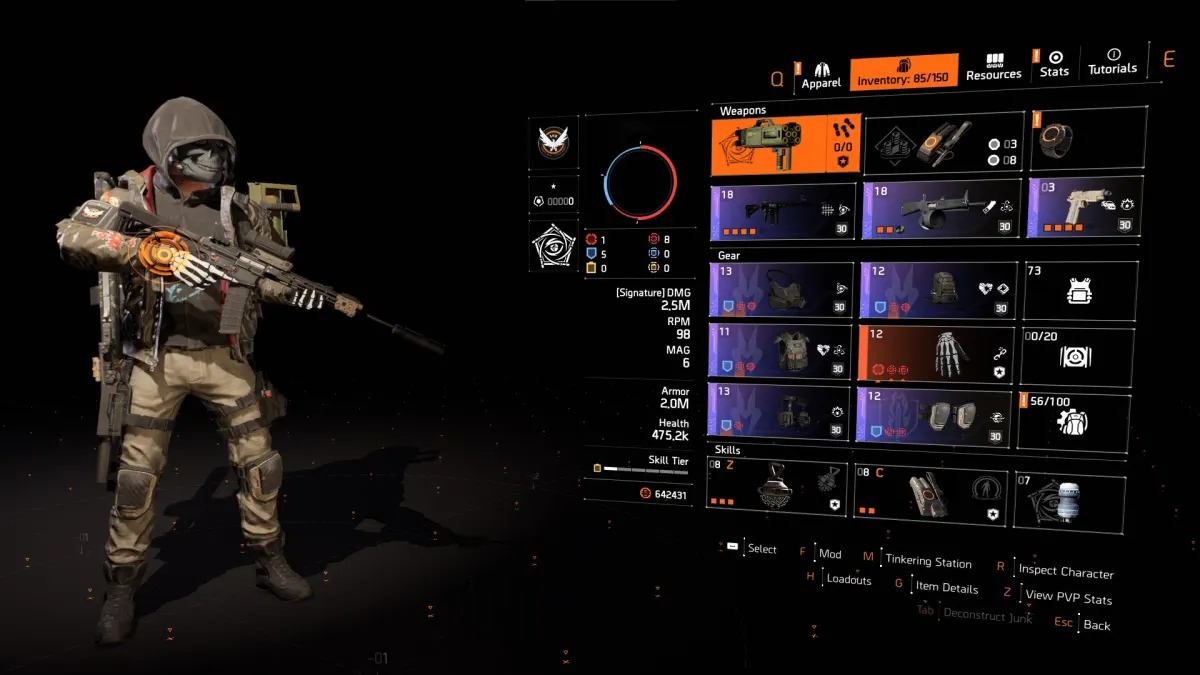
Build store link: Prototype Heartbreaker Build for Sale.
8. Prototype Tipping Scales LMG Build
| Build Component | Description |
| Weapon Slot #1 | Prototype GR9 with DMG to target out of cover & "Frenzy" |
| Weapon Slot #2 | Prototype GR9 with DMG to target out of cover & "Fast Hands" |
| Weapon Slot #3 | Prototype Quickstep (for Augment stacking) |
| Specialization | Gunner |
| Mask | Tinkerer |
| Backpack | Prototype Tipping Scales with Weapon Damage and Crit Chance or Crit Damage |
| Chest | Prototype Tipping Scales with Weapon Damage and Crit Chance or Crit Damage |
| Gloves | Prototype Tipping Scales with Weapon Damage and Crit Chance or Crit Damage |
| Holster | Prototype Tipping Scales with Weapon Damage and Crit Chance or Crit Damage |
| Kneepads | Prototype Fox's Prayer with Weapon Damage and Crit Chance or Crit Damage |
| Gear Mods | Crit Chance | Crit Damage |
| Skills | Decoy | Banshee Pulse | Reviver Hive |
| Pro Tip | Aim for 55%+ Crit Chance, then use Crit Damage rolls and mods |
Build store link: Prototype Tipping Scales LMG Build for Sale.
9. Prototype Armor Regen Build
| Build Component | Description |
| Weapon Slot #1 | Prototype Lexington, Carbine 7, Police M4, or FAMAS with "Streamline", "Killer", or "Measured" |
| Weapon Slot #2 | Scorpio |
| Weapon Slot #3 | Prototype Quickstep (for Augment stacking) |
| Specialization | Gunner |
| Mask | Investor with Armor, Hazard Protection, Explosive Resistance & Armor Regen |
| Backpack | Prototype Gila with Armor, Crit Chance, Crit Damage/Armor Regen & "Adrenaline Rush" |
| Chest | Prototype Belstone with Armor, Crit Chance, Crit Damage/Armor Regen & "Intimidate" or "Obliterate" |
| Gloves | Prototype Gila with Armor, Crit Chance & Armor Regen |
| Holster | Prototype Gila with Armor, Crit Chance & Armor Regen |
| Kneepads | Prototype Emperor's Guard with Armor |
| Gear Mods | Crit Chance | Crit Damage |
| Skills | Crusader Ballistic Shield | Banshee Pulse | Reviver Hive |
| Pro Tip | Aim for 50%+ Crit Chance, then use Crit Damage rolls and mods |
Build store link: Prototype Armor Regen Build for Sale.
10. Prototype Hunter's Fury Build
| Build Component | Description |
| Weapon Slot #1 | Prototype Dark Winter with DMG to target out of cover |
| Weapon Slot #2 | St. Elmo's Engine |
| Weapon Slot #3 | Prototype Quickstep (for Augment stacking) |
| Specialization | Gunner |
| Mask | Prototype Hunter's Fury with Weapon Damage and Crit Chance or Crit Damage |
| Backpack | Memento |
| Chest | Prototype Ceska with Weapon Damage, Crit Chance, Crit Damage & "Intimidate" |
| Gloves | Prototype Hunter's Fury with Armor and Crit Chance or Crit Damage |
| Holster | Prototype Hunter's Fury with Armor and Crit Chance or Crit Damage |
| Kneepads | Prototype Hunter's Fury with Armor and Crit Chance or Crit Damage |
| Gear Mods | Crit Chance | Crit Damage |
| Skills | Crusader Ballistic Shield | Reviver Hive |
| Pro Tip | Aim for 55%+ Crit Chance, then use Crit Damage rolls and mods |
Build store link: Prototype Hunter's Fury Build for Sale.
11. Prototype Status Effects Build
| Build Component | Description |
| Weapon Slot #1 | Capacitor |
| Weapon Slot #2 | Prototype Harmony (for Augment stacking) |
| Weapon Slot #3 | Prototype Quickstep (for Augment stacking) |
| Specialization | Survivalist |
| Mask | Vile |
| Backpack | Prototype Wyvern with Skill Tier, Status Effects, Skill Damage & "Creeping Death" |
| Chest | Prototype Eclipse Protocol with Skill Tier and Status Effects |
| Gloves | Prototype Eclipse Protocol with Skill Tier and Status Effects |
| Holster | Prototype Eclipse Protocol with Skill Tier and Status Effects |
| Kneepads | Prototype Eclipse Protocol with Skill Tier and Status Effects |
| Gear Mods | Skill Haste |
| Skills | Burn Sticky Bomb | Jammer Pulse |
Build store link: Prototype Status Effects Build for Sale.
These are only some of the most popular Prototype builds added so far. More to come very soon!
Best Striker Builds for PvE & PvP in 2026
Our most popular Striker builds for Division 2 in Year 8 are:
1. Striker Build with Overdogs and Equalizer
| Build Component | Description |
| Weapon Slot #1 | St. Elmo's Engine |
| Weapon Slot #2 | GR9 or MK46 with Damage to Armor and Frenzy |
| Specialization | Gunner |
| Mask | Red Core Striker with Crit Chance or Crit Damage |
| Backpack | Red Core Striker with Crit Chance or Crit Damage |
| Chest | Red Core Equalizer with Crit Chance & Crit Damage |
| Gloves | Overdogs |
| Holster | Red Core Striker with Crit Chance or Crit Damage |
| Kneepads | Red Core Striker with Crit Chance or Crit Damage |
| Gear Mods | Crit Chance | Crit Damage |
| Skills | Crusader Ballistic Shield | Decoy | Pulse | Reviver Hive |
| Pro Tip | Aim for 60% Crit Chance, then use Crit Damage rolls and mods |
Build showcase:
Build store link: Striker Build with Overdogs and Equalizer for Sale (variant 1).
2. Red Striker Build with Memento
| Build Component | Description |
| Weapon Slot #1 | St. Elmo's Engine |
| Weapon Slot #2 | GR9 or MK46 with Damage to Armor and Frenzy |
| Specialization | Gunner |
| Mask | Red Core Striker with Crit Chance or Crit Damage |
| Backpack | Memento |
| Chest | Red Core Equalizer with Crit Chance & Crit Damage |
| Gloves | Red Core Striker with Crit Chance or Crit Damage |
| Holster | Red Core Striker with Crit Chance or Crit Damage |
| Kneepads | Red Core Striker with Crit Chance or Crit Damage |
| Gear Mods | Crit Chance | Crit Damage |
| Skills | Crusader Ballistic Shield | Decoy | Pulse | Reviver Hive |
| Pro Tip | Aim for 60% Crit Chance, then use Crit Damage rolls and mods |
Build showcase:
Build store link: Red Striker Build with Memento for Sale (variant 2).
3. Blue Striker Build with Memento
| Build Component | Description |
| Weapon Slot #1 | St. Elmo's Engine |
| Weapon Slot #2 | GR9 or MK46 with Damage to Armor and Frenzy |
| Specialization | Gunner |
| Mask | Blue Core Striker with Crit Chance or Crit Damage |
| Backpack | Memento |
| Chest | Blue Core Palisade with Crit Chance, Crit Damage & Obliterate |
| Gloves | Blue Core Striker with Crit Chance or Crit Damage |
| Holster | Blue Core Striker with Crit Chance or Crit Damage |
| Kneepads | Blue Core Striker with Crit Chance or Crit Damage |
| Gear Mods | Crit Chance | Crit Damage |
| Skills | Crusader Ballistic Shield | Decoy | Pulse | Reviver Hive |
| Pro Tip | Aim for 60% Crit Chance, then use Crit Damage rolls and mods |
Build showcase:
Build store link: Blue Striker Build with Memento for Sale (variant 3).
4. Striker Build for Group
| Build Component | Description |
| Weapon Slot #1 | St. Elmo's Engine |
| Weapon Slot #2 | GR9 or MK46 with Damage to Armor and Frenzy or Fast Hands |
| Specialization | Firewall | Gunner |
| Mask | Coyote's Mask |
| Backpack | Red Core Striker with Crit Chance or Crit Damage |
| Chest | Red Core Equalizer with Crit Chance and Crit Damage |
| Gloves | Red Core Striker with Crit Chance or Crit Damage |
| Holster | Red Core Striker with Crit Chance or Crit Damage |
| Kneepads | Red Core Striker with Crit Chance or Crit Damage |
| Gear Mods | Crit Chance | Crit Damage |
| Skills | Striker Ballistic Shield | Crusader Ballistic Shield | Reviver Hive | Decoy |
| Pro Tip | Aim for 50% Crit Chance, then use Crit Damage rolls and mods |
Build showcase:
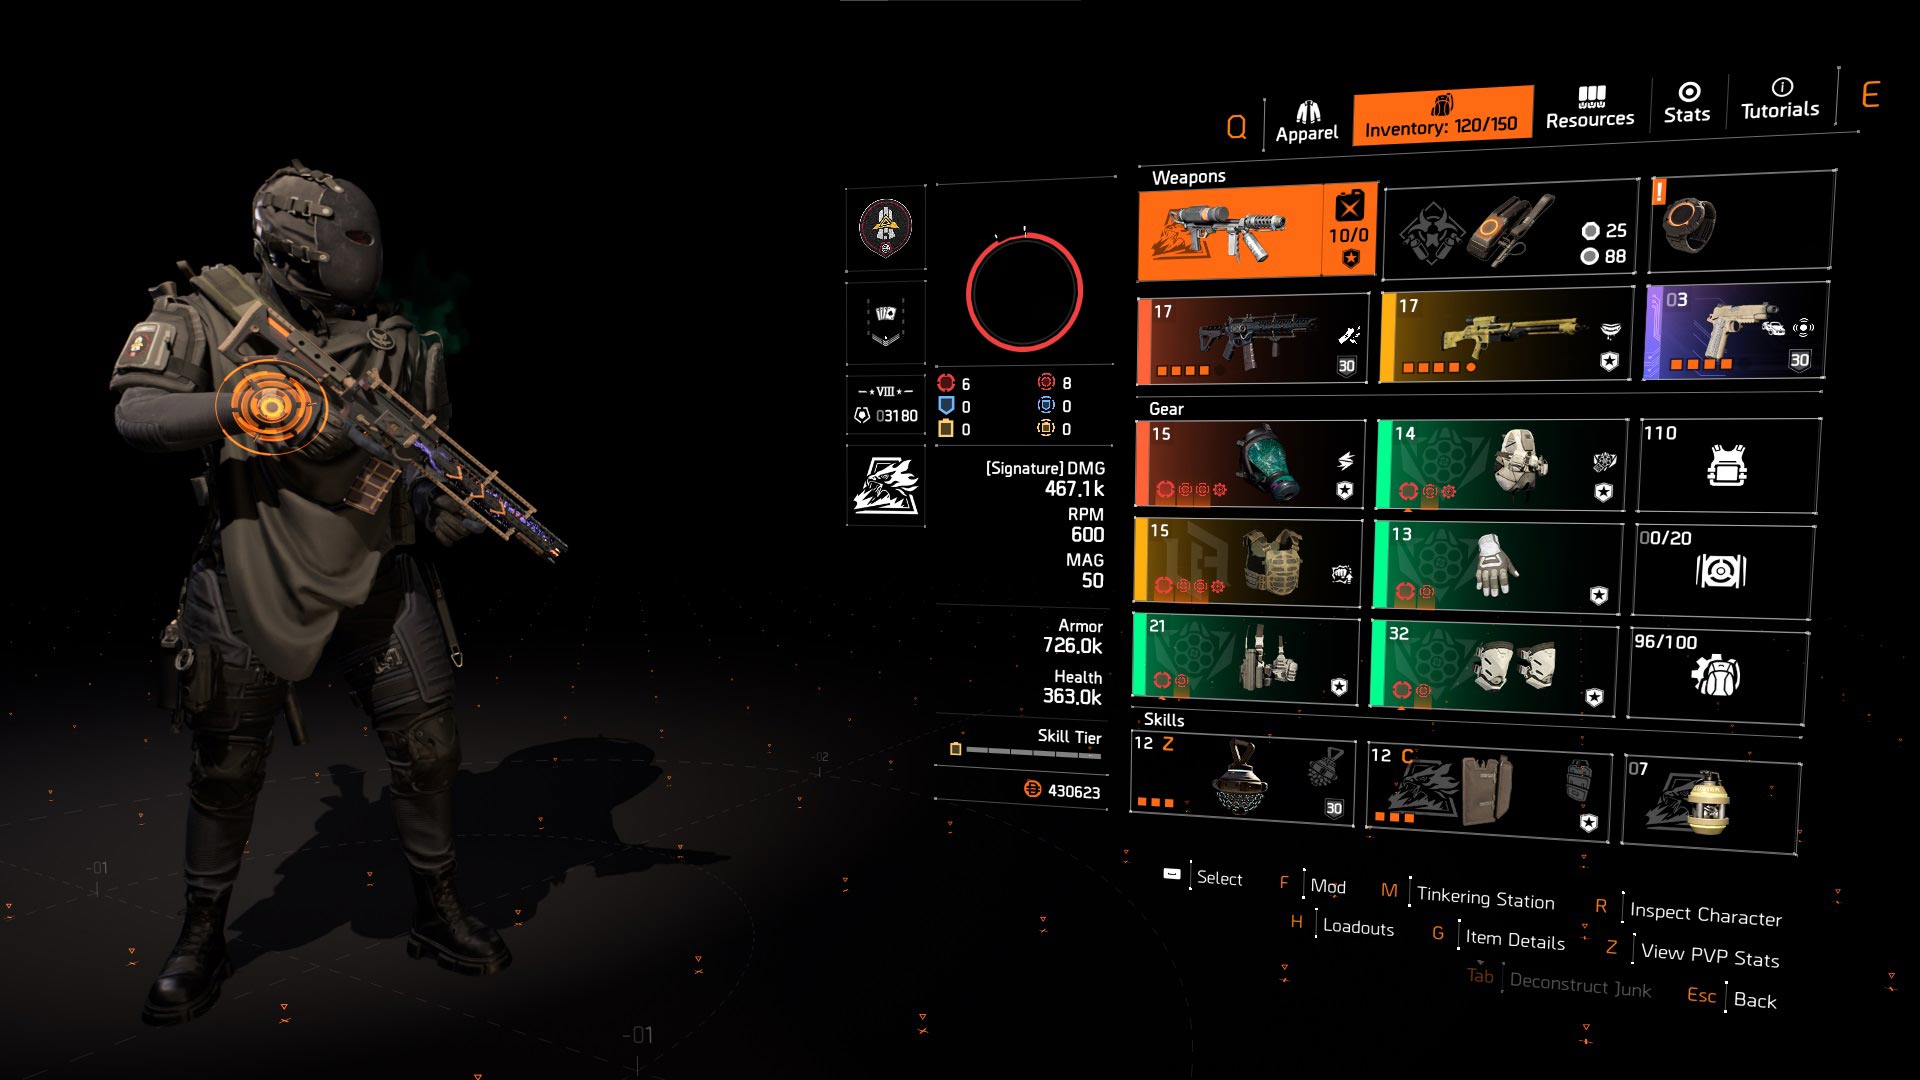
Build store link: Striker Build for Group for Sale (variant 4).
5. Striker PvE Build with Ouroboros
| Build Component | Description |
| Weapon Slot #1 | Ouroboros |
| Weapon Slot #2 | Any preferred weapon |
| Specialization | Gunner |
| Mask | Red Core Striker with Crit Chance or Crit Damage |
| Backpack | Memento |
| Chest | Red Core Ceska or Grupo with Crit Chance, Crit Damage & Intimidate |
| Gloves | Blue Core Striker with Crit Chance or Crit Damage |
| Holster | Blue Core Striker with Crit Chance or Crit Damage |
| Kneepads | Blue Core Striker with Crit Chance or Crit Damage |
| Gear Mods | Crit Chance | Crit Damage |
| Skills | Crusader Ballistic Shield | Reviver Hive | Decoy | Pulse |
| Pro Tip | Aim for 55% Crit Chance, then use Crit Damage rolls and mods |
Build showcase:
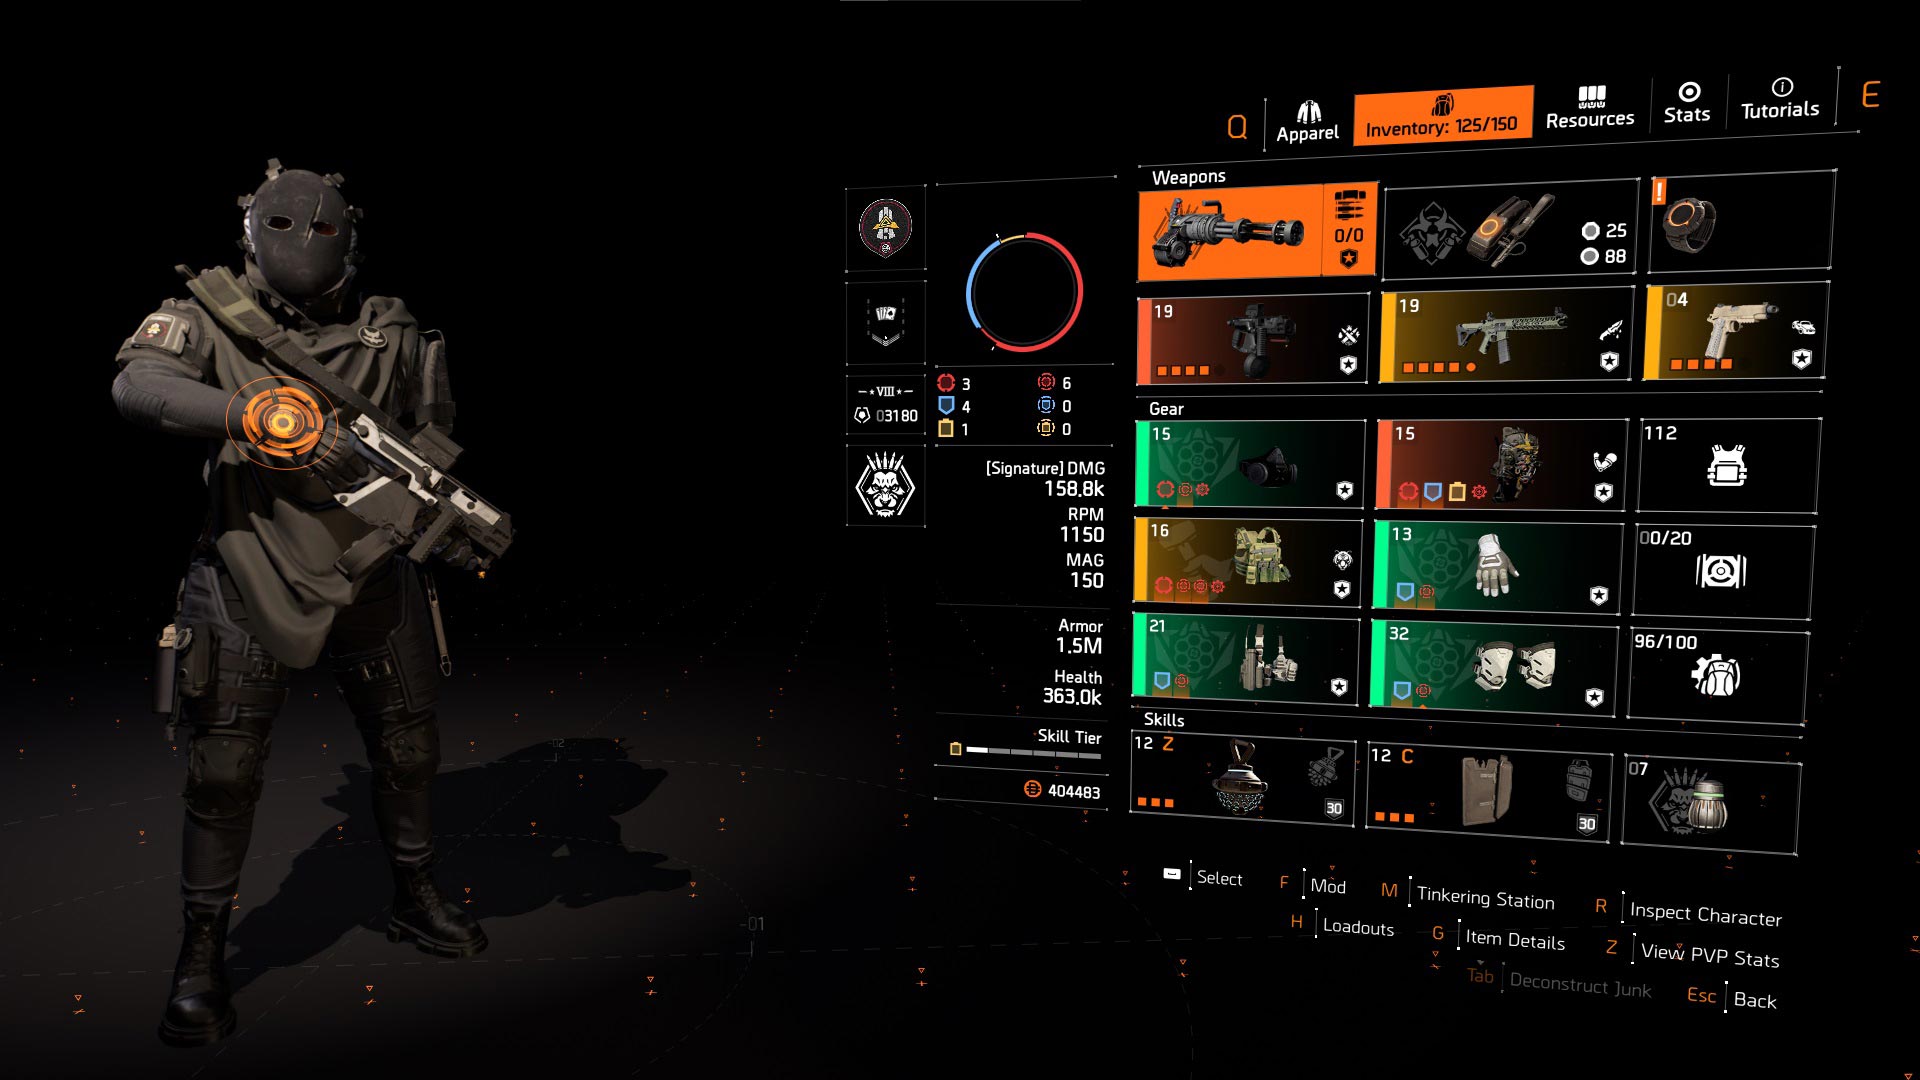
Build store link: Striker PvE Build with Ouroboros for Sale (variant 5).
6. Striker PvP Build with Ouroboros
| Build Component | Description |
| Weapon Slot #1 | Ouroboros |
| Weapon Slot #2 | M870 with DMG to target out of cover & Optimist |
| Specialization | Gunner |
| Mask | Red Core Striker with Crit Chance or Crit Damage |
| Backpack | Red Core Ceska or Grupo with Crit Chance, Crit Damage & Adrenaline Rush |
| Chest | Red Core Ceska or Grupo with Crit Chance, Crit Damage & Unbreakable |
| Gloves | Red Core Striker with Crit Chance or Crit Damage |
| Holster | Blue Core Striker with Crit Chance or Crit Damage |
| Kneepads | Blue Core Striker with Crit Chance or Crit Damage |
| Gear Mods | Crit Chance | Crit Damage |
| Skills | Crusader Ballistic Shield | Seeker Mine | Decoy | Pulse |
| Pro Tip | Aim for 55% Crit Chance, then use Crit Damage rolls and mods |
Build showcase:
Build store link: Striker PvP Build with Ouroboros for Sale (variant 6).
7. Striker PvP Build with St. Elmo's
| Build Component | Description |
| Weapon Slot #1 | St. Elmo's Engine |
| Weapon Slot #2 | M870 with DMG to target out of cover & Optimist |
| Specialization | Firewall |
| Mask | Red Core Striker with Crit Chance or Crit Damage |
| Backpack | Red Core Ceska or Grupo with Crit Chance, Crit Damage & Adrenaline Rush |
| Chest | Red Core Ceska or Grupo with Crit Chance, Crit Damage & Unbreakable |
| Gloves | Blue Core Striker with Crit Chance or Crit Damage |
| Holster | Blue Core Striker with Crit Chance or Crit Damage |
| Kneepads | Blue Core Striker with Crit Chance or Crit Damage |
| Gear Mods | Crit Chance | Crit Damage |
| Skills | Striker Ballistic Shield | Seeker Mine | Decoy | Pulse |
| Pro Tip | Aim for 55% Crit Chance, then use Crit Damage rolls and mods |
Build showcase:
Build store link: Striker PvP Build with St. Elmo's for Sale (variant 7).
Best St Elmo's Builds for PvE & PvP in 2026
Our most popular St Elmos builds for Division 2 in Year 8 are:
1. St. Elmo's Blue Striker Build with Memento
| Build Component | Description |
| Weapon Slot #1 | St. Elmo's Engine |
| Weapon Slot #2 | Any preferred weapon |
| Specialization | Gunner |
| Mask | Blue Core Striker with Crit Chance or Crit Damage |
| Backpack | Memento |
| Chest | Blue Core Palisade with Crit Chance, Crit Damage & Obliterate or Intimidate |
| Gloves | Blue Core Striker with Crit Chance or Crit Damage |
| Holster | Blue Core Striker with Crit Chance or Crit Damage |
| Kneepads | Blue Core Striker with Crit Chance or Crit Damage |
| Gear Mods | Crit Chance | Crit Damage |
| Skills | Crusader Ballistic Shield | Decoy | Pulse | Reviver Hive |
| Pro Tip | Aim for 55% Crit Chance, then use Crit Damage rolls and mods |
Build showcase:
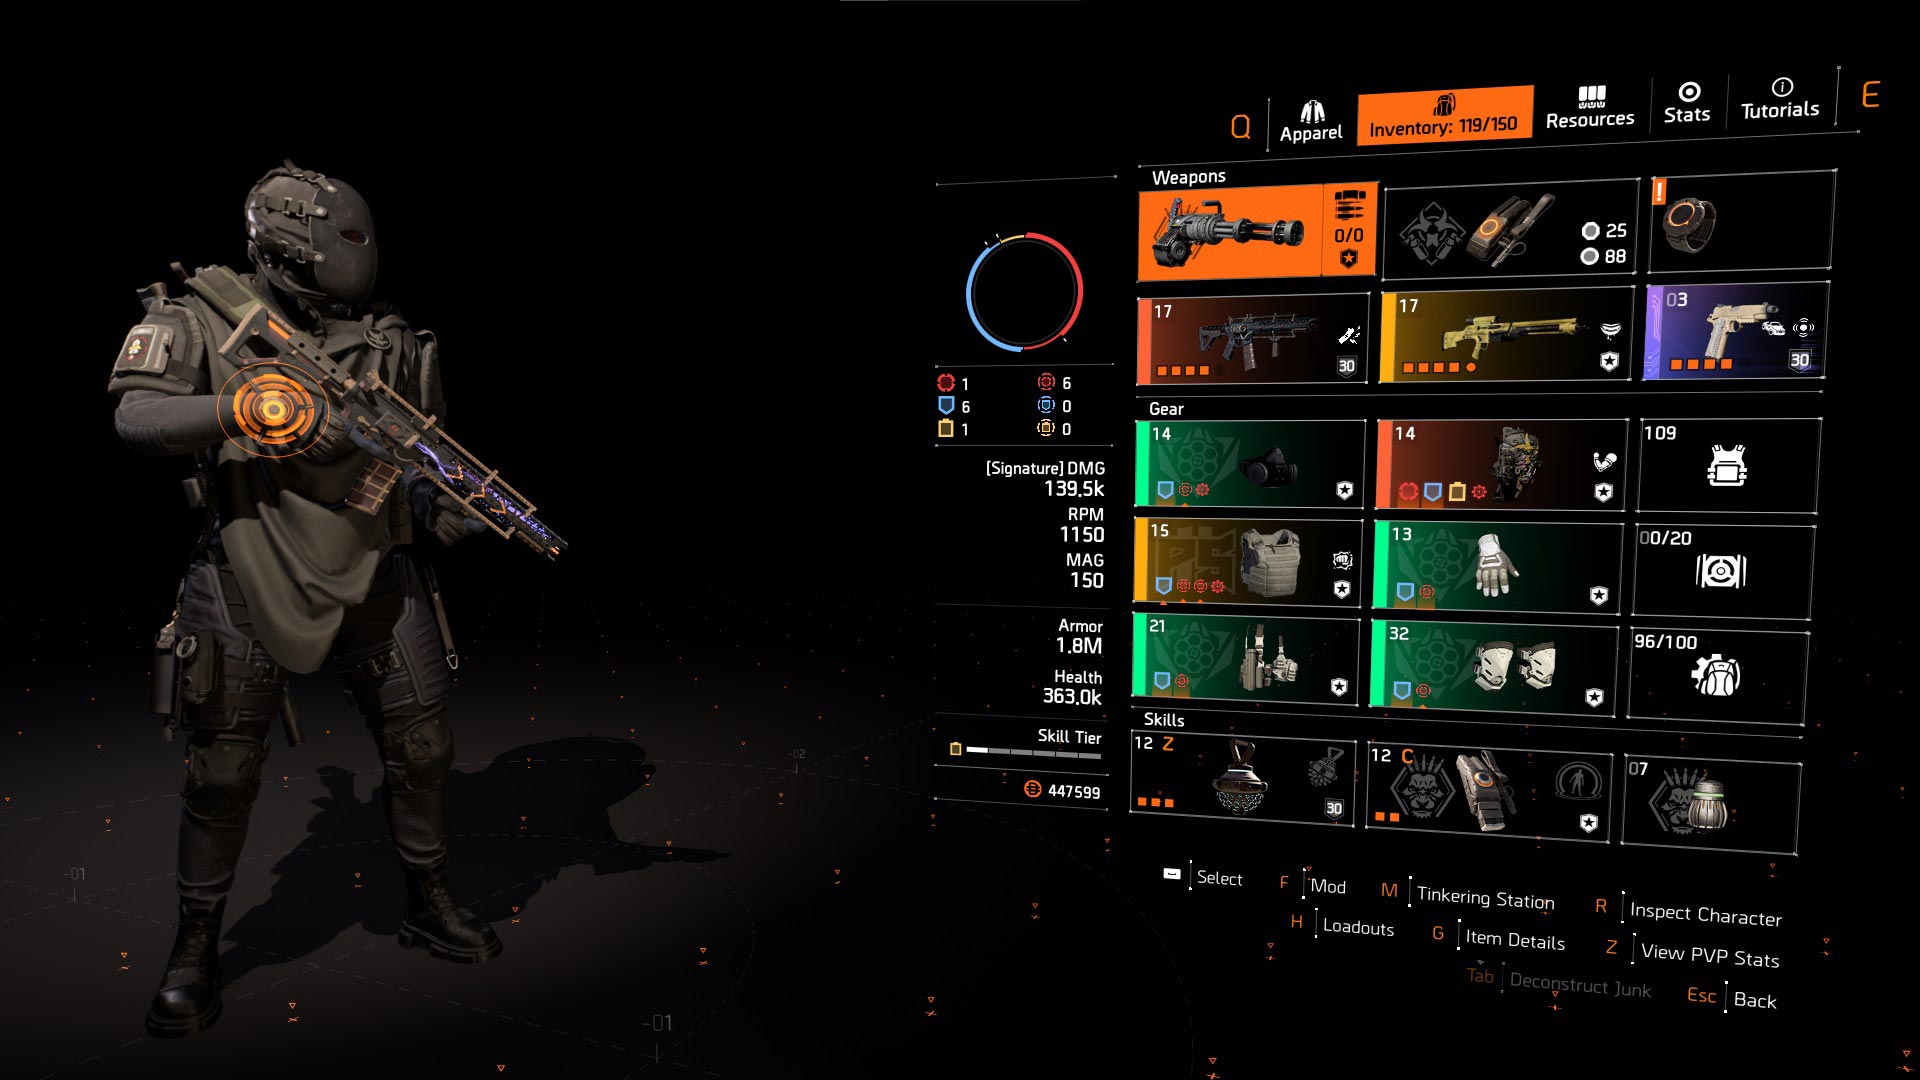
Build store link: St. Elmo's Blue Striker Build with Memento for Sale (variant 1).
2. St. Elmo's Red Striker Build with Memento
| Build Component | Description |
| Weapon Slot #1 | St. Elmo's Engine |
| Weapon Slot #2 | Any preferred weapon |
| Specialization | Gunner |
| Mask | Red Core Striker with Crit Chance or Crit Damage |
| Backpack | Memento |
| Chest | Red Core Equalizer with Crit Chance & Crit Damage |
| Gloves | Red Core Striker with Crit Chance or Crit Damage |
| Holster | Red Core Striker with Crit Chance or Crit Damage |
| Kneepads | Red Core Striker with Crit Chance or Crit Damage |
| Gear Mods | Crit Chance | Crit Damage |
| Skills | Crusader Ballistic Shield | Decoy | Pulse | Reviver Hive |
| Pro Tip | Aim for 55% Crit Chance, then use Crit Damage rolls and mods |
Build showcase:
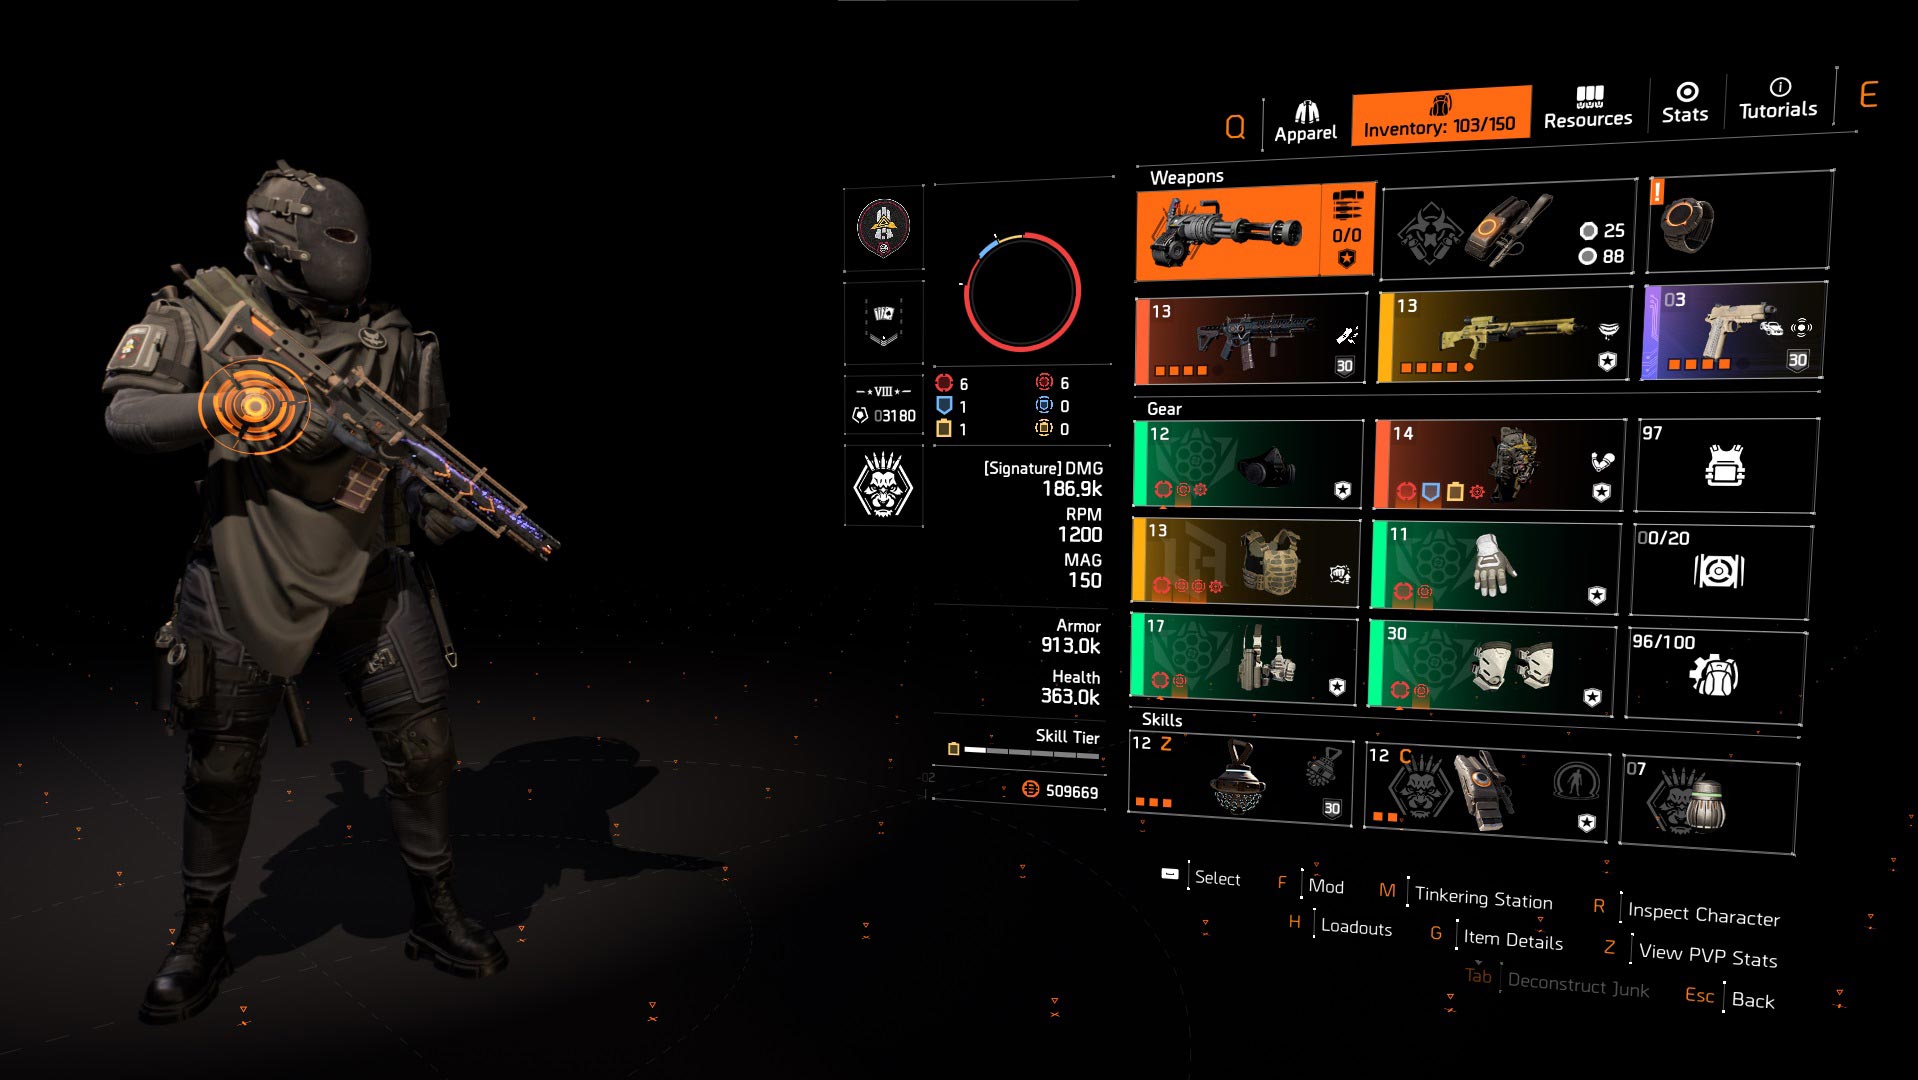
Build store link: St. Elmo's Red Striker Build with Memento For Sale (variant 2).
3. St. Elmo's Striker Build with Overdogs
| Build Component | Description |
| Weapon Slot #1 | St. Elmo's Engine |
| Weapon Slot #2 | Any preferred weapon |
| Specialization | Gunner |
| Mask | Red Core Striker with Crit Chance or Crit Damage |
| Backpack | Red Core Striker with Crit Chance or Crit Damage |
| Chest | Red Core Equalizer with Crit Chance & Crit Damage |
| Gloves | Overdogs |
| Holster | Red Core Striker with Crit Chance or Crit Damage |
| Kneepads | Red Core Striker with Crit Chance or Crit Damage |
| Gear Mods | Crit Chance | Crit Damage |
| Skills | Crusader Ballistic Shield | Decoy | Pulse | Reviver Hive |
| Pro Tip | Aim for 55% Crit Chance, then use Crit Damage rolls and mods |
Build showcase:
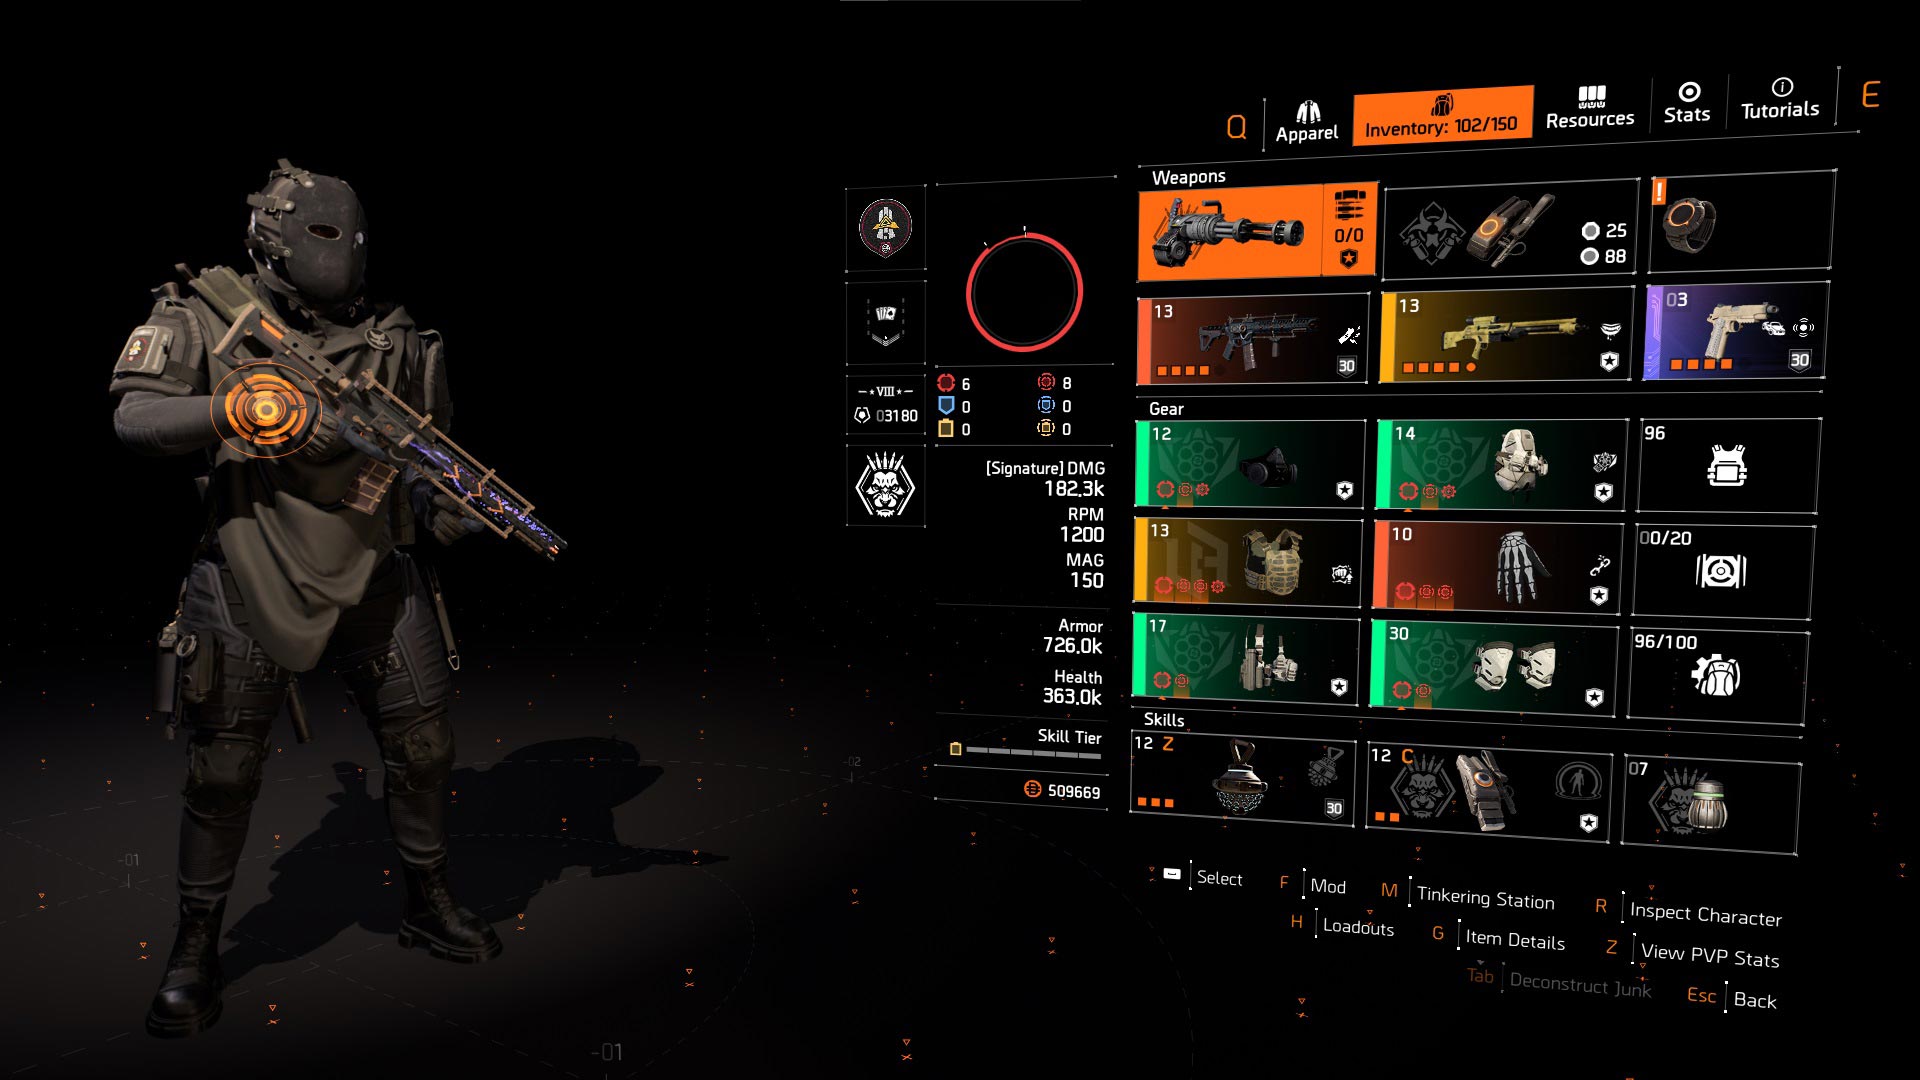
Build store link: St. Elmo's Striker Build with Overdogs for Sale (variant 3).
4. St. Elmo's Striker Build for Group
| Build Component | Description |
| Weapon Slot #1 | St. Elmo's Engine |
| Weapon Slot #2 | Any preferred weapon |
| Specialization | Firewall |
| Mask | Coyote's Mask |
| Backpack | Red Core Striker with Crit Chance or Crit Damage |
| Chest | Red Core Equalizer with Crit Chance & Crit Damage |
| Gloves | Red Core Striker with Crit Chance or Crit Damage |
| Holster | Red Core Striker with Crit Chance or Crit Damage |
| Kneepads | Red Core Striker with Crit Chance or Crit Damage |
| Gear Mods | Crit Chance | Crit Damage |
| Skills | Striker Shield | Decoy | Pulse | Reviver Hive |
| Pro Tip | Aim for 50% Crit Chance, then use Crit Damage rolls and mods |
Build showcase:
Build store link: St. Elmo's Striker Build for Group for Sale (variant 4).
5. St. Elmo's Heartbreaker PvE Build
| Build Component | Description |
| Weapon Slot #1 | St. Elmo's Engine |
| Weapon Slot #2 | ACS-12 with Flatline |
| Specialization | Gunner |
| Mask | Blue Core Heartbreaker with Crit Chance or Crit Damage |
| Backpack | Blue Core Heartbreaker with Crit Chance or Crit Damage |
| Chest | Blue Core Heartbreaker with Crit Chance or Crit Damage |
| Gloves | Overdogs |
| Holster | Blue Core Heartbreaker with Crit Chance or Crit Damage |
| Kneepads | Red Core Fox's Prayer with Crit Chance or Crit Damage |
| Gear Mods | Crit Chance | Crit Damage |
| Skills | Crusader Ballistic Shield | Decoy | Pulse | Reviver Hive |
| Pro Tip | Aim for 55% Crit Chance, then use Crit Damage rolls and mods |
Build showcase:
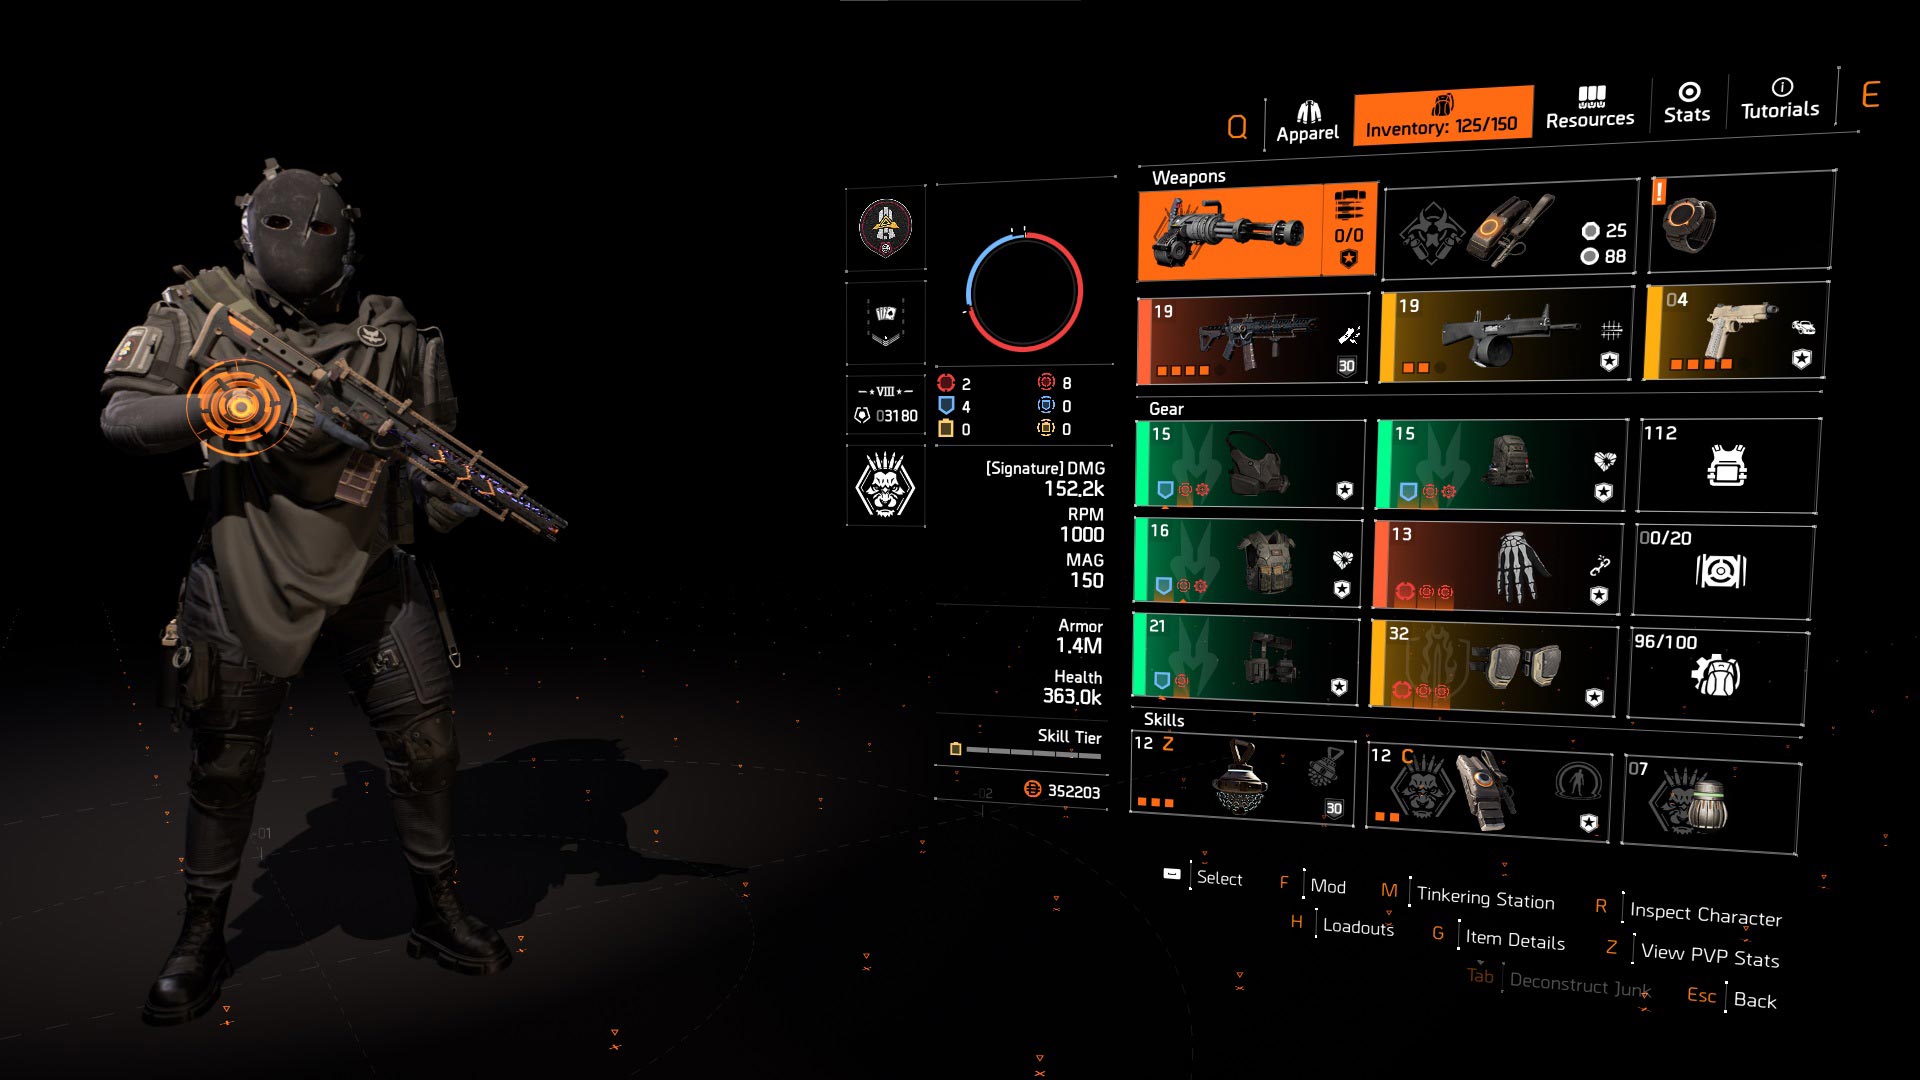
Build store link: St. Elmo's Heartbreaker PvE Build for Sale (variant 5).
6. St. Elmo's Umbra PvE Build
| Build Component | Description |
| Weapon Slot #1 | St. Elmo's Engine |
| Weapon Slot #2 | Any preferred weapon |
| Specialization | Gunner |
| Mask | Red Core Umbra with Crit Chance or Crit Damage |
| Backpack | Red Core Unit Alloys with Crit Chance, Crit Damage & Vigilance |
| Chest | Blue Core Umbra with Crit Chance or Crit Damage |
| Gloves | Blue Core Umbra with Crit Chance or Crit Damage |
| Holster | Red Core Salvo with Crit Chance or Crit Damage |
| Kneepads | Blue Core Umbra with Crit Chance or Crit Damage |
| Gear Mods | Crit Chance | Crit Damage |
| Skills | Crusader Ballistic Shield | Decoy | Pulse | Reviver Hive |
| Pro Tip | Aim for 55% Crit Chance, then use Crit Damage rolls and mods |
Build showcase:
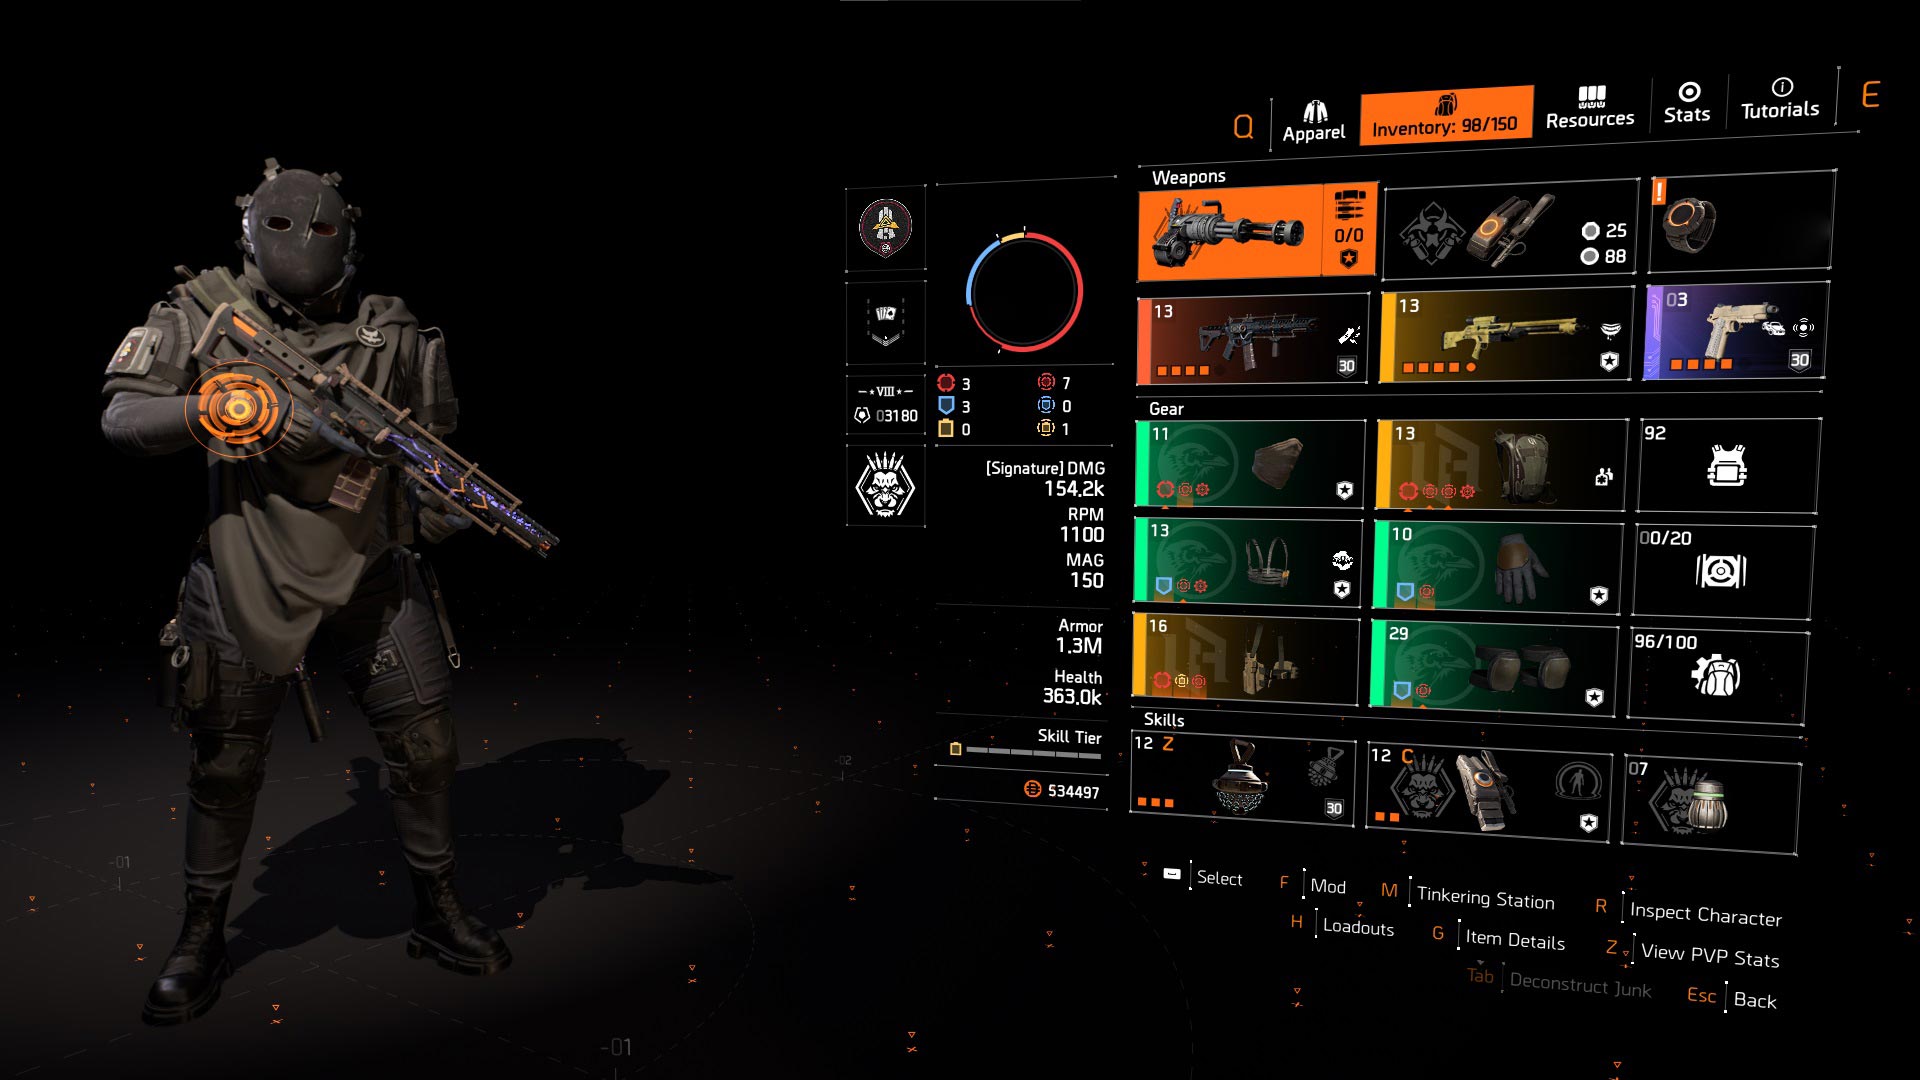
Build store link: St. Elmo's Umbra PvE Build for Sale (variant 6).
7. St. Elmo's Negotiator's Build
| Build Component | Description |
| Weapon Slot #1 | St. Elmo's Engine |
| Weapon Slot #2 | Any preferred weapon |
| Specialization | Gunner |
| Mask | Red Core Negotiator with Crit Chance or Crit Damage |
| Backpack | Red Core Negotiator with Crit Chance or Crit Damage |
| Chest | Red Core Negotiator with Crit Chance or Crit Damage |
| Gloves | Overdogs |
| Holster | Red Core Negotiator with Crit Chance or Crit Damage |
| Kneepads | Red Core Turmoil with Crit Chance & Crit Damage |
| Gear Mods | Crit Chance | Crit Damage |
| Skills | Crusader Ballistic Shield | Decoy | Pulse | Reviver Hive |
| Pro Tip | Aim for 55% Crit Chance, then use Crit Damage rolls and mods |
Build showcase:
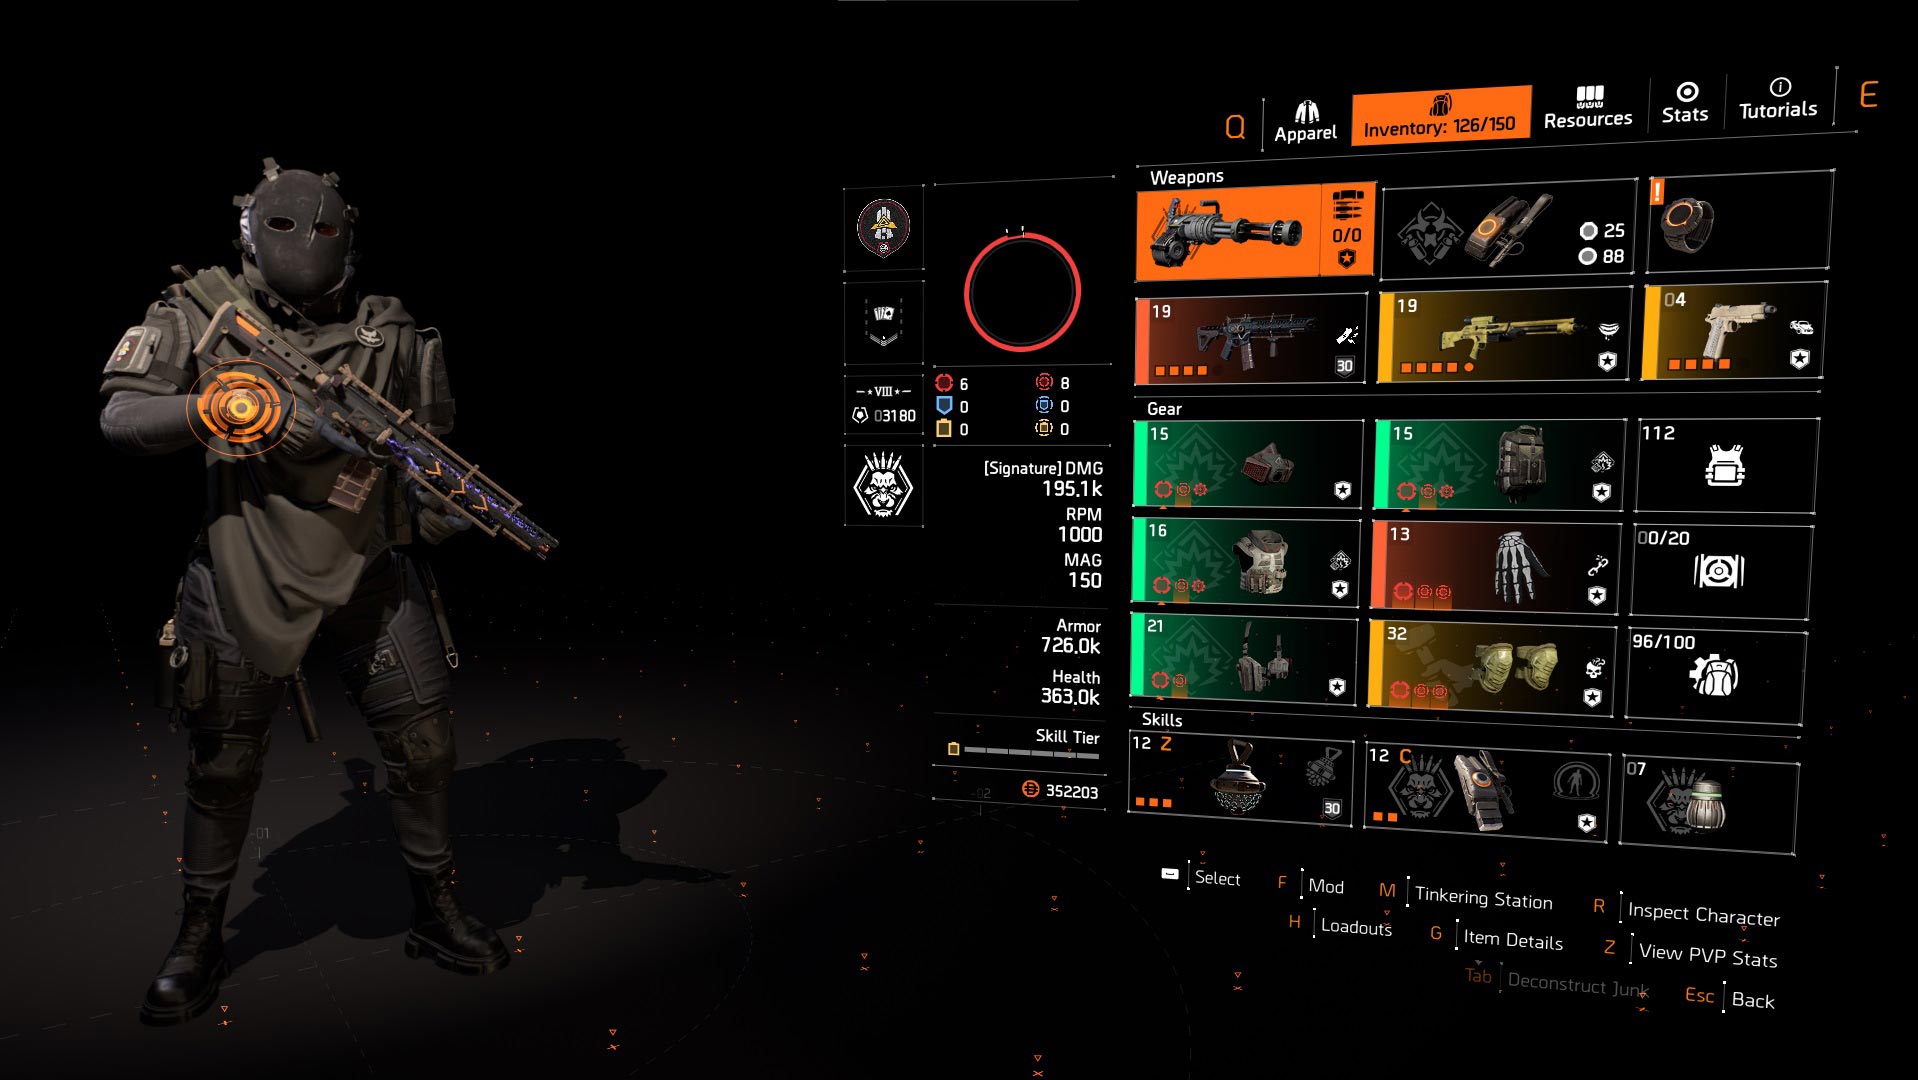
Build store link: St. Elmo's Negotiator's Build for Sale (variant 7).
8. St. Elmo's Striker PvP Build
| Build Component | Description |
| Weapon Slot #1 | St. Elmo's Engine |
| Weapon Slot #2 | M870 with DMG to target out of cover & Optimist |
| Specialization | Firewall |
| Mask | Red Core Striker with Crit Chance or Crit Damage |
| Backpack | Red Core Ceska or Grupo with Crit Chance, Crit Damage & Adrenaline Rush |
| Chest | Red Core Ceska or Grupo with Crit Chance, Crit Damage & Unbreakable |
| Gloves | Blue Core Striker with Crit Chance or Crit Damage |
| Holster | Blue Core Striker with Crit Chance or Crit Damage |
| Kneepads | Blue Core Striker with Crit Chance or Crit Damage |
| Gear Mods | Crit Chance | Crit Damage |
| Skills | Striker Shield | Decoy | Pulse | Reviver Hive |
| Pro Tip | Aim for 55% Crit Chance, then use Crit Damage rolls and mods |
Build showcase:
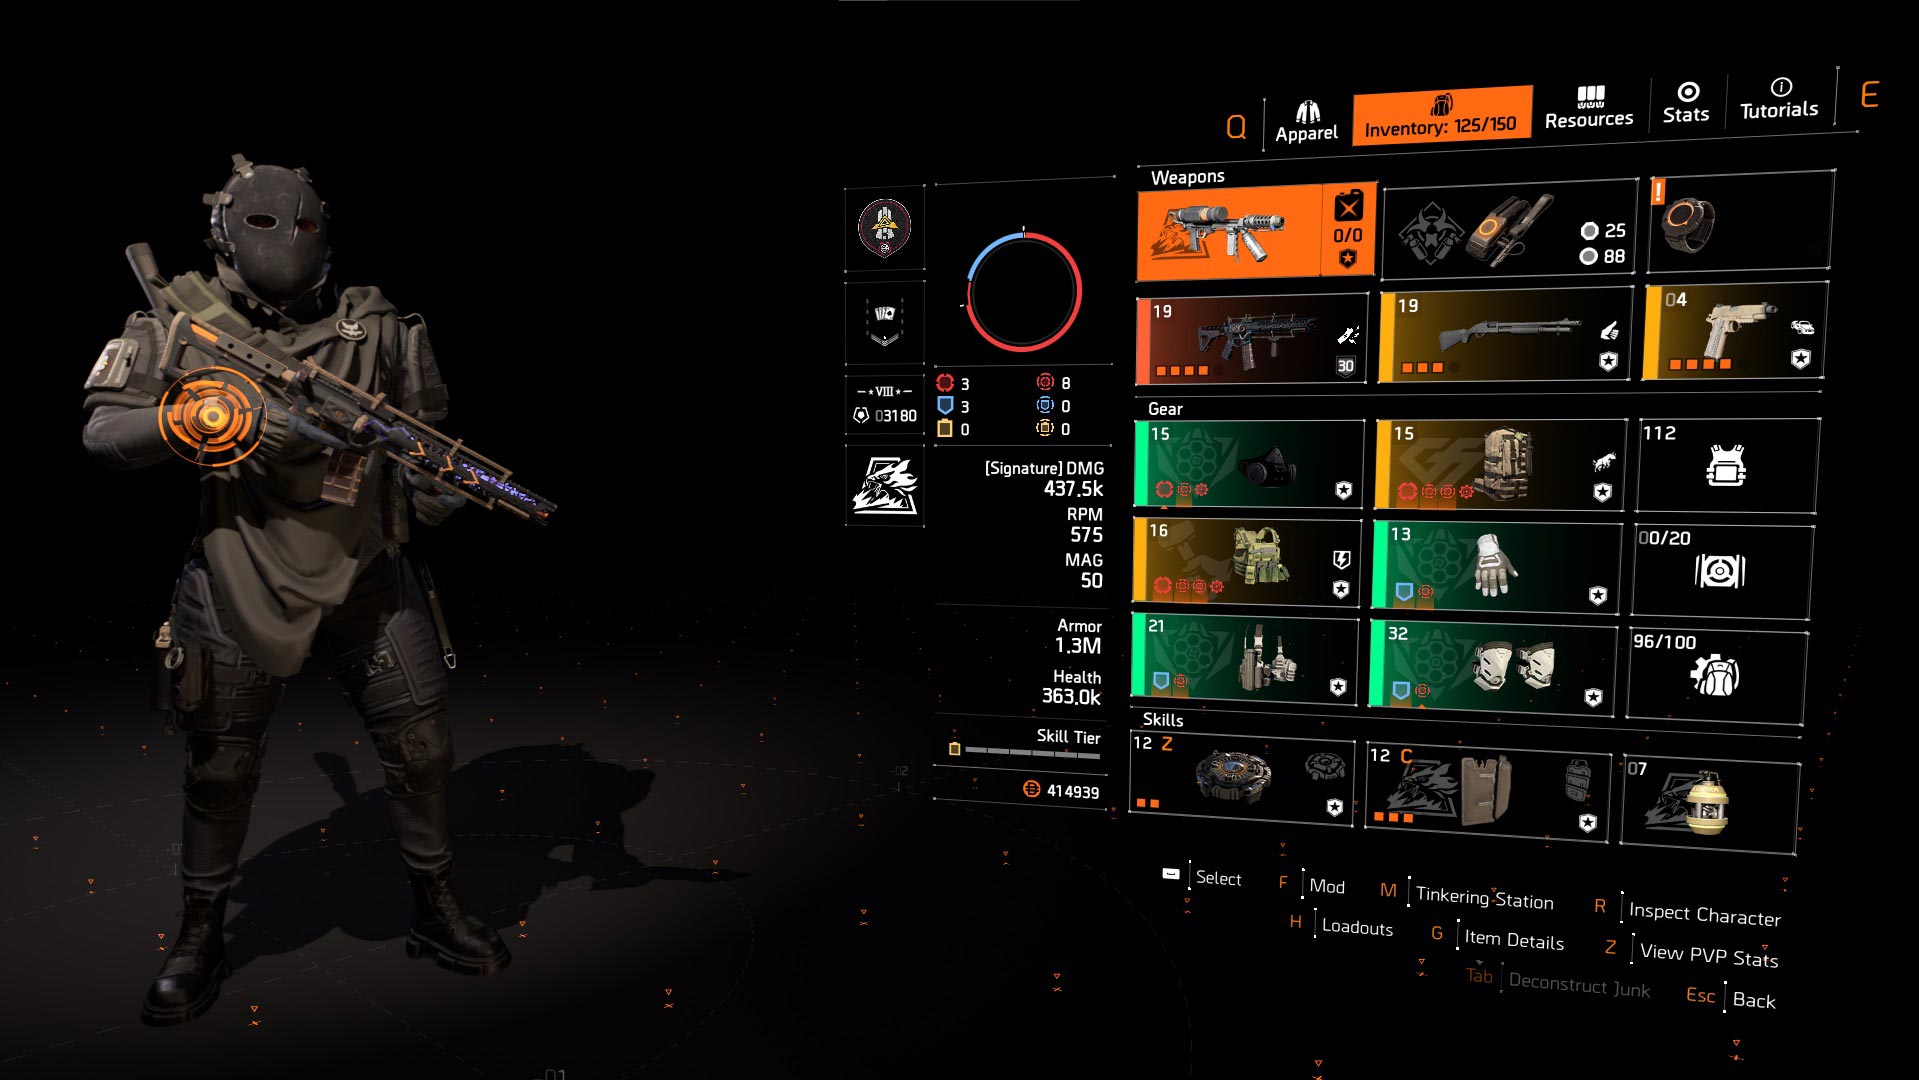
Build store link: St. Elmo's Striker PvP Build for Sale (variant 8).
Best Ouroboros Builds for PvE & PvP in 2026
Our most popular Ouroboros builds for Division 2 in Year 8 are:
1. Blue Hunter's Fury Ouroboros PvE Build
| Build Component | Description |
| Weapon Slot #1 | Ouroboros |
| Weapon Slot #2 | Any preferred weapon |
| Specialization | Gunner |
| Mask | Blue Core Hunter's Fury with Crit Chance or Crit Damage |
| Backpack | Memento |
| Chest | Blue Core Palisade with Crit Chance, Crit Damage & Obliterate or Intimidate |
| Gloves | Blue Core Hunter's Fury with Crit Chance or Crit Damage |
| Holster | Blue Core Hunter's Fury with Crit Chance or Crit Damage |
| Kneepads | Blue Core Hunter's Fury with Crit Chance or Crit Damage |
| Gear Mods | Crit Chance | Crit Damage |
| Skills | Crusader Ballistic Shield | Decoy | Pulse | Reviver Hive |
| Pro Tip | Aim for 55% Crit Chance, then use Crit Damage rolls and mods |
Build showcase:
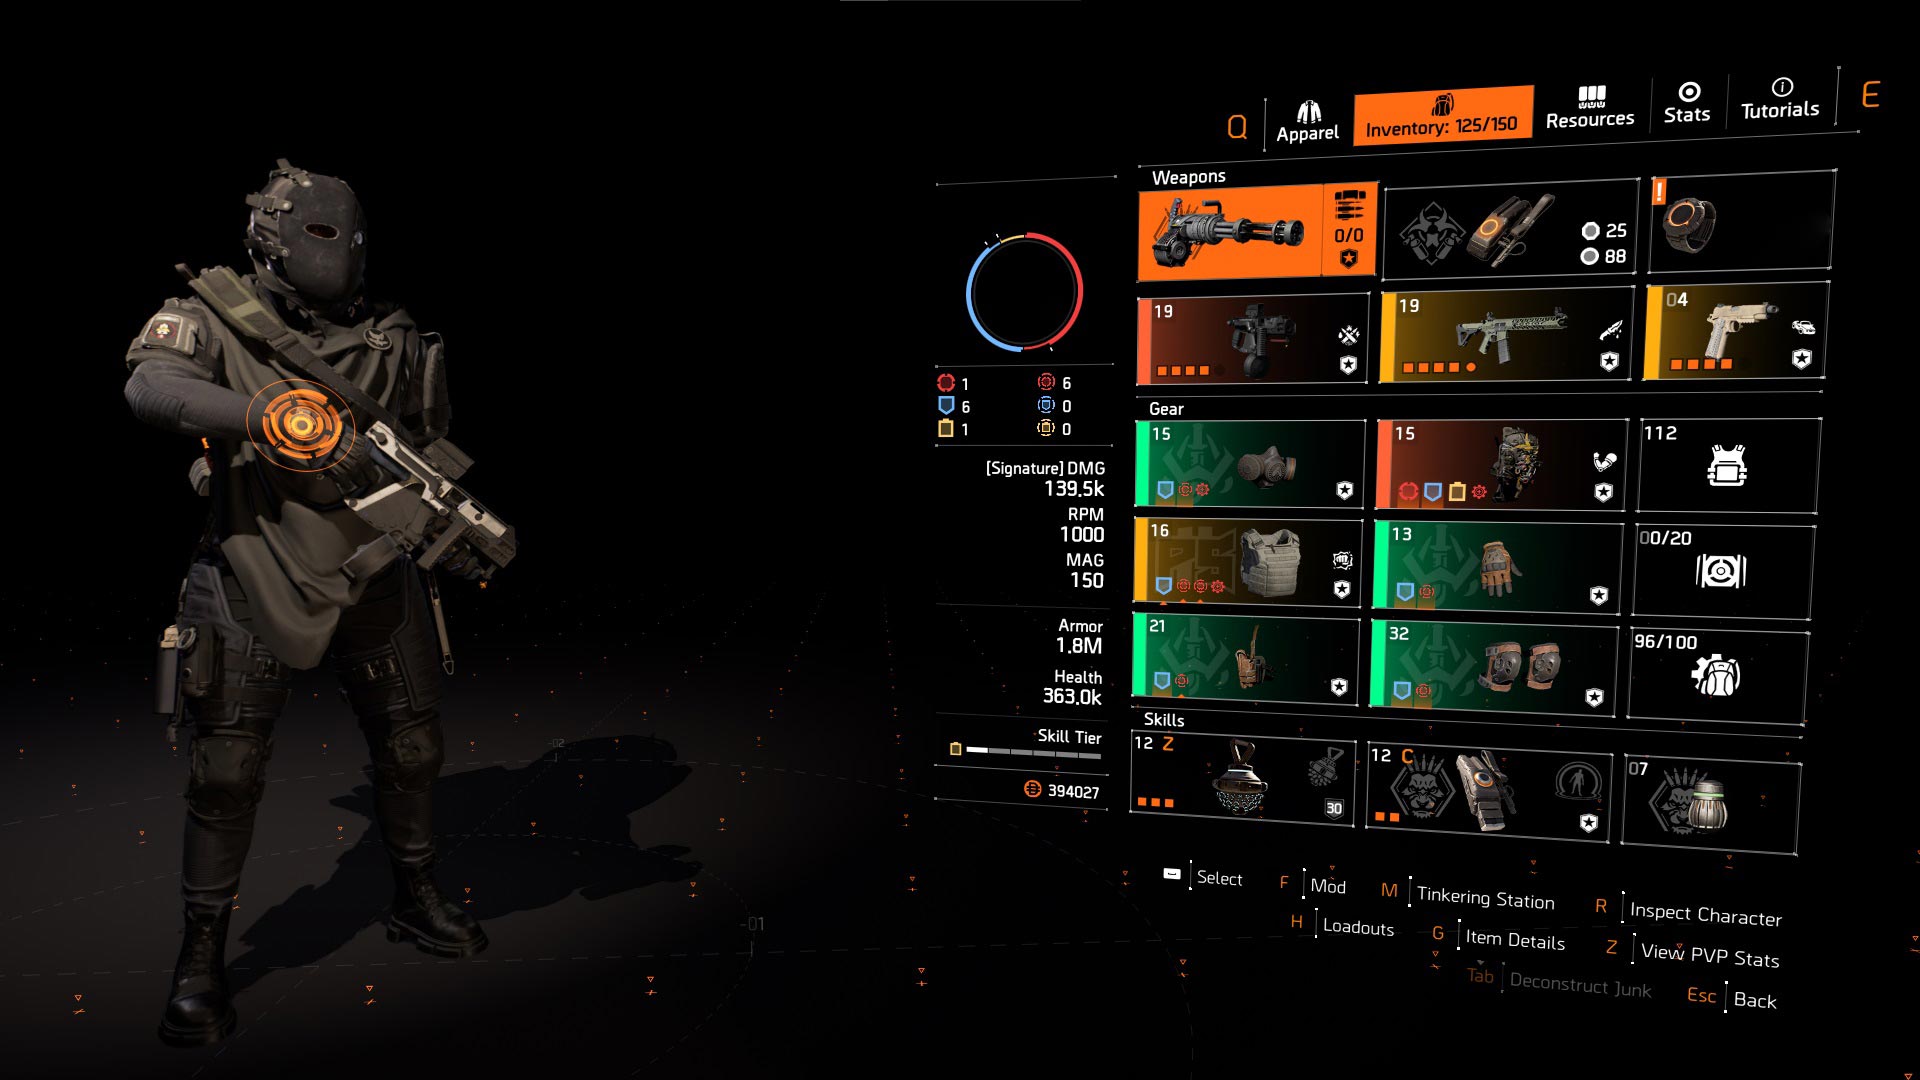
Build store link: Blue Hunter's Fury Ouroboros PvE Build for Sale (variant 1).
2. Red Hunter's Fury Ouroboros PvE Build
| Build Component | Description |
| Weapon Slot #1 | Ouroboros |
| Weapon Slot #2 | Any preferred weapon |
| Specialization | Gunner |
| Mask | Red Core Hunter's Fury with Crit Chance or Crit Damage |
| Backpack | Memento |
| Chest | Red Core Ceska or Grupo with Crit Chance, Crit Damage & Obliterate or Intimidate |
| Gloves | Red Core Hunter's Fury with Crit Chance or Crit Damage |
| Holster | Red Core Hunter's Fury with Crit Chance or Crit Damage |
| Kneepads | Red Core Hunter's Fury with Crit Chance or Crit Damage |
| Gear Mods | Crit Chance | Crit Damage |
| Skills | Crusader Ballistic Shield | Decoy | Pulse | Reviver Hive |
| Pro Tip | Aim for 55% Crit Chance, then use Crit Damage rolls and mods |
Build showcase:
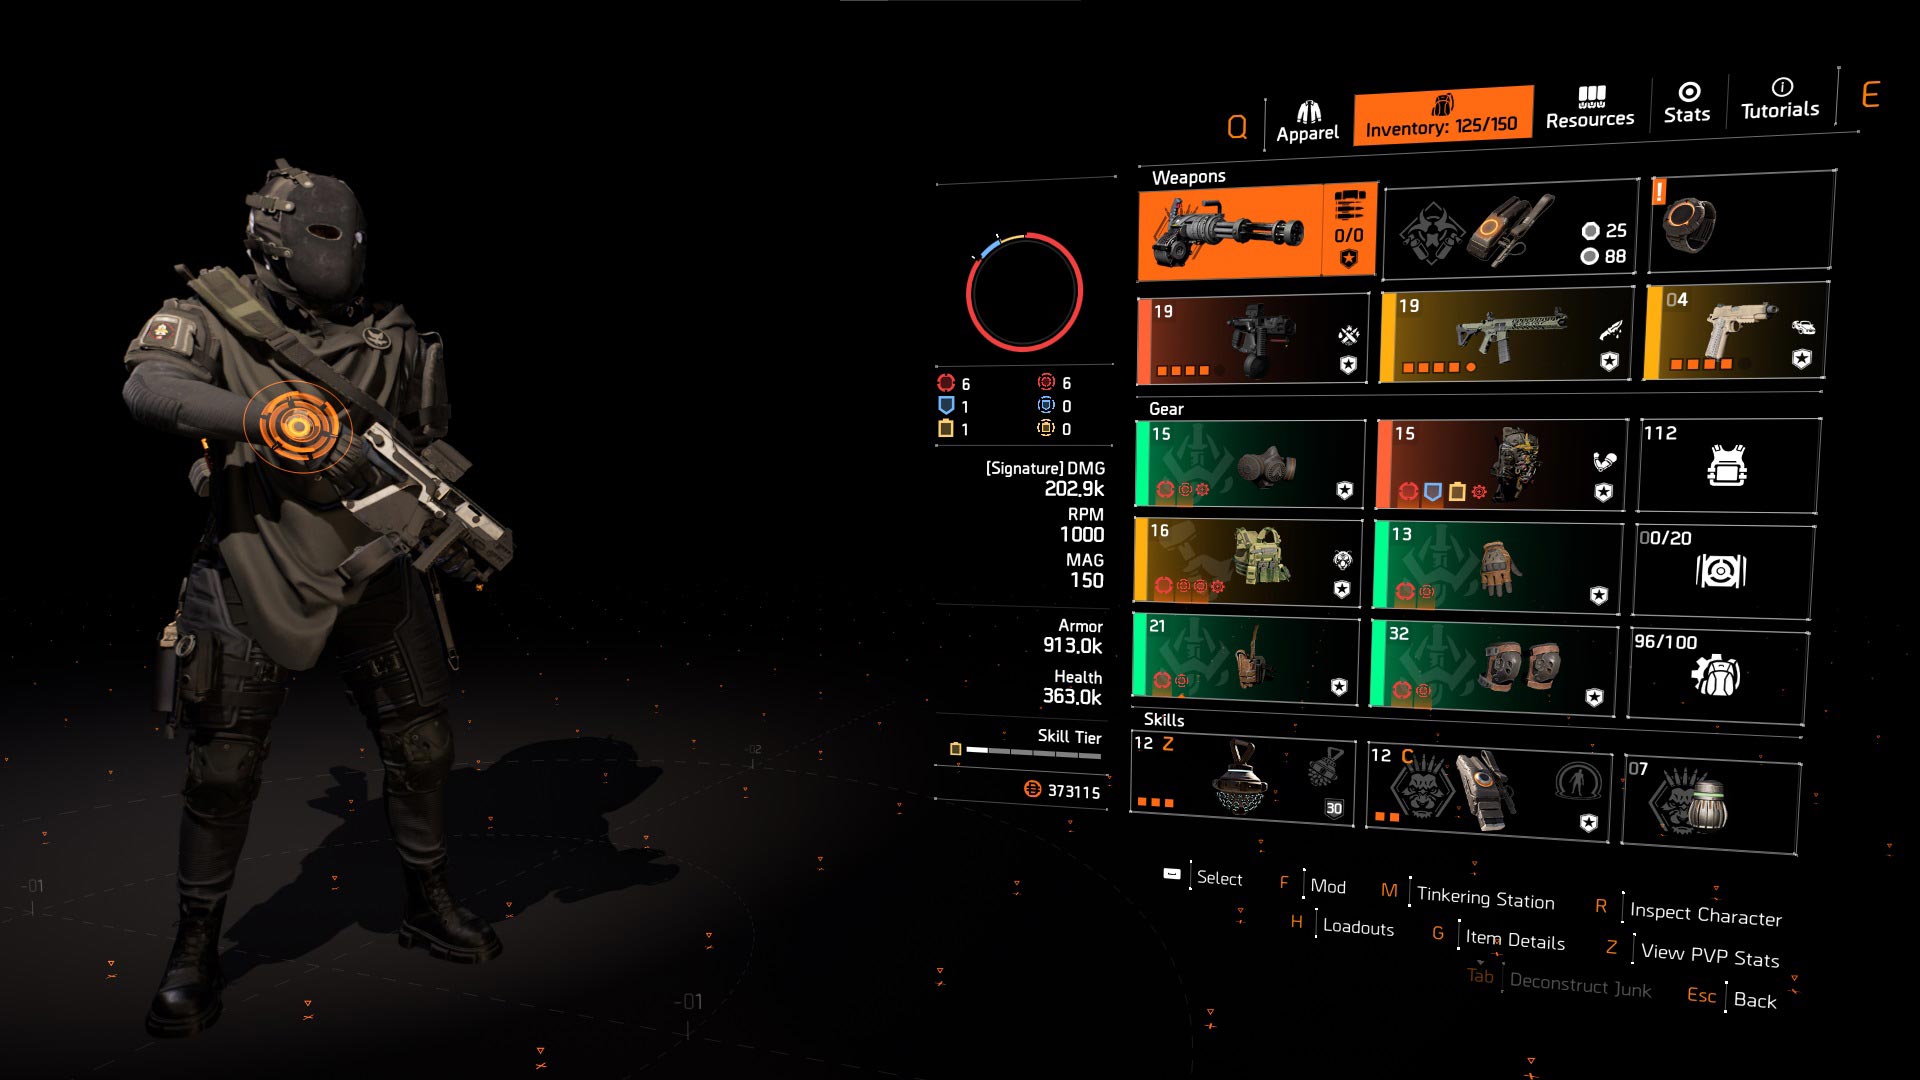
Build store link: Red Hunter's Fury Ouroboros PvE Build For Sale (variant 2).
3. Striker PvE Build with Ouroboros
| Build Component | Description |
| Weapon Slot #1 | Ouroboros |
| Weapon Slot #2 | Any preferred weapon |
| Specialization | Gunner |
| Mask | Red Core Striker with Crit Chance or Crit Damage |
| Backpack | Memento |
| Chest | Red Core Ceska or Grupo with Crit Chance, Crit Damage & Obliterate or Intimidate |
| Gloves | Blue Core Striker with Crit Chance or Crit Damage |
| Holster | Blue Core Striker with Crit Chance or Crit Damage |
| Kneepads | Blue Core Striker with Crit Chance or Crit Damage |
| Gear Mods | Crit Chance | Crit Damage |
| Skills | Crusader Ballistic Shield | Decoy | Pulse | Reviver Hive |
| Pro Tip | Aim for 55% Crit Chance, then use Crit Damage rolls and mods |
Build showcase:
Build store link: Striker PvE Build with Ouroboros for Sale (variant 3).
4. Striker PvP Build with Ouroboros
| Build Component | Description |
| Weapon Slot #1 | Ouroboros |
| Weapon Slot #2 | M870 with DMG to target out of cover & Optimist |
| Specialization | Gunner |
| Mask | Red Core Striker with Crit Chance or Crit Damage |
| Backpack | Red Core Ceska or Grupo with Crit Chance, Crit Damage & Adrenaline Rush |
| Chest | Red Core Ceska or Grupo with Crit Chance, Crit Damage & Unbreakable |
| Gloves | Red Core Striker with Crit Chance or Crit Damage |
| Holster | Blue Core Striker with Crit Chance or Crit Damage |
| Kneepads | Blue Core Striker with Crit Chance or Crit Damage |
| Gear Mods | Crit Chance | Crit Damage |
| Skills | Crusader Ballistic Shield | Seeker Mine | Decoy | Pulse |
| Pro Tip | Aim for 55% Crit Chance, then use Crit Damage rolls and mods |
Build showcase:
Build store link: Striker PvP Build with Ouroboros for Sale (variant 4).
5. Hunter's Fury PvP Build with Ouroboros
| Build Component | Description |
| Weapon Slot #1 | Ouroboros |
| Weapon Slot #2 | M870 with DMG to target out of cover & Optimist |
| Specialization | Firewall |
| Mask | Red Core Hunter's Fury with Crit Chance or Crit Damage |
| Backpack | Red Core Ceska or Grupo with Crit Chance, Crit Damage & Adrenaline Rush |
| Chest | Red Core Ceska or Grupo with Crit Chance, Crit Damage & Unbreakable |
| Gloves | Red Core Hunter's Fury with Crit Chance or Crit Damage |
| Holster | Blue Core Hunter's Fury with Crit Chance or Crit Damage |
| Kneepads | Blue Core Hunter's Fury with Crit Chance or Crit Damage |
| Gear Mods | Crit Chance | Crit Damage |
| Skills | Crusader Ballistic Shield | Seeker Mine | Decoy | Pulse |
| Pro Tip | Aim for 55% Crit Chance, then use Crit Damage rolls and mods |
Build showcase:
Build store link: Hunter's Fury PvP Build with Ouroboros for Sale (variant 5).
Update Log
01.09.2026 - Updated the "Year 8 & Season 3 Builds" section
10.08.2026 - Updated the "Best PvP Builds" section with the latest builds
07.08.2026 - Added the "Best Builds for Master Missions" section
06.08.2026 - Updated the "Best Builds for Incursions" section
05.08.2026 - Added the "Best Builds for Escalations" section
04.08.2026 - Updated the "Best Striker Builds" and "Best Ouroboros Builds" sections
31.07.2026 - Updated the "Best PvE Builds" section with the latest builds
30.07.2026 - Updated the "Best PvE Builds" section with Tipping Scales loadouts
23.04.2026 - Updated the "Best Prototype Builds" section with new loadouts
08.04.2026 - Updated the "Best Prototype Builds" section with new loadouts
06.04.2026 - Added the "Best Prototype Builds" section
05.04.2026 - Updated the "Best Striker Builds" and "Best PvE Builds" sections with "Striker Build with Overdogs and Equalizer"
21.02.2026 - Updated the "Year 7 & Season 3 Builds" section with Best Sheriff Builds
06.12.2025 - Updated the "Year 7 & Season 3 Builds" section
03.12.2025 - Updated the "Year 7 & Season 3 Builds" section
26.09.2025 - Updated the "Year 7 & Season 2 Builds" section
18.09.2025 - Updated the "Year 7 & Season 2 Builds" section
15.09.2025 - Updated the "Year 7 & Season 2 Builds" section
12.09.2025 - Updated the "Year 7 & Season 2 Builds" section
18.08.2025 - Updated the "Best Tinkerer Builds" section
13.08.2025 - Added the "Best Tinkerer Builds" section
08.08.2025 - Added the "Best Lexington Builds" section
10.06.2025 - Updated the "Year 7 & Season 1 Builds" section
05.06.2025 - Updated the "Year 7 & Season 1 Builds" section
04.06.2025 - Updated the "Year 7 & Season 1 Builds" section
01.03.2025 - Re-added the "Best Striker Builds", "Best St Elmo's Builds", and "Best Ouroboros Builds" sections
28.02.2025 - Updated the "Year 6 & Season 3 Builds" section
27.02.2025 - Updated the "Year 6 & Season 3 Builds" section
21.02.2025 - Updated the "Best PvE Builds (2025)" section
20.02.2025 - Updated the "Best PvP Builds (2025)" & "Meta Raid Builds" sections
19.02.2025 - Updated the "Best PvP Builds (2025)" section for Season 3
18.02.2025 - Updated the "Best XP & SHD Farming Builds", "Paradise Lost Builds", "Meta Raid Builds", and "Best PFE Builds" sections
17.02.2025 - Updated the "Best Legendary Builds" section
14.02.2025 - Added 6 new PvP builds in the "Best PvP Builds" section
18.11.2024 - Added the Chatterbox Builds in the "Year 6 Season 2" section
13.11.2024 - Added the Auto Rifle Builds in the "Year 6 Season 2" section
04.11.2024 - Added the Infinite Seeker Mines HW Build in the "Year 6 Season 2" section
02.11.2024 - Updated the "Year 6 Season 2" section with the most recent seasonal builds
13.06.2024 - Updated the "Year 6 Season 1" section with the "Rifle Builds"
11.06.2024 - Updated the "Title Update 20 & Season 3" section and renamed it "Year 6 Season 1"
27.05.2024 - Added the "Umbra PvP Builds" in the "Best PvP Builds" section
24.05.2024 - Updated the "RPK-74 Builds" in the "Title Update 20 & Season 3" section
23.05.2024 - Added the "RPK-74 Builds" in the "Title Update 20 & Season 3" section
11.05.2024 - Updated the "Best XP & SHD Farming Builds" section
17.03.2024 - Updated the guide with the newest healer build variant
13.03.2024 - Updated the "Best Legendary Builds" section
11.03.2024 - Added the "Hybrid Red-Yellow Empress Skill Build" in "Best PvE Builds" section
09.03.2024 - Added the "Best PFE Builds" section
05.03.2024 - Added the "Best XP & SHD Farming Builds" section
10.02.2024 - Added the "System Corruption Build" in "Best PvP Builds" & "Title Update 20 & Season 3" sections
09.02.2024 - Updated the "Title Update 20 & Season 3" section with Armor Regen & Vindicator Builds
08.02.2024 - Updated the "Title Update 20 & Season 3" section with Shield Splinterer Builds
07.02.2024 - Updated the "Title Update 20 & Season 3" section
05.01.2024 - Updated the whole guide with the new 2024 changes
20.10.2023 - Updated the "Title Update 19 & Season 2" section with "Iron Lung Builds", "Collector Builds", and "Ortiz Exuro Builds"
05.10.2023 - Added the "Title Update 19 & Season 2" and "Paradise Lost Incursion Builds" sections
14.09.2023 - Added the "Best Hardcore Builds" section with 7 recommended builds
01.09.2023 - Updated the "Title Update 18 & Season 1 Builds" section with the Hunter's Determined Build & St Elmo's Armor Regen Build
04.07.2023 - Updated the "Title Update 18 & Season 1 Builds" section with the Hunter's Fury Build
03.07.2023 - Updated the "Title Update 18 & Season 1 Builds" section with the Double Companion Build
12.06.2023 - Updated the "Title Update 18 & Season 1 Builds" section
28.04.2023 - Added the Heartbreaker PvE Build in "Best PvE Builds (2023)" section
06.04.2023 - Added the Striker PvP Build & Catharsis PvP Build in "Best PvP Builds (2023)" section
12.03.2023 - Added the NinjaBike Legendary Skill Build in "Title Update 17 Builds" section
05.03.2023 - Added the Doctor Home Rifle Build in "Title Update 17 Builds" section
04.03.2023 - Added the NinjaBike Striker's Fury Build in "Title Update 17 Builds" section
03.03.2023 - Added the NinjaBike Heartbreaker Striker Build in "Title Update 17 Builds" section
02.03.2023 - Added the Hotshot Sniper Build in "Title Update 17 Builds" section
01.03.2023 - Updated the "Title Update 17 Builds" section with Prophet and NinjaBike Messenger Builds
29.09.2022 - Added the Kingbreaker Striker Build in "Title Update 16 Builds" section
17.09.2022 - Added the Ridgeway's Ongoing SMG Build in "Title Update 16 Builds" section
15.09.2022 - Added the "Title Update 16 Builds" section with 6 new loadouts
03.09.2022 - Started working on the new builds for Season 10 and Title Update 16. Updates incoming very soon!
10.06.2022 - Updated the "Build components" section with the best gear sets and exotic items to use in 2022 meta
07.06.2022 - Added the "Pulse Resistance Build (Heartbreaker Counter Build)" in the "Best PvP Builds (2022)" section
22.05.2022 - Updated the "Creating the perfect build" section with the new Expertise feature
18.05.2022 - Added the "Heartbreaker PvP Build" in the "Best PvP Builds (2022)" and "Title Update 15 Builds" sections
16.05.2022 - Updated "Tank Build" and "Healer Build" in the "Meta Raid Builds" section
14.05.2022 - Added "Title Update 15 Builds" section that showcases 3 brand-new builds introduced with the launch of Season 9: "Kingbreaker Spotter Build", "Bluescreen LMG Build", "Dread Edict Sniper Build"
04.05.2022 - Added Pestilence LMG Build and Legendary Skill Build with Empress Set to "Best Builds for PvE in 2022"
Conclusion
This wraps up everything you should know regarding build-making and the best Division 2 builds in 2026. By reading this guide, I hope you now have a clear image of what a build is made of, how min-maxing works, the different types of builds and their particularities, and how to choose the best PvE or PvP build for your character.
We will keep updating this guide as new builds keep joining the stage, so keep an eye on this post and don't miss out on what can be the "new best build" for your character.
Related Guides
Stay tuned and check out our related guides for The Division 2:
- Broken Rain Incursion Guide
- Division 2 Best Gear Sets and Brand Sets
- Division 2 Best Exotic Weapons & Armor
- Division 2 Best Weapons Guide
- Paradise Lost Incursion Guide
- Descent Mode Guide
- Division 2 Battle for Brooklyn Overview
- Division 2 Brooklyn Hunter Masks
- How to complete all Journey Missions in Division 2
About Grindout
Are you struggling to put all the pieces together or simply don’t have the time for all the grinding? No problem, we've got it covered! At Grindout, we also provide build-making services for Division 2. All you have to do is to choose the desired build for your character and let our professional boosters handle everything for you.
You can buy Complete Division 2 Builds from the store or create your custom build, and we will follow your instructions and prepare the desired loadout on your account. Also, if you are eager to try the most powerful loadouts right now, you can purchase a premade TD2 account and get your hands on the best builds in the game, lightning-fast. You deserve the best gaming experience, Agent! We're here to make it happen!
Contents
- Introduction
- Build components
- Fastest way to create builds
- Creating the perfect build
- Types of builds
- Best PvE Builds (2026)
- Best PvP Builds (2026)
- Best Builds in Red Horizon (Y8S3)
- Best Builds for Escalations
- Best Builds for Incursions
- Best Builds for Raids
- Best XP & SHD Farming Builds
- Best Builds for Master Missions
- Best Prototype Builds
- Best Striker Builds
- Best St Elmo's Builds
- Best Ouroboros Builds
- Update Log
- Conclusion