
Broken Rain Incursion Guide: Complete Division 2 Walkthrough
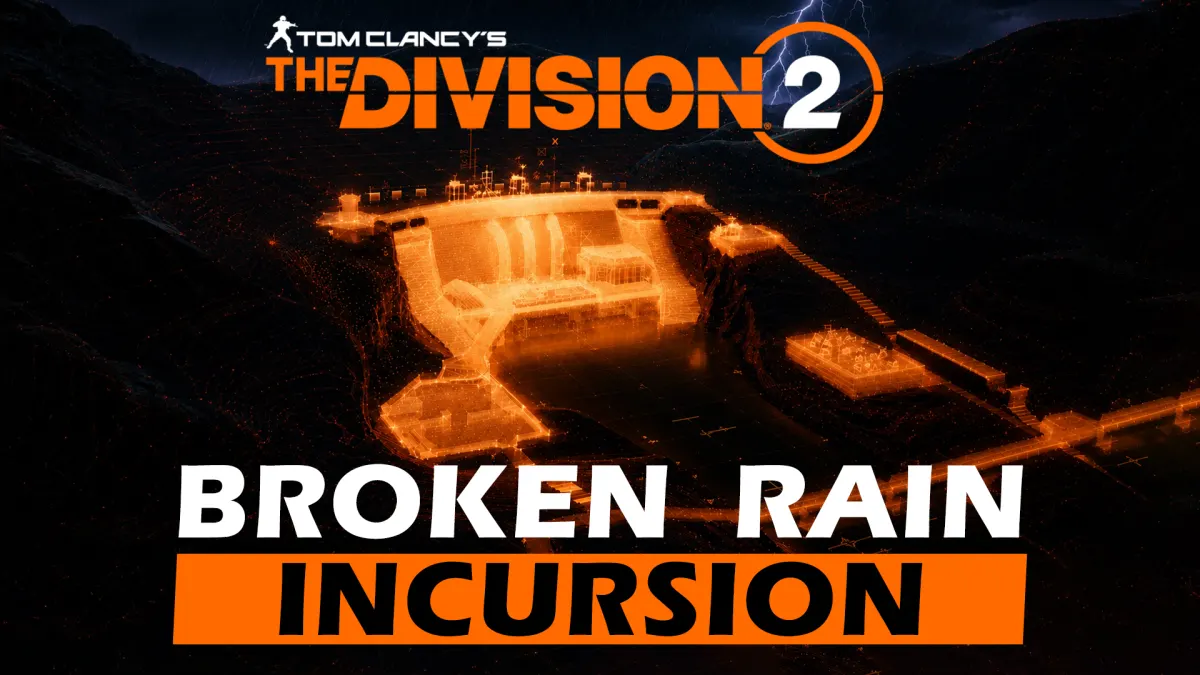
Welcome to our Broken Rain Incursion Guide for The Division 2, Agent! Broken Rain is the newest Incursion added to the game and takes the fight to Steel Creek Dam and Hydroelectric Plant, where the Rikers have seized control of the facility.
In this guide, we cover everything you need to know about the Broken Rain Incursion, including how to access it, its requirements, difficulty, matchmaking, bosses, encounters, mechanics, rewards, loot, farming methods, and the best builds to use.
Whether you are preparing for your first Broken Rain clear, looking for the best Broken Rain builds, or trying to optimize your team's strategy for faster runs, we have you covered.
What Is Broken Rain in The Division 2?
Broken Rain is the newest Incursion in The Division 2, designed as a challenging end-game activity for coordinated teams. It takes place at Steel Creek Dam and Hydroelectric Plant, a new location that has been taken over by the Rikers.
An approaching hurricane makes the situation even more dangerous. Agents have to breach the Rikers' defenses, fight through the hydroelectric facility, eliminate the enemy leadership, and secure the site before the storm arrives.
Like the Paradise Lost Incursion , Broken Rain sits between regular high-end PvE missions and the game's full raids in terms of group size and encounter complexity. Expect four-player coordination, unique mechanics, boss encounters, and end-game rewards.
Broken Rain Release Date
The Broken Rain release date is 11 August 2026, as part of The Division 2's Year 8 Season 2: Into the Dark.
Why Should You Play Broken Rain?
If you are an end-game Division 2 player, Broken Rain is worth playing for three reasons: the new encounters, the challenge of learning its mechanics, and unlocking Incursion-exclusive rewards such as the new Steel & Sons exotic rifle or the Beats Per Minute Mask .
How to Access the Broken Rain Incursion
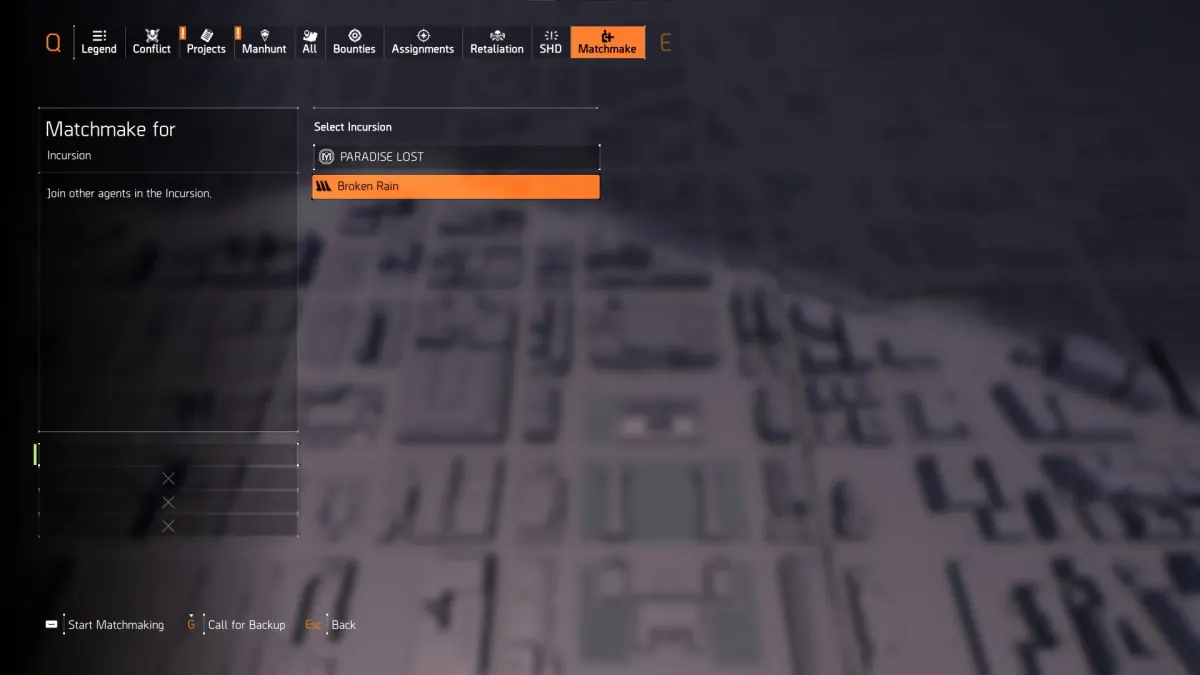
Broken Rain is an end-game Incursion and is accessed through the same interfaces you already use for other end-game activities, the world map:
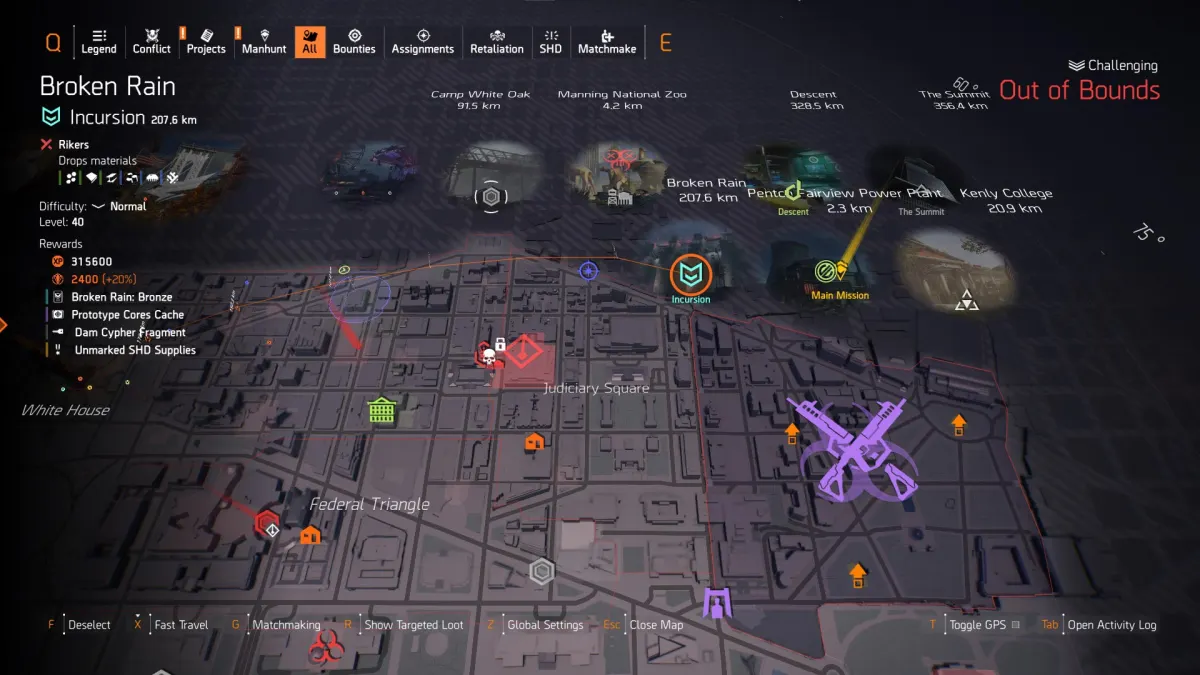
and the matchmaking menu:
Broken Rain Requirements and Team Setup
Before you queue for Broken Rain, make sure your Agent is properly prepared. As with every challenging Division 2 activity, this is not content designed around a fresh level 40 character.
| Requirement | What You Need |
| Character level | Level 40 end-game Agent |
| Team size | Four players strongly recommended |
| Matchmaking | Supported |
| Warlords of New York | Not required |
| Battle for Brooklyn | Not required |
| Extra purchase | None, Broken Rain is part of the core game |
| Loadout | Optimized end-game build, not a fresh level 40 kit |
The short version: nothing gates you out of Broken Rain except your own gear. There is no DLC wall and no separate purchase, so the only real barrier is whether your build is ready.
Who Can Play Broken Rain?
Broken Rain is intended for level 40 end-game Agents prepared with adequate, optimized loadouts.
Is Broken Rain Free?
Yes. Broken Rain is part of The Division 2's core content and is not sold as a separate paid purchase the way Classified Assignments are.
Do You Need Warlords of New York or Battle for Brooklyn?
No. Neither the Warlords of New York nor the Battle for Brooklyn expansion is required to access the Broken Rain Incursion.
Can You Play Broken Rain Solo?
Technically yes, you can enter without a pre-made team. But Broken Rain is designed around coordinated group play, and its Incursion format means a full four-player team is strongly recommended.
We do not recommend planning your first Broken Rain clear as a solo run.
Matchmaking and Finding a Team
Matchmaking matters for anyone without a fixed group. Just like Paradise Lost, Broken Rain supports matchmaking, so you can find teammates instead of relying purely on clans or friends.
Pro Tip: If you are using matchmaking, talk before you start an encounter. Agreeing on roles and mechanics up front is the difference between a smooth clear and a night of repeated wipes.
How Hard Is the Broken Rain Incursion?
Broken Rain is challenging end-game PvE content. If Paradise Lost is your reference point, expect Broken Rain to demand the same level of expertise and coordination.
Where the Difficulty Actually Comes From
The biggest challenge is not enemy damage or health. Incursions are built around mechanics, positioning, communication, and team coordination. Prepare for a combination of:
- Damage checks: windows where the team has to push a threshold before a timer runs out.
- Add management: deciding what dies first while the objective is still running.
- Positioning: holding the right spot rather than chasing kills.
- Objective mechanics: tasks that need someone to stop shooting and do them.
This is why a highly optimized DPS build will not carry a team on its own. If the group does not understand the mechanics, raw damage does not save the run.
Are There Multiple Difficulty Levels?
No. Just like Paradise Lost, Broken Rain is built around a dedicated Incursion difficulty rather than the standard Normal, Hard, Challenging and Heroic selection.
Are There Rewards for a Flawless Clear?
Yes, the rewards for completing the Broken Rain Flawless (deathless) are a backpack trophy and a mask.
Does Broken Rain Scale With Team Size?
Nothing official yet, but do not assume fewer players makes Broken Rain proportionally easier. Incursion mechanics are normally designed around team coordination, so a four-player squad should be treated as the standard way to approach the activity.
How Long Does a Broken Rain Clear Take?
Completion time depends heavily on team experience, builds, and how fast your group learns the mechanics. Experienced groups are already completing the incursion in less than 30 minutes.
Is There a World First Race for Broken Rain?
No. Ubisoft has confirmed that the new Incursion does not use the World First competition format previously attached to major end-game releases.
Even without a formal race, fast completion times and optimized farming routes are likely to become a major part of the Broken Rain community meta.
Can you use Prototype Gear in the Broken Rain Incursion?
Yes, Ubisoft has confirmed that players can bring their Prototype items to the Incursion, but "stats will be fully normalized. This means Prototype Augments will be disabled, and Prototype stats will be reduced to their minimum values" - same system already used in the other incursion and raids.
Broken Rain Bosses, Encounters & Mechanics
This is where things get serious, Agent! The Broken Rain Incursion is heavily focused on mechanics, and knowing what to do during each encounter is just as important as having the right builds.
As you make your way through the Steel Creek Dam, you'll encounter several boss fights and objective-based mechanics involving a War Hound, APC, turbines, water valves, EMPs, access terminals, weak points, and Thermite.
Below, we'll go through all four Broken Rain encounters and explain what you need to do at each stage, including the recommended strategy and the mechanics you should watch out for.
How Many Bosses and Encounters Are in Broken Rain?
Broken Rain features four main encounters. Each one introduces a different mechanic, with the final encounter combining several mechanics into one extended boss fight.
- Encounter #1: First Boss: "Lester Steel" & Burning Arena
- Encounter #2: War Hound (Patch) Escort, APC & Second Boss "Dwayne Steel IV"
- Encounter #3: Turbine System & Third Boss "Iris Steel"
- Encounter #4: Access Relay, Water Pressure & Final Boss "Marguerite Steel"
Broken Rain Encounter #1 - First Boss: Lester Steel
The first boss encounter is a relatively simple introduction to Broken Rain's mechanics. Once you've reached the arena, you'll have to deal with several enemies and, most importantly, the snipers positioned around the area.
How to Prepare for the First Boss
- Drop into the area and start clearing the initial wave of enemies.
- Keep an eye on the sniper positions around the arena.
- There can be four snipers covering different angles.
- Use cover and remove the snipers before they become a problem.
- A Foam-focused Crowd Control build can make this part considerably easier.
- Once the area is clear, interact with the War Hound to start the boss sequence.
How to Beat the First Broken Rain Boss (Lester Steel)
After activating the encounter, the boss enters the arena from a vehicle. Don't immediately waste your strongest damage, as the boss has temporary damage reduction while approaching the team.
- Set up on the right side of the boss's spawn area.
- Wait for the boss to reach the ground and lose its protection.
- Once the damage reduction disappears, commit your team's DPS.
- Keep moving as the boss starts setting sections of the arena on fire.
- Don't allow the fight to drag on, as the available safe space becomes increasingly limited.
- Finish off the remaining enemies once the boss is down.
The key here is simple: wait for the proper damage window and kill the boss quickly. The longer the encounter lasts, the more difficult positioning becomes.
Broken Rain Encounter #2 - War Hound Escort & Dwayne Steel Fight
The second encounter changes the pace completely. Instead of simply burning down a boss, your team needs to escort a War Hound while protecting it from the Rikers.
Starting the War Hound Mechanic
- Activate the War Hound to begin the encounter.
- Follow it until it reaches the first set of gates.
- Use the door on the right to reach the nearby activation button.
- Press the button and regroup with the team.
- Once the gates open, continue following the War Hound.
How to Control the War Hound
The War Hound will continue moving when players remain within range. This can actually make the encounter harder, because it may push forward while your team is still dealing with enemies.
A useful strategy is to create some distance from the War Hound. When the team moves far enough away, it stops, giving you time to clear the enemies ahead before continuing the escort.
- Don't rush the War Hound through areas full of enemies.
- Move away from it whenever you need to pause its progress.
- Clear dangerous enemies before advancing.
- Keep an eye on the War Hound's health throughout the encounter.
- Be especially careful as you approach the lower section of the area.
Broken Rain APC Phase
Eventually, the War Hound reaches the APC section. This is your next objective, and the APC needs to be destroyed before you can progress.
- Clear the surrounding enemies first.
- Destroy the APC.
- Be ready for additional heavy enemies after the APC goes down.
- Once the area is secure, enter the room on the left.
- Activate the first power button.
- Cross the bridge area and activate the second button.
- Use the crane control to lower the bridge.
- Clear the remaining enemies and return to the War Hound.
Once the War Hound reaches the end of its route, it triggers an EMP blast. This disables the team temporarily but also opens the path forward.
Shortly, you will meet Dwayne Steel IV, the 2nd Broken Rain Incursion boss. All you need to do is destroy its backpack and then melt it down. Be careful; stay in cover and avoid taking damage from the turrets and heavies while on it. This is another DPS check phase.
Broken Rain Encounter #3 - Turbines & Iris Steel Boss
The third encounter is the first major mechanic check in Broken Rain. Your team needs to keep the turbine system running by monitoring the control-room screens and the corresponding water valves.
How the Turbine Mechanic Works
The room contains two water valves, one on each side, while the control room contains four screens. Each side of the room controls two of those screens.
- Assign a player to keep an eye on the control-room screens.
- Watch for a screen changing from green to red / Critical.
- Interact with the affected screen.
- Immediately head to the water valve associated with that side.
- Activate the valve to resolve the problem.
- The screen will change state before returning to normal.
Good communication is extremely useful here. Instead of everyone running around, assign one player to monitor the control room and call out left or right whenever a valve needs attention.
Dealing With the Snipers
Snipers will periodically appear around the encounter and can put serious pressure on anyone handling the mechanics. Kill them as soon as they spawn, especially when another player is away from the team dealing with a valve.
How to Beat the Broken Rain Turbine Boss (Iris Steel)
After several turbine cycles, the boss joins the encounter. She starts with a blue charge meter that prevents normal damage while it is active.
Don't panic when you see the blue bar. This is actually part of the mechanic. The important moment comes when the boss reaches an active turbine and begins recharging instead of losing charge.
- Ignore the boss while the blue charge is naturally decreasing.
- Continue dealing with the turbine mechanics.
- Watch which turbine becomes active.
- When the boss moves toward it, prepare your EMP.
- Use EMP once the boss begins gaining charge from the turbine.
- This removes the protection and creates your damage opportunity.
- Complete the associated turbine mechanic.
- Use the resulting window to unload your team's DPS.
You'll need to repeat the mechanic several times before the boss can be permanently defeated. The important part is not wasting EMP or DPS during the wrong phase.
Pro Tip #1: Have your CC player save EMP specifically for the boss's turbine recharge. This makes the encounter considerably easier to control.
Pro Tip #2: You can bypass the whole boss mechanic by transferring DMG to the boss while it's in the immunity phase by using a Negotiator Build. Mark the boss while it's immune and then attack surrounding enemies to lower its HP.
Broken Rain Final Encounter - The Marguerite Steel Boss Fight
The final Broken Rain encounter combines several mechanics and is easily the most demanding part of the Incursion. You'll first learn the relay mechanic without the boss, and then you'll have to perform it again while managing the final boss.
Phase 1 - Access Credentials Relay
The first part of the encounter revolves around moving access credentials across the area before the timer expires.
- Interact with the laptop to obtain the access credentials.
- The player carrying them receives a limited amount of time to reach the opposite side.
- Whoever takes the credentials will be the one and only to make the runs.
- Run toward the second tower.
- Use the keyboard inside the tower to activate the gate controls.
- Once enabled, interact with all three gate boxes.
- Repeat the relay sequence for the required number of rotations.
A Protection From Elites build is particularly useful for the player handling the credentials because the route contains damaging electrical hazards.
DIVISION 2 CURRENCY & MATERIALS FOR SALE




Central Tower Snipers
One of the biggest threats during this section comes from the enemies spawning around the central tower. The snipers in particular can deal enormous damage, even to heavily armored players.
Make these enemies (especially the purples) a top priority whenever they appear. Don't let them remain active while someone is attempting the relay.
Phase 2 - Final Boss Water Pressure Mechanic
After completing the relay section, the final boss enters the fight. At this point, you'll need to keep track of the water pressure meter displayed on the side of your screen.
The pressure must stay below the critical threshold. When one of the gates becomes active, it will turn green and a siren will alert the team.
- Listen for the warning siren.
- Find the gate that has become active.
- Move to it immediately.
- Interact with the gate to release the pressure.
- Return to the boss mechanic after the pressure has been reduced.
- Never allow the pressure meter to reach 100% - that's gonna be a wipe.
The first activation can involve all three gates, while later activations can occur at different locations. This makes communication particularly important during the final fight.
Marguerite Steel Weak Point Mechanics
The final boss cannot simply be burned down through conventional DPS. She will recover her health unless your team deals with her two special weak points.
- Destroy the weak point located on the boss's helmet.
- Break the second weak point on her back.
- Once both weak points have been destroyed, the boss will change behavior.
- She will then move toward the central tower.
- Prepare for the next mechanic as she reaches the tower.
Mini-Boss, Key & Thermite Mechanic
Once the boss reaches the central tower, the fight introduces another objective. A named enemy will spawn on one side of the arena.
- Locate the named enemy as soon as it appears.
- Eliminate it before continuing the mechanic.
- Pick up the key dropped by the enemy.
- Use the key on one of the available SHD boxes.
- Plant the Thermite charge.
- Once the box is destroyed, that particular box cannot be used again.
- Continue managing the water pressure while completing the objective.
Broken Rain Final Boss Rotation
Once you understand the pattern, the final encounter becomes much easier to follow. The team needs to repeatedly execute the following sequence:
- Keep the water pressure under control.
- Break the boss's helmet and back weak points.
- Allow the boss to move toward the central tower.
- Kill the spawned named enemy.
- Collect the key.
- Use Thermite on an available SHD box.
- Continue monitoring the water gates.
- Repeat the entire sequence until all required rotations are completed.
After the final mechanic has been completed, the boss becomes vulnerable to a normal DPS burn. Finish her off, clear the remaining enemies, and the Broken Rain Incursion is complete!
Recommended Broken Rain Team Composition
For a first clear, a balanced team with strong DPS and Crowd Control works extremely well. A solid starting composition is 3x Striker DPS + 1x Eclipse Foam/BTSU.
- 3x Striker DPS: provides the sustained damage needed for bosses and priority targets.
- 1x Eclipse BTSU Foam: provides reliable Crowd Control and can switch to EMP utility when required.
For the final relay mechanic, one of the players can temporarily switch to a Protection From Elites build to safely handle the credential run. Once that section is complete, switch back to your normal combat loadout.
For DPS, a good starting point is around 50% Critical Hit Chance when using Coyote's Mask, with the remaining offensive stats invested into Critical Hit Damage. Without Coyote's Mask, you can aim for the usual 60% Critical Hit Chance cap.
A Brazen ACS-12 works well for close-range engagements, while the St. Elmo's or Lexington provide a strong option for longer-range damage.
Broken Rain Encounter Quick Tips
- First Boss: wait for the damage window and burn the boss before the fire removes too much of the arena.
- War Hound: keep some distance when you need to stop it, clear the route, destroy the APC, and complete the bridge controls.
- Second Boss: take cover behind the truck and avoid taking DMG from the turrets and heavies.
- Turbines: monitor the control screens and call out which valve needs attention.
- Third Boss: save EMP for the moment when the boss starts charging from an active turbine.
- Final Relay: use PFE for the credential carrier and immediately remove the central tower sniper.
- Final Boss: manage the water pressure, destroy both weak points, eliminate the named enemy, and use Thermite on the SHD boxes.
- Communication: call out active valves, EMP timing, sniper spawns, gate activations, and Thermite objectives.
Once everyone knows their assignment, Broken Rain becomes much more manageable. The Incursion isn't purely a DPS race; clean mechanics and good communication are what make the difference.
Broken Rain Rewards, Drops and Loot Table
Broken Rain is an end-game activity, so completing it is expected to reward high-value loot alongside the Incursion's exclusive rewards.
What Rewards Do You Get From Broken Rain?
The complete loot table categories are:
- Incursion completion rewards
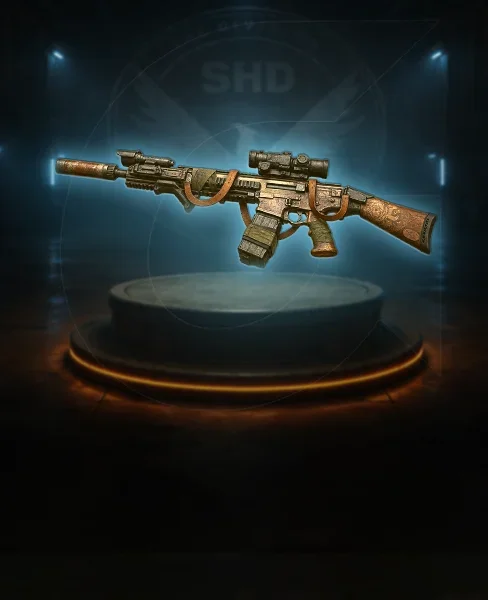
- Steel & Sons ACR exotic rifle
- Beats Per Minute Cosmetic Mask
- Backpack Trophy for flawless completion
- Incursion-specific collectibles and commendations
The Broken Rain Exotic
Broken Rain brings a new exotic weapon, the Steel & Sons exotic rifle . We update this section once everything is confirmed, but we expect it to share the same drop behaviour as the exotics from the other Incursion. For everything else in this category, see our Division 2 Exotic weapons and armour guide .
As with Paradise Lost, the safest farming strategy is to complete the Incursion's weekly reward opportunities on every eligible character and use loot sharing with your team whenever possible.
Broken Rain Exotic Drop Rate
Regarding Steel & Sons ACR's drop rate, Ubisoft has only confirmed that players have a "chance to obtain it from the final reward chest after a full completion, or from bosses during repeat runs".
Our current expectation is a low chance on each boss kill (around 1%) and a meaningfully better chance (around 10%) behind the weekly reset when you open the chest at the end of the mission. None of these values are confirmed yet.
Important: treat both figures as estimates based on previous Incursion behavior, not as datamined values. They are replaced with tested numbers as soon as we have a large enough sample.
BEST BROKEN RAIN BOOSTING SERVICES
First-Clear and Launch Rewards
Ubisoft has promoted special launch challenges around Broken Rain, which makes the first week particularly important for collectors. The Incursion comes with unique Day One and Week One completion rewards in the form of Golden Beaver and Silver Beaver Arm Patches.
Broken Rain Tips and Tricks
Incursions punish poorly coordinated groups far harder than ordinary missions. The first two points below matter more than the other eight combined, so start there.
- Bring a full four-player team: your first clear will be far easier with four coordinated Agents.
- Use voice communication: mechanics get much easier when players can make instant callouts.
- Do not build for DPS only: prepare support options for mechanics that need survivability or utility.
- Carry a Reviver Hive: a revive option saves a run after one mistake.
- Bring a reliable DPS build: Striker remains a strong starting point for testing Incursion damage requirements.
- Prepare multiple loadouts: be ready to switch between DPS, healer, tank, and utility roles.
- Learn the mechanics before chasing speed: your first goal is a clean clear, not a record time.
- Use checkpoints wisely: if an encounter goes wrong, reset and identify exactly which mechanic caused the wipe.
- Do not waste burst damage: save high-damage abilities and weapons for genuine DPS windows.
- Communicate enemy priorities: named enemies, special units, mechanics and objectives should always have clear callouts.
Cheese, Glitches and Exploits
As with every major Division 2 end-game activity, players have already looked for shortcuts and unintended mechanics within hours of launch.
Important: we strongly recommend playing Broken Rain as intended and avoiding glitches or exploits that could put your account at risk.
If a legitimate route makes an encounter significantly faster, we document it as a strategy or shortcut. We do not recommend exploits that rely on unintended bugs or carry account-risk behavior.
Best Builds for the Broken Rain Incursion
The best Broken Rain team composition depends on the live mechanics, but every group should prepare three core roles: DPS, Healer, and Tank/Support.
A good starting composition for a first casual clear is 2x DPS + 1x Healer + 1x PFE Tank/Support. If the encounters turn out to favor raw damage, the team can shift to 3x DPS + 1x Healer/Support.
Below are our six recommended loadouts. Builds 1, 2 and 3 are DPS variants, build 4 is the healer, build 5 is the tank, with the 6th one being the support, so a full squad can be assembled straight from this list. For wider context, see our Division 2 best builds guide .
1. St. Elmo's Striker Build with Overdogs & Equalizer
| Build Component | Description |
| Weapon Slot #1 | St. Elmo's Engine |
| Weapon Slot #2 | ACS-12 with Brazen or GR9 with Frenzy |
| Specialization | Gunner |
| Mask | Red Core Striker with Crit Chance or Crit Damage |
| Backpack | Red Core Striker with Crit Chance or Crit Damage |
| Chest | Red Core Equalizer with Crit Chance & Crit Damage |
| Gloves | Overdogs |
| Holster | Red Core Striker with Crit Chance or Crit Damage |
| Kneepads | Red Core Striker with Crit Chance or Crit Damage |
| Gear Mods | Crit Chance | Crit Damage |
| Skills | Crusader Ballistic Shield | Decoy | Pulse | Reviver Hive |
| Pro Tip | Aim for 50%+ Crit Chance, then stack Crit Damage rolls and mods |
The two pieces worth farming first are Overdogs and the Equalizer chest. The crit stats on Striker slots are interchangeable, so any combination that pushes you past 50% Crit Chance does the job while you finish the rest.
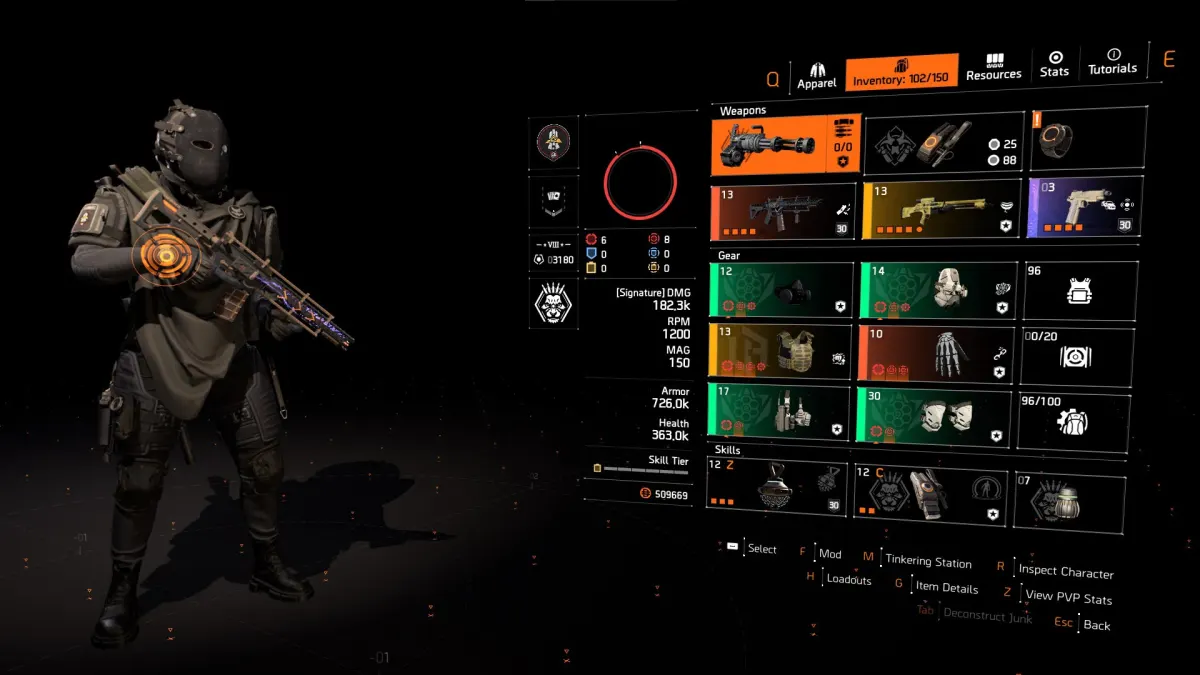
Do not want to farm it yourself? Grab the St. Elmo's Striker Build with Overdogs & Equalizer from our store.
2. Striker Build with Coyote's Mask & Equalizer
| Build Component | Description |
| Weapon Slot #1 | St. Elmo's Engine |
| Weapon Slot #2 | ACS-12 with Brazen or GR9 with Frenzy |
| Specialization | Firewall |
| Mask | Coyote's Mask |
| Backpack | Red Core Striker with Crit Chance or Crit Damage |
| Chest | Red Core Equalizer with Crit Chance & Crit Damage |
| Gloves | Red Core Striker with Crit Chance or Crit Damage |
| Holster | Red Core Striker with Crit Chance or Crit Damage |
| Kneepads | Red Core Striker with Crit Chance or Crit Damage |
| Gear Mods | Crit Chance | Crit Damage |
| Skills | Striker Shield | Decoy | Pulse | Reviver Hive |
| Pro Tip | Aim for 50%+ Crit Chance, then stack Crit Damage rolls and mods |
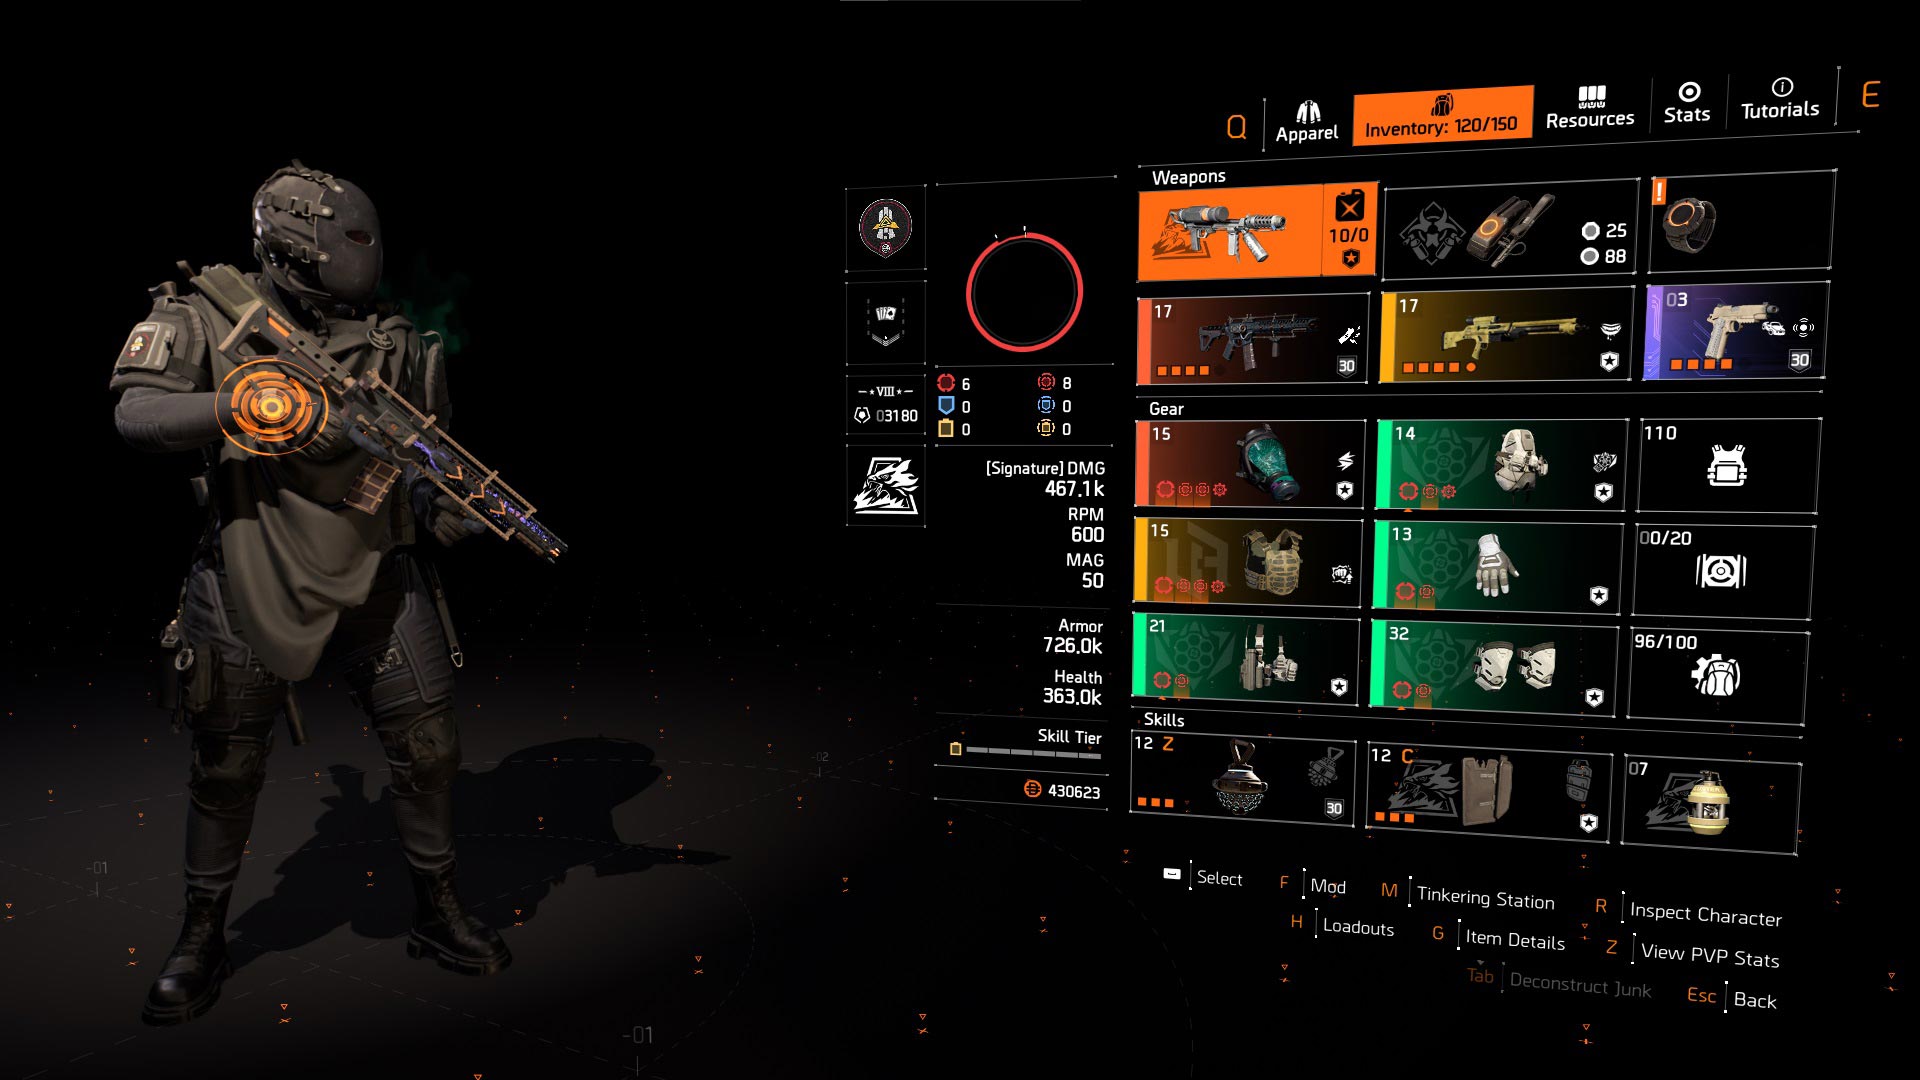
You can also pick up the Striker Build with Coyote's Mask & Equalizer ready-made.
3. Negotiator's Pestilence Build
| Build Component | Description |
| Weapon Slot #1 | Pestilence |
| Weapon Slot #2 | Any preferred weapon |
| Specialization | Gunner |
| Mask | Red Core Negotiator with Crit Chance or Crit Damage |
| Backpack | Red Core Negotiator with Crit Chance or Crit Damage |
| Chest | Red Core Negotiator with Crit Chance or Crit Damage |
| Gloves | Overdogs |
| Holster | Red Core Negotiator with Crit Chance or Crit Damage |
| Kneepads | Red Core Turmoil with Crit Chance & Crit Damage |
| Gear Mods | Crit Chance | Crit Damage |
| Skills | Decoy | Pulse | Reviver Hive |
| Pro Tip | Aim for 50%+ Crit Chance, then stack Crit Damage rolls and mods |
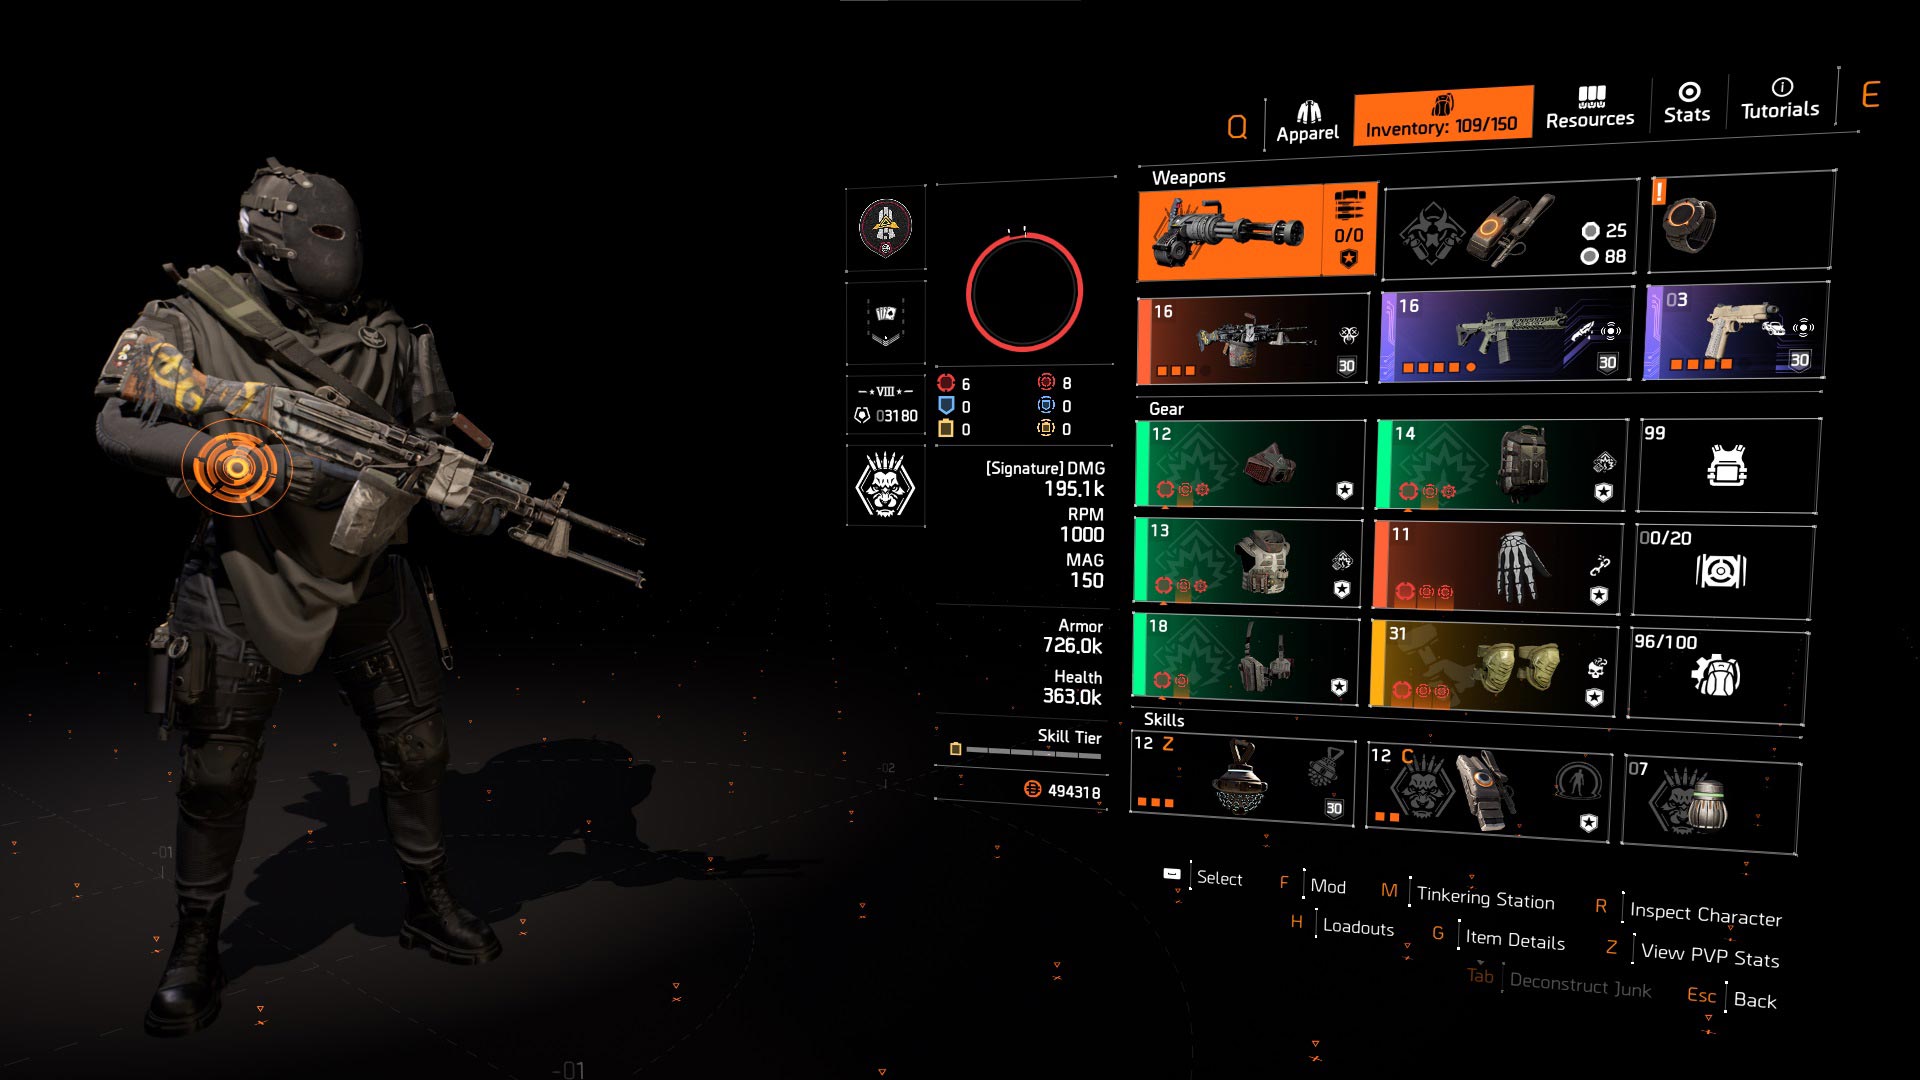
The ready-made version is the Negociator Pestilence Build .
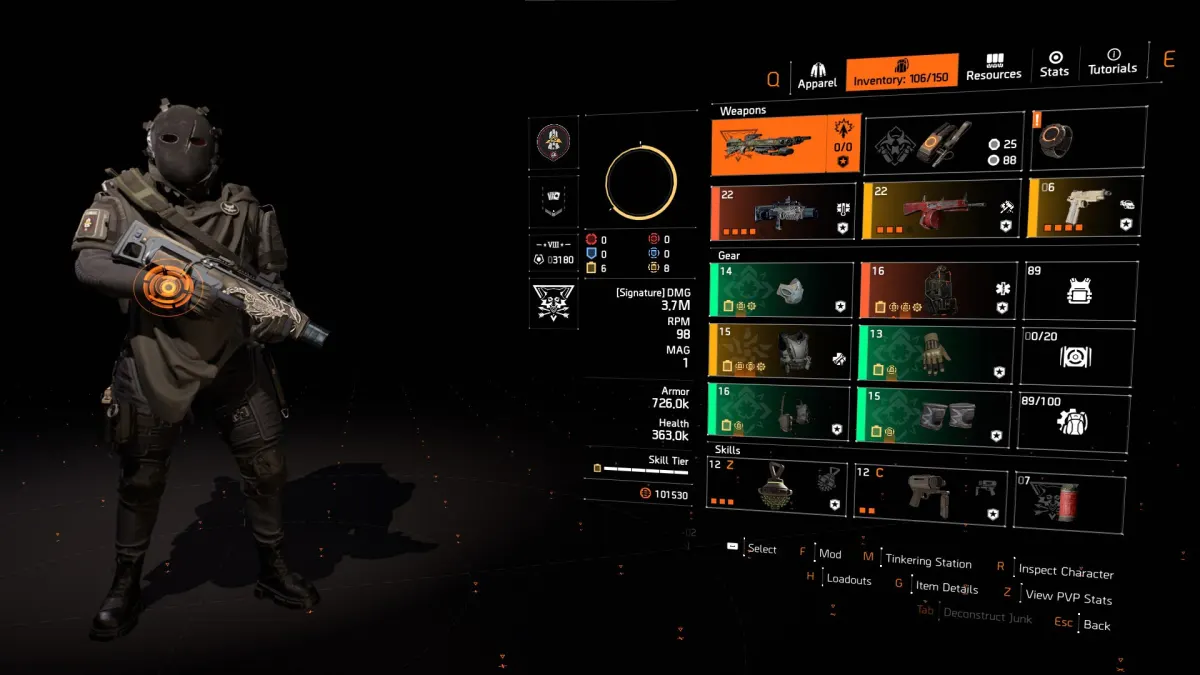
4. Future Initiative Birdie Healer Build
| Build Component | Description |
| Weapon Slot #1 | Scorpio |
| Weapon Slot #2 | Lefty |
| Specialization | Survivalist |
| Mask | Yellow Core Future Initiative with Repair Skills |
| Backpack | Birdie's Quick Fix Pack |
| Chest | Yellow Core Benefactor with Repair Skills & Skill Haste |
| Gloves | Yellow Core Future Initiative with Repair Skills |
| Holster | Yellow Core Future Initiative with Repair Skills |
| Kneepads | Yellow Core Future Initiative with Repair Skills |
| Gear Mods | Repair Skills |
| Skills | Reinforcer Chem Launcher | Restorer Hive |
This is the loadout that keeps a first clear alive. If nobody in your group has a dedicated healer ready, this is the build to prepare before launch rather than a fourth damage variant.
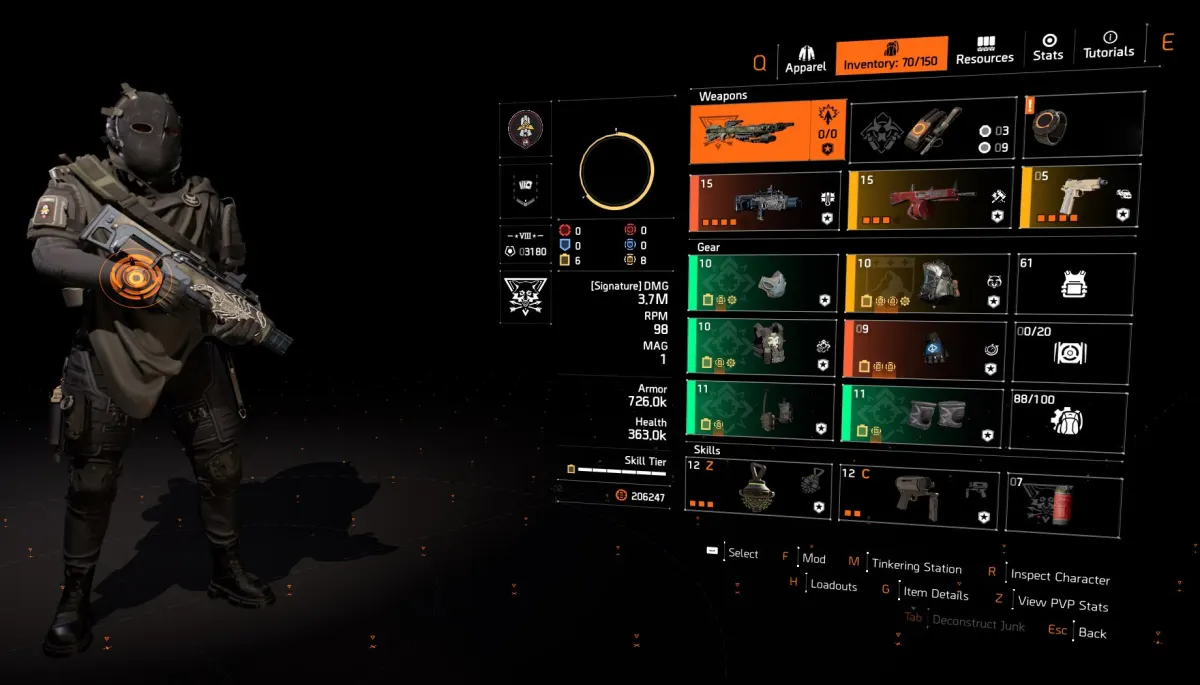
If your group is missing the BTSU Foam role that should overcharge the hives and decoys, below we present an alternative healer build that uses the BTSU Datagloves:
| Build Component | Description |
| Weapon Slot #1 | Scorpio |
| Weapon Slot #2 | Lefty |
| Specialization | Survivalist |
| Mask | Yellow Core Future Initiative with Repair Skills |
| Backpack | Yellow Core Alps with Repair Skills, Skill Haste & Opportunistic |
| Chest | Yellow Core Future Initiative with Repair Skills |
| Gloves | BTSU Datagloves |
| Holster | Yellow Core Future Initiative with Repair Skills |
| Kneepads | Yellow Core Future Initiative with Repair Skills |
| Gear Mods | Repair Skills |
| Skills | Reinforcer Chem Launcher | Restorer Hive |
Short on time? Order the Future Initiative Healer Build from our store.
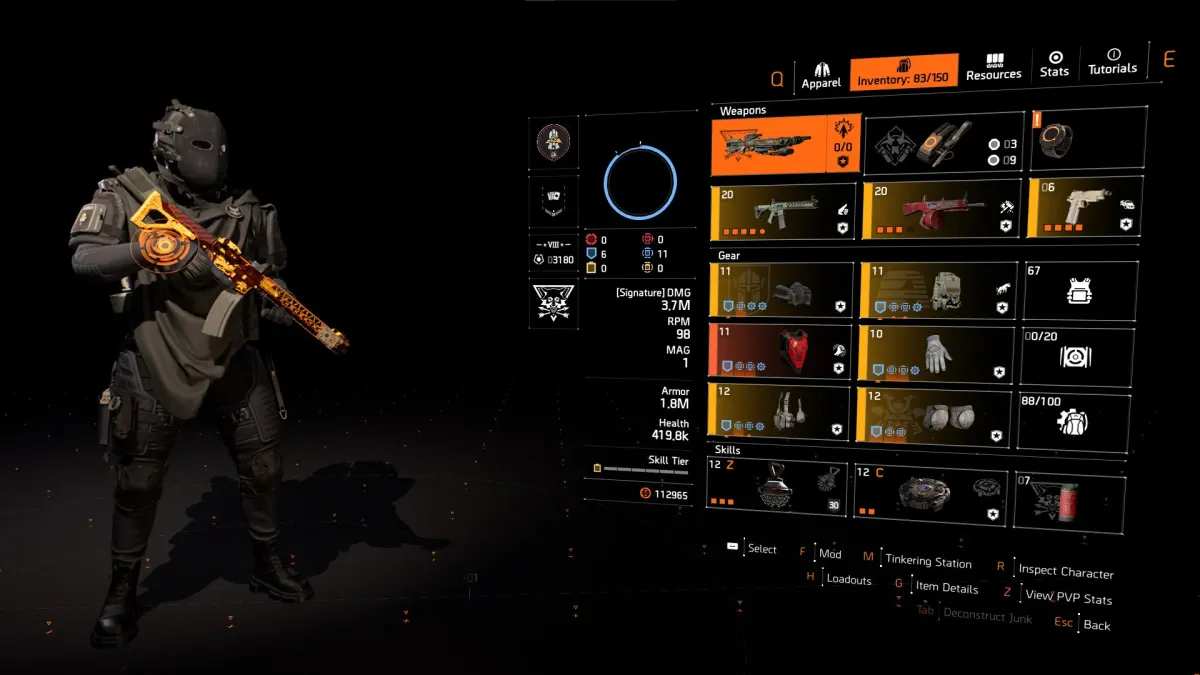
5. Protection From Elites Tank Build
| Build Component | Description |
| Weapon Slot #1 | Any preferred weapon |
| Weapon Slot #2 | Any preferred weapon |
| Weapon Slot #3 | Quickstep |
| Specialization | Survivalist |
| Mask | Blue Core Gila with Armor Regen & Hazard Protection |
| Backpack | Blue Core Belstone with Armor Regen, Hazard Protection & Adrenaline Rush |
| Chest | Provocator |
| Gloves | Blue Core Improvised Gloves with Armor Regen & Hazard Protection |
| Holster | Blue Core Improvised Holster with Armor Regen & Hazard Protection |
| Kneepads | Blue Core Emperor's Guard |
| Gear Mods | Protection from Elites |
| Skills | Reviver Hive | Decoy |
You can also buy the PFE Tank Build directly.
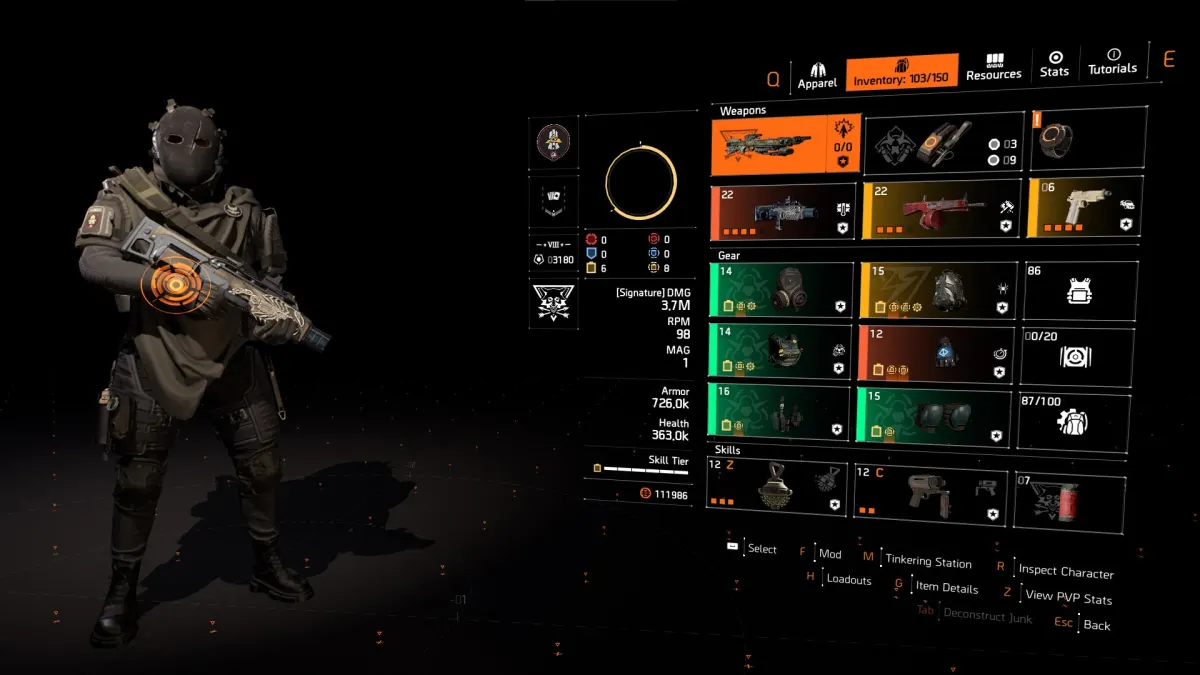
6. Eclipse BTSU Foam Build
| Build Component | Description |
| Weapon Slot #1 | Scorpio |
| Weapon Slot #2 | Lefty |
| Specialization | Survivalist |
| Mask | Yellow Core Eclipse Protocol with Status Effects |
| Backpack | Yellow Core Electrique with Status Effects, Skill Haste & Creeping Death |
| Chest | Yellow Core Eclipse Protocol with Status Effects |
| Gloves | BTSU Datagloves |
| Holster | Yellow Core Eclipse Protocol with Status Effects |
| Kneepads | Yellow Core Eclipse Protocol with Status Effects |
| Gear Mods | Skill Haste |
| Skills | Restorer Hive | Riot Foam Chem Launcher |
You can also pick up the Eclipse BTSU Foam Build ready-made.
These are starting-point builds, not the final Broken Rain meta. Once the live encounters are tested, we optimize each loadout around the actual boss mechanics and damage checks.
Broken Rain Incursion FAQ
What is Broken Rain in The Division 2?
Broken Rain is the newest Incursion in The Division 2. It takes place at Steel Creek Dam and Hydroelectric Plant, which has been taken over by the Rikers.
How many players do you need for Broken Rain?
Four. Broken Rain is designed as a four-player Incursion, and a full team is strongly recommended for a first clear.
Can you solo Broken Rain?
You can enter solo, but we do not recommend it. The Incursion is designed around coordinated four-player team play.
Does Broken Rain have matchmaking?
Yes. That makes it the easiest option for players who do not already have a full Incursion team.
What rewards do you get from Broken Rain?
Broken Rain features end-game loot plus exclusive rewards, including a new exotic weapon, arm patches and commendations.
What is the Broken Rain exclusive exotic reward?
The exclusive exotic reward is the Steel & Sons ACR exotic rifle.
Can you farm Broken Rain?
Yes. Broken Rain is designed to be replayable, which matters because its exclusive exotic is not a guaranteed drop.
Still stuck on a mechanic or short a player? Our Broken Rain carries put a full team of professional boosters on the run with you.
Final Thoughts
Broken Rain is the newest major end-game challenge in The Division 2, sending Agents into Steel Creek Dam and Hydroelectric Plant to stop the Rikers before the hurricane hits.
The winning order for a first clear is simple: four players on voice, two DPS and a healer, mechanics before speed. Optimizing clear times is a week-two problem. Getting through the encounter without wiping is the week-one one.
Good luck at Steel Creek, Agent. The storm is coming!
Related Division 2 Guides
Check out our other Division 2 guides while you wait for launch:
- Division 2 Paradise Lost Incursion Guide
- Division 2 Best Builds Guide
- Division 2 Best Gear Sets and Brand Sets
- Division 2 Best Exotic Weapons & Armor
- Division 2 Best Weapons Guide
- Descent Mode Guide
- Division 2 Battle for Brooklyn Overview
- Division 2 Brooklyn Hunter Masks
- How to Complete All Journey Missions in Division 2
Broken Rain Carry Service
Struggling to put a team together, or simply short on time to learn and clear the Incursion? At Grindout we run a fast and clean Broken Rain Carry Service .
Let our professional boosters handle the Incursion and secure the rewards you are after. For everything else in the game, browse our full range of The Division 2 boosting services. You deserve the best gaming experience, Agent!